Tired of pulling the same reports over and over? With Scheduled Reports, BuyerBridge sends the right report to the right people—automatically. In a few clicks, you can choose templates, cadence, recipients, and ship clean reporting on a schedule.
How to Schedule a Report
Follow these steps to put reporting on autopilot.
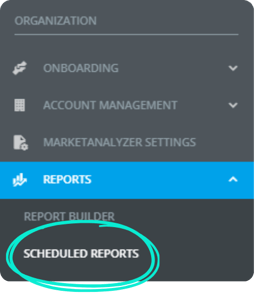
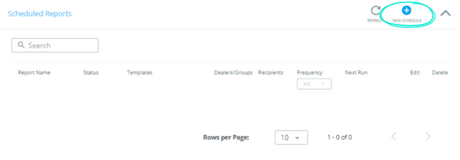
Step 1 — Open Scheduled Reports
Go to Organization → Reports → Schedule reports, then click the blue “+” in the upper-right corner0.
Step 2 — Name your schedule
Give it a clear name (e.g., “Smith Auto – Monthly Client Pack”).
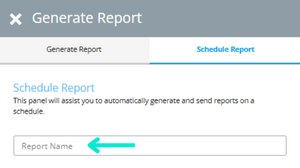
Pro tip: Add a short description so teammates know what it sends.
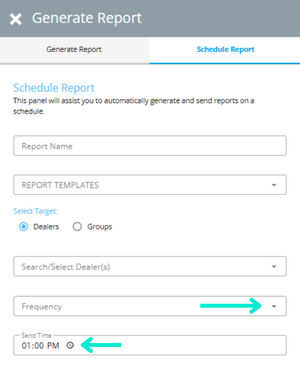
Step 3 — Pick your report templates
Open the Report Template and select one or multiple (e.g., Facebook Monthly, 90-Day Sales Report).
Need to create a new report first? 👉 Learn how with the Omnisocial PDF Report Builder guide.
Step 4 — Choose your target (Dealer or Group)
-
Dealer = sends to a single store.
-
Group = sends to a team or multi-rooftop rollup.

Step 5 — Set the frequency, day, and time
Choose Daily, Weekly, Monthly, or Quarterly. Pick any day and the send time (uses your account timezone).
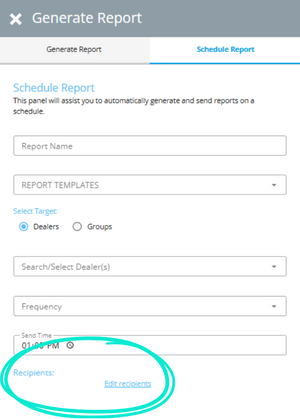
Step 6 — Add recipients
Your login email is added by default. Add or remove teammates and client emails as needed.
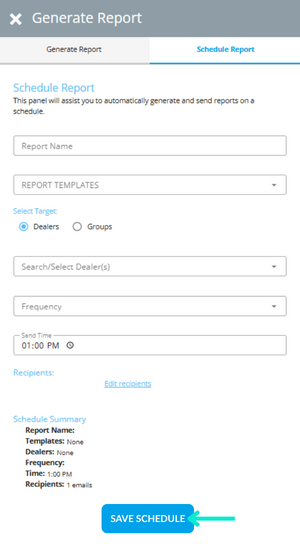
Step 7 — Review & Save
- Check the Schedule Summary (name, templates, target, cadence, recipients).
- Click Save Schedule.
You’re done! 🎉
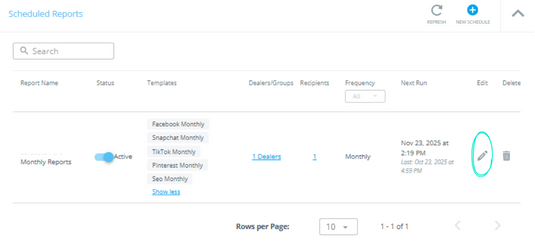
Optional: Pause or edit later
Return to Organization → Reports → Schedule reports, click your schedule to edit, pause, or delete anytime.
What's Next:
-
Understanding Omnichannel Advertising Metrics — get clear on KPIs before you build or schedule reports.
-
Omnisocial PDF Report Builder Tool — create or customize the report templates you’ll add to a schedule.
-
[WATCH] How To View Multi-Account Reports — see cross-account performance once your reporting is standardized.