---
title: How to Onboard a Client's Google Channel
description: Connect a client's Google accounts in BuyerBridge and set up the feed, conversion tracking, and account assets, so the account is ready to deploy Search, PMax, and VLAs.
---
[Skip to content](https://support.buyerbridge.com/knowledge/onboarding-a-clients-google-channel-in-buyerbridge#main-content)
English
Show submenu for translations
[Submit a ticket](https://support.buyerbridge.com/knowledge/kb-tickets/new?hsLang=en)
![BuyerBridge\_LOGO-dark-2.png\]](https://support.buyerbridge.com/hs-fs/hubfs/BuyerBridge_LOGO-dark-2.png?height=40&name=BuyerBridge_LOGO-dark-2.png)
Open main navigation
Close main navigation
- English
Show submenu for translations
- [Submit a ticket](https://support.buyerbridge.com/knowledge/kb-tickets/new)
- Go to buyerbridge.com
Go to buyerbridge.com
Welcome to the BuyerBridge Help Center!
- There are no suggestions because the search field is empty.
1. [Help Center](https://support.buyerbridge.com/knowledge?hsLang=en)
2. [Onboarding Clients](https://support.buyerbridge.com/knowledge/onboarding-clients?hsLang=en)
3. [Google Onboarding](https://support.buyerbridge.com/knowledge/onboarding-clients?hsLang=en#google-onboarding)
# How to Onboard a Client's Google Channel
## Connect a client's Google account and set up inventory, tracking, and assets so the account is ready to deploy.
Onboarding a client's Google channel connects their Google accounts, brings in inventory, sets up tracking, and builds the account-level assets Google needs. When it is done, the account is ready to deploy Search, PMax, and Vehicle Listing Ads. For the shared steps that apply to every channel, see [How to Onboard Client Accounts to Any Channel](https://support.buyerbridge.com/knowledge/how-to-onboard-client-accounts-to-any-channel?hsLang=en). For the big picture on Google, start with the **[Google Tools 101 hub](https://support.buyerbridge.com/knowledge/google-tools-101-starting-guide?hsLang=en).**
**💡 Note:** This is the setup for a client's Google channel. It's separate from creating your own agency account in BuyerBridge.
**Quick Links**
- [Before You Get Started](https://support.buyerbridge.com/knowledge/onboarding-a-clients-google-channel-in-buyerbridge#before)
- [Step 1: Start Setup and Authenticate with Google](https://support.buyerbridge.com/knowledge/onboarding-a-clients-google-channel-in-buyerbridge#auth)
- [Step 2: Agree to AdvertisingPLUS](https://support.buyerbridge.com/knowledge/onboarding-a-clients-google-channel-in-buyerbridge#advplus)
- [Step 3: Choose the Inventory Type](https://support.buyerbridge.com/knowledge/onboarding-a-clients-google-channel-in-buyerbridge#inv-type)
- [Step 4: Configure the Feed Provider](https://support.buyerbridge.com/knowledge/onboarding-a-clients-google-channel-in-buyerbridge#feed)
- [Step 5: Confirm Inventory Processed](https://support.buyerbridge.com/knowledge/onboarding-a-clients-google-channel-in-buyerbridge#inv-status)
- [Step 6: Install EventFlow](https://support.buyerbridge.com/knowledge/onboarding-a-clients-google-channel-in-buyerbridge#eventflow)
- [Step 7: Select the Business Profile](https://support.buyerbridge.com/knowledge/onboarding-a-clients-google-channel-in-buyerbridge#gbp)
- [Step 8: Connect the Business Manager (MCC)](https://support.buyerbridge.com/knowledge/onboarding-a-clients-google-channel-in-buyerbridge#mcc)
- [Step 9: Create or Connect the Ad Account](https://support.buyerbridge.com/knowledge/onboarding-a-clients-google-channel-in-buyerbridge#adaccount)
- [Step 10: Confirm the Dealer Links](https://support.buyerbridge.com/knowledge/onboarding-a-clients-google-channel-in-buyerbridge#dealerlinks)
- [Step 11: Connect Assets (Store Code and Merchant Center)](https://support.buyerbridge.com/knowledge/onboarding-a-clients-google-channel-in-buyerbridge#assets)
- [Step 12: Connect Google Analytics (GA4)](https://support.buyerbridge.com/knowledge/onboarding-a-clients-google-channel-in-buyerbridge#ga4)
- [Step 13: Set Conversion Tracking](https://support.buyerbridge.com/knowledge/onboarding-a-clients-google-channel-in-buyerbridge#conversions)
- [Step 14: Set Account Branding](https://support.buyerbridge.com/knowledge/onboarding-a-clients-google-channel-in-buyerbridge#branding)
- [Step 15: Add Asset Extensions](https://support.buyerbridge.com/knowledge/onboarding-a-clients-google-channel-in-buyerbridge#extensions)
- [Step 16: Review and Complete](https://support.buyerbridge.com/knowledge/onboarding-a-clients-google-channel-in-buyerbridge#review)
- [Step 17: What's Next](https://support.buyerbridge.com/knowledge/onboarding-a-clients-google-channel-in-buyerbridge#next)
---
### 🚧 **Before You Get Started**
**➡️** Before you connect Google to BuyerBridge, make sure you have one **master Google login** that has access to the client’s:
- **Google Business Profile**
- **Google Ads account**
- **Google Analytics (GA4)**
- **Google Merchant Center**
- **A square business logo.** Google requires a logo to run ads, so a campaign will not deploy without one.
**‼️ Tip:** Know where to find the client's **Merchant Center ID** and **Google Ads account ID** ahead of time. Both live in the account settings of each tool, and having them on hand keeps onboarding moving.
### **Step 1: Start Setup and Authenticate with Google**
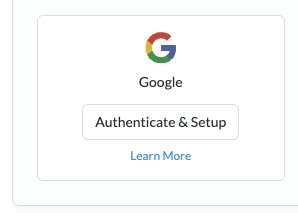
On the client's Google channel card, click **Authenticate & Setup**.
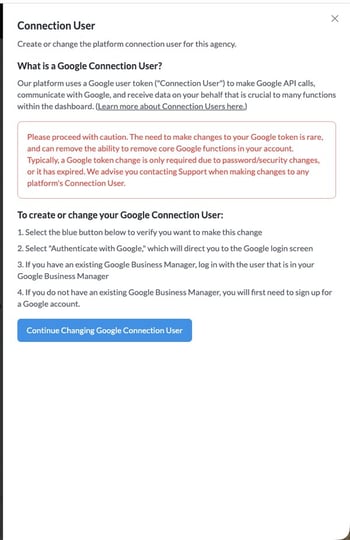
If your agency has not connected a Google Connection User yet, you will set that up once. This is the Google login BuyerBridge uses to make changes on your behalf, and you only do it one time for your whole organization.
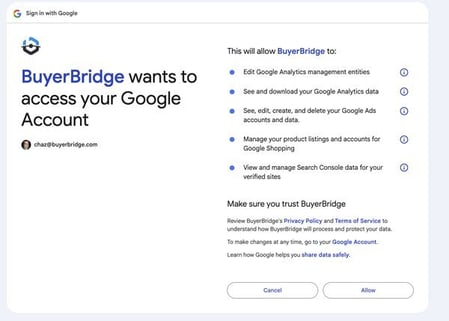
Sign in with the Google account that has access to your clients, and allow the requested permissions.
---
### **Step 2: Agree to AdvertisingPLUS**
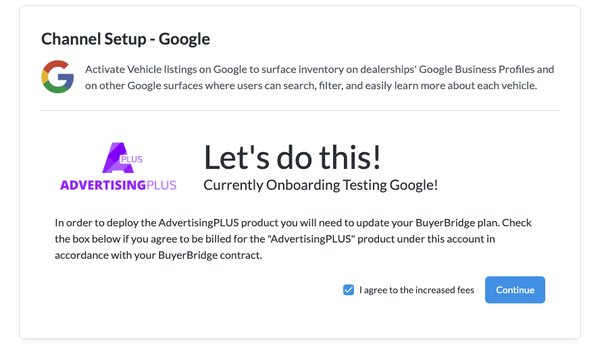
Google onboarding runs under the AdvertisingPLUS product. Check the box to agree to the billing terms, then click **Continue**.
---
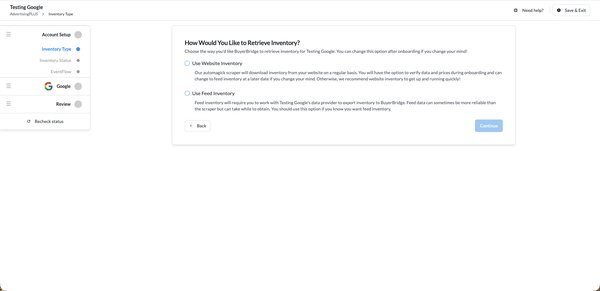
### **Step 3: Choose the Inventory Type**
Choose how BuyerBridge pulls the client's inventory. Feed inventory is the most reliable. If the client's website cannot be scraped, you will be prompted to use a feed.
---
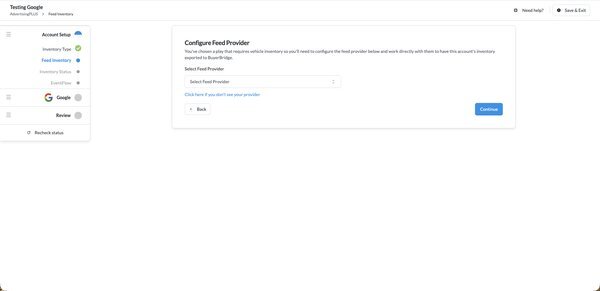
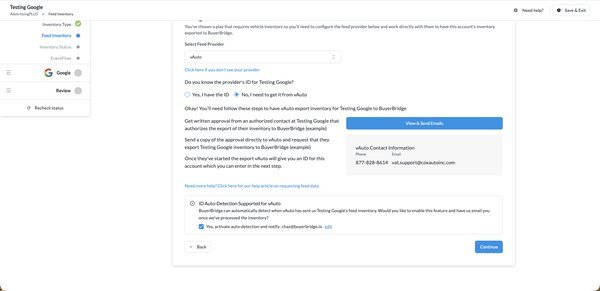
### **Step 4: Configure the Feed Provider**
Select the client's feed provider. If you do not have the provider's ID yet, BuyerBridge gives you the steps and an email template to request the export from the provider.
---
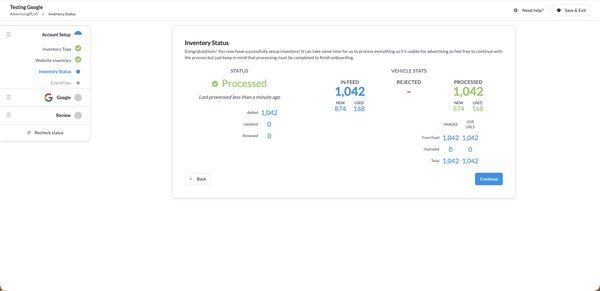
### **Step 5: Confirm Inventory Processed**
Inventory can take time to process. You can keep onboarding, but processing must finish before you complete it. A green **Processed** status means the feed is in.
---
### **Step 6: Install EventFlow**
EventFlow is the BuyerBridge tracking code. It powers call tracking and retargeting audiences. Select the client's site provider, then copy, download, or email the code for their web team to install.
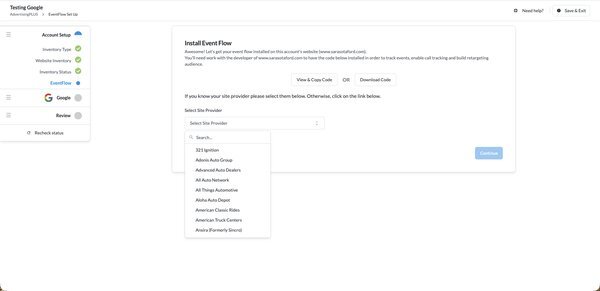
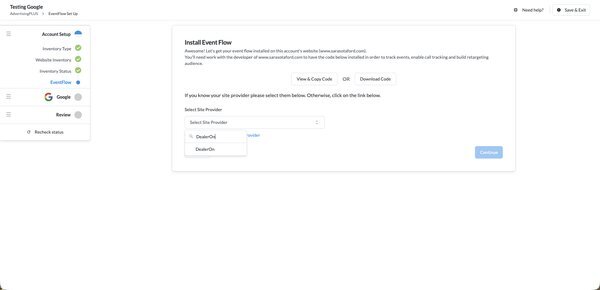
**💡 Note:** EventFlow is not required for Google conversion tracking, GA4 handles that (Step 13). Install it to enable retargeting and call tracking.
---
### **Step 7: Select the Business Profile**
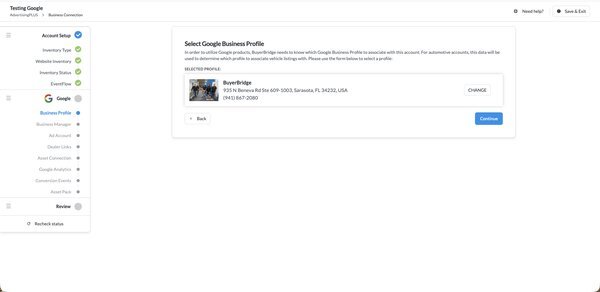
Choose the client's Google Business Profile. Google uses this for local targeting and to associate vehicle listings.
---
### **Step 8: Connect the Business Manager (MCC)**
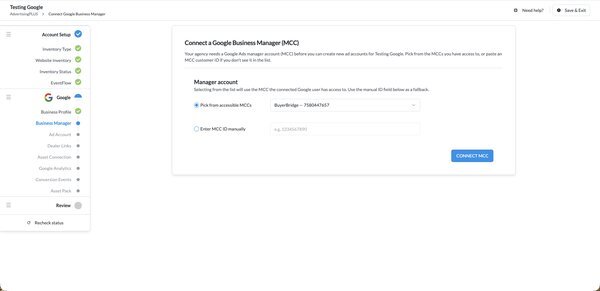
Your agency needs a Google Ads manager account (MCC) to create ad accounts for the client. Pick from the MCCs you have access to, or enter an MCC ID manually.
---
### **Step 9: Create or Connect the Ad Account**
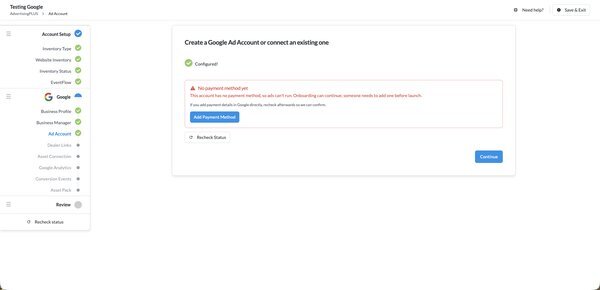
Create a new Google Ads account for the client, or connect an existing one.
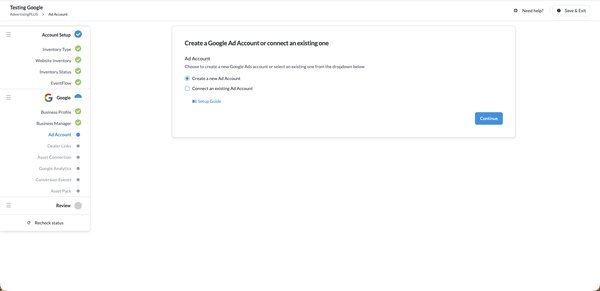
**💡 Note:** If the account has no payment method, onboarding can continue, but someone needs to add one in Google before the campaigns can run. Recheck the status after adding it.
---
### **Step 10: Confirm the Dealer Links**
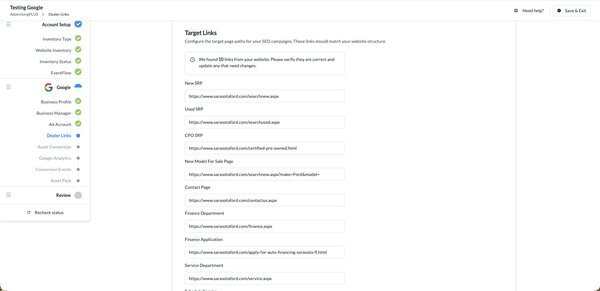
BuyerBridge pulls the client's key page URLs (new and used SRPs, finance, service, contact, and more). Review them, fix any that are wrong, and confirm.
---
### **Step 11: Connect Assets (Store Code and Merchant Center)**
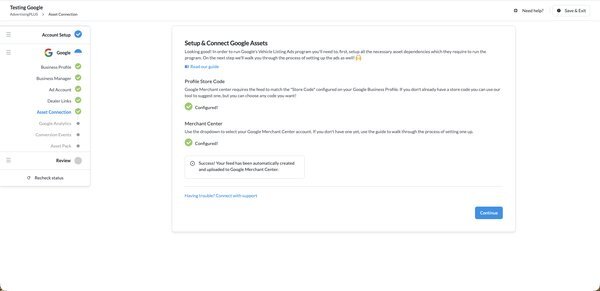
BuyerBridge sets the Business Profile store code and links the Merchant Center account, then creates and uploads the vehicle feed to Merchant Center.
---
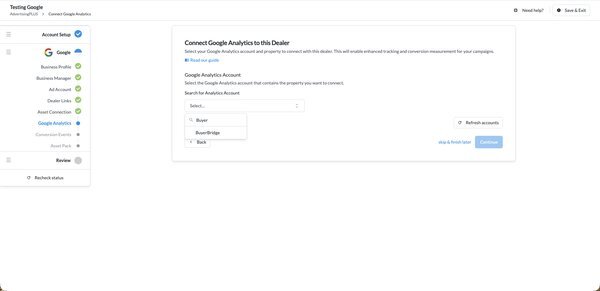
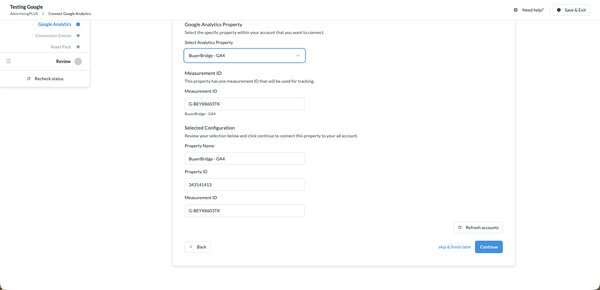
### **Step 12: Connect Google Analytics (GA4)**
Select the client's existing GA4 account and property. BuyerBridge connects it, it does not create a new one.
---
### **Step 13: Set Conversion Tracking**
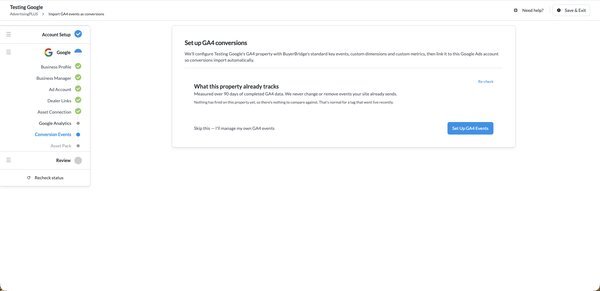
BuyerBridge configures the GA4 property with the standard conversion events and links it to Google Ads so conversions import automatically. If duplicate events exist, you choose one primary source so leads are not double-counted. If the client runs their own tracking, choose **Skip this, I'll manage my own GA4 events**.
For the full detail, see [How Google Conversion Tracking Works in BuyerBridge](https://support.buyerbridge.com/knowledge/how-google-conversion-tracking-works-in-buyerbridge?hsLang=en).
---
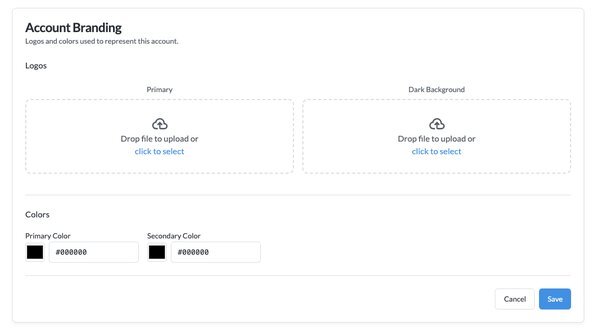
### **Step 14: Set Account Branding**
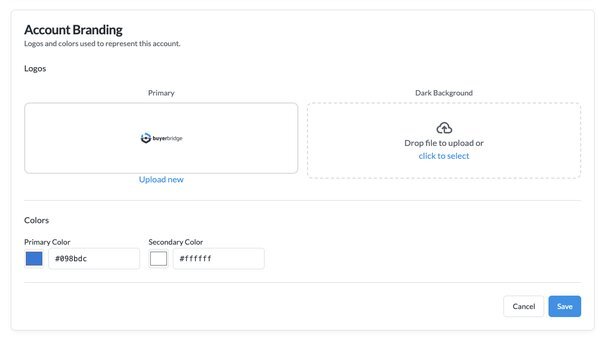
Add the client's logo and brand colors. A square logo is required, since Google will not deploy a campaign without one.
---
### **Step 15: Add Asset Extensions**
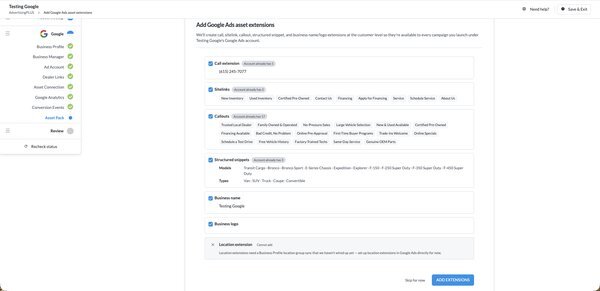
BuyerBridge generates the account-level assets Google needs: call, sitelinks, callouts, structured snippets, and the business name and logo. Review them and click **Add Extensions**.
---
### **Step 16: Review and Complete**
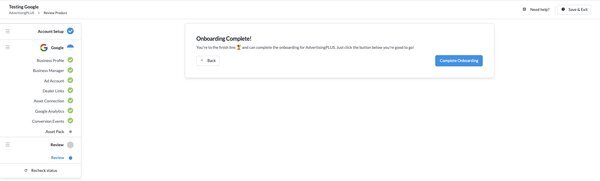
Confirm every step shows complete, then click **Complete Onboarding**.
---
### **Step 17: What's Next**
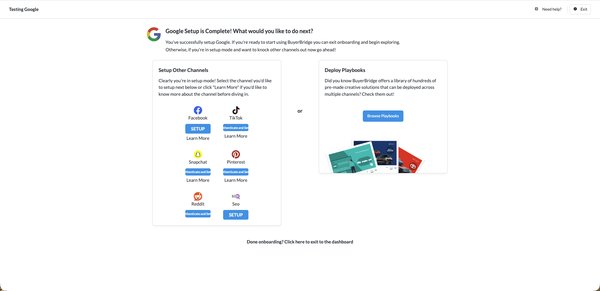
Google setup is done. From here you can deploy the client's first campaigns from a Playbook, or set up another channel.
---
#### **What Happens Next**
- [How to Deploy a Google Search Campaign with Playbooks](https://support.buyerbridge.com/knowledge/how-to-deploy-a-google-search-campaign-with-playbooks?hsLang=en)
- [How to Deploy Google VLAs with the PMax Playbook](https://support.buyerbridge.com/knowledge/how-to-deploy-a-google-performance-max-campaign?hsLang=en)
---
#### **Continue Learning**
- - **Back to Hub:** [Google Tools 101: Starting Guide](https://support.buyerbridge.com/knowledge/google-tools-101-starting-guide?hsLang=en)
- [Getting Started](https://support.buyerbridge.com/knowledge/getting-started?hsLang=en#main-content)
- [Welcome Kit](https://support.buyerbridge.com/knowledge/getting-started?hsLang=en#welcome-kit)
- [Getting Started](https://support.buyerbridge.com/knowledge/getting-started?hsLang=en#getting-started)
- [Navigating the Platform](https://support.buyerbridge.com/knowledge/getting-started?hsLang=en#navigating-the-platform)
- [Account Management](https://support.buyerbridge.com/knowledge/getting-started?hsLang=en#account-management)
- [Onboarding Clients](https://support.buyerbridge.com/knowledge/onboarding-clients?hsLang=en#main-content)
- [Channel Onboarding](https://support.buyerbridge.com/knowledge/onboarding-clients?hsLang=en#channel-onboarding)
- [Google Onboarding](https://support.buyerbridge.com/knowledge/onboarding-clients?hsLang=en#google-onboarding)
- [Meta Onboarding](https://support.buyerbridge.com/knowledge/onboarding-clients?hsLang=en#meta-onboarding)
- [Pinterest Onboarding](https://support.buyerbridge.com/knowledge/onboarding-clients?hsLang=en#pinterest-onboarding)
- [SEO Onboarding](https://support.buyerbridge.com/knowledge/onboarding-clients?hsLang=en#seo-onboarding)
- [Snapchat Onboarding](https://support.buyerbridge.com/knowledge/onboarding-clients?hsLang=en#snapchat-onboarding)
- [TikTok Onboarding](https://support.buyerbridge.com/knowledge/onboarding-clients?hsLang=en#tiktok-onboarding)
- [Platform Tools](https://support.buyerbridge.com/knowledge/platform-tools?hsLang=en#main-content)
- [Ad Builder](https://support.buyerbridge.com/knowledge/platform-tools?hsLang=en#ad-builder)
- [Ad Launcher](https://support.buyerbridge.com/knowledge/platform-tools?hsLang=en#ad-launcher)
- [Ads Library](https://support.buyerbridge.com/knowledge/platform-tools?hsLang=en#ads-library)
- [Best Practices](https://support.buyerbridge.com/knowledge/platform-tools?hsLang=en#best-practices)
- [Budgeting](https://support.buyerbridge.com/knowledge/platform-tools?hsLang=en#budgeting)
- [Campaign Management](https://support.buyerbridge.com/knowledge/platform-tools?hsLang=en#campaign-management)
- [EventFlow](https://support.buyerbridge.com/knowledge/platform-tools?hsLang=en#eventflow)
- [MarketAnalyzer](https://support.buyerbridge.com/knowledge/platform-tools?hsLang=en#marketanalyzer)
- [Playbooks](https://support.buyerbridge.com/knowledge/platform-tools?hsLang=en#playbooks)
- [SEOFlow](https://support.buyerbridge.com/knowledge/platform-tools?hsLang=en#seoflow)
- [Reports](https://support.buyerbridge.com/knowledge/platform-tools?hsLang=en#reports)
- [VINFlow](https://support.buyerbridge.com/knowledge/platform-tools?hsLang=en#vinflow)
- [White Labeling](https://support.buyerbridge.com/knowledge/platform-tools?hsLang=en#white-labeling)
- [Multichannel Advertising](https://support.buyerbridge.com/knowledge/multichannel-advertising?hsLang=en#main-content)
- [Overview](https://support.buyerbridge.com/knowledge/multichannel-advertising?hsLang=en#overview)
- [Google](https://support.buyerbridge.com/knowledge/multichannel-advertising?hsLang=en#google)
- [Meta](https://support.buyerbridge.com/knowledge/multichannel-advertising?hsLang=en#meta)
- [Pinterest](https://support.buyerbridge.com/knowledge/multichannel-advertising?hsLang=en#pinterest)
- [Snapchat](https://support.buyerbridge.com/knowledge/multichannel-advertising?hsLang=en#snapchat)
- [TikTok](https://support.buyerbridge.com/knowledge/multichannel-advertising?hsLang=en#tiktok)
- [Agency Sales Assets](https://support.buyerbridge.com/knowledge/agency-sales-assets?hsLang=en#main-content)
- [Facebook Sales Assets](https://support.buyerbridge.com/knowledge/agency-sales-assets?hsLang=en#facebook-sales-assets)
- [Google Sales Assets](https://support.buyerbridge.com/knowledge/agency-sales-assets?hsLang=en#google-sales-assets)
- [Graphics & Web Elements](https://support.buyerbridge.com/knowledge/agency-sales-assets?hsLang=en#graphics-web-elements)
- [Instagram Sales Assets](https://support.buyerbridge.com/knowledge/agency-sales-assets?hsLang=en#instagram-sales-assets)
- [Meta Sales Assets](https://support.buyerbridge.com/knowledge/agency-sales-assets?hsLang=en#meta-sales-assets)
- [Omnichannel Sales Assets](https://support.buyerbridge.com/knowledge/agency-sales-assets?hsLang=en#omnichannel-sales-assets)
- [Pinterest Sales Assets](https://support.buyerbridge.com/knowledge/agency-sales-assets?hsLang=en#pinterest-sales-assets)
- [Snapchat Sales Assets](https://support.buyerbridge.com/knowledge/agency-sales-assets?hsLang=en#snapchat-sales-assets)
- [TikTok Sales Assets](https://support.buyerbridge.com/knowledge/agency-sales-assets?hsLang=en#tiktok-sales-assets)
- [SEO for Dealers](https://support.buyerbridge.com/knowledge/agency-sales-assets?hsLang=en#seo-for-dealers)
- [Product Updates & Enhancements](https://support.buyerbridge.com/knowledge/product-updates-enhancements?hsLang=en#main-content)
- [Enhancements](https://support.buyerbridge.com/knowledge/product-updates-enhancements?hsLang=en#enhancements)
- [Product Updates](https://support.buyerbridge.com/knowledge/product-updates-enhancements?hsLang=en#product-updates)
- [Announcements](https://support.buyerbridge.com/knowledge/product-updates-enhancements?hsLang=en#announcements)
- [Monthly Updates](https://support.buyerbridge.com/knowledge/product-updates-enhancements?hsLang=en#monthly-updates)
- [Metrics](https://support.buyerbridge.com/knowledge/metrics?hsLang=en#main-content)
- [Offline Events](https://support.buyerbridge.com/knowledge/metrics?hsLang=en#offline-events)
- [Metrics Defined](https://support.buyerbridge.com/knowledge/metrics?hsLang=en#metrics-defined)
- [Leads](https://support.buyerbridge.com/knowledge/metrics?hsLang=en#leads)
- [Reporting](https://support.buyerbridge.com/knowledge/metrics?hsLang=en#reporting)
- [SEO Reporting](https://support.buyerbridge.com/knowledge/metrics?hsLang=en#seo-reporting)
- [Supported Providers](https://support.buyerbridge.com/knowledge/supported-providers?hsLang=en#main-content)
- [CRM Integrations](https://support.buyerbridge.com/knowledge/supported-providers?hsLang=en#crm-integrations)
- [Inventory & Feed Providers](https://support.buyerbridge.com/knowledge/supported-providers?hsLang=en#inventory-feed-providers)
- [Website Providers](https://support.buyerbridge.com/knowledge/supported-providers?hsLang=en#website-providers)
- [3rd Party Support](https://support.buyerbridge.com/knowledge/3rd-party-support?hsLang=en#main-content)
- [Google Help Center](https://support.buyerbridge.com/knowledge/3rd-party-support?hsLang=en#google-help-center)
- [Facebook Platform Help](https://support.buyerbridge.com/knowledge/3rd-party-support?hsLang=en#facebook-platform-help)
- [TikTok Help Center](https://support.buyerbridge.com/knowledge/3rd-party-support?hsLang=en#tiktok-help-center)
[](https://buyerbridge.com/)
buyerbridge.com | Help Center
Copyright © 2026, Dealers United