When onboarding a client to Microsoft inside of the BuyerBridge platform, we require the creation and connection of specific Microsoft assets.
This article will help your organization create the necessary Microsoft assets and complete the Asset Connection step (below) during BuyerBridge onboarding.
We will be going over how to:
- Step 1: Microsoft Ad Account Creation
- Step 2: Generate A Pixel/UET Tag
- Step 3: Create A Catalog
- Step 4: Connect Assets
- Step 5: Create AIA Ads
Let's get started...
Step 1: Microsoft Ad Account Creation
To begin, you will need to set up Microsoft Ads Manager account for your organization - which is similar to the way you set up Ad accounts for other social media platforms.
- First, go to ads.microsoft.com
- If you don’t already have an account, you’ll need to set up a new user and go through Microsoft's onboarding process.
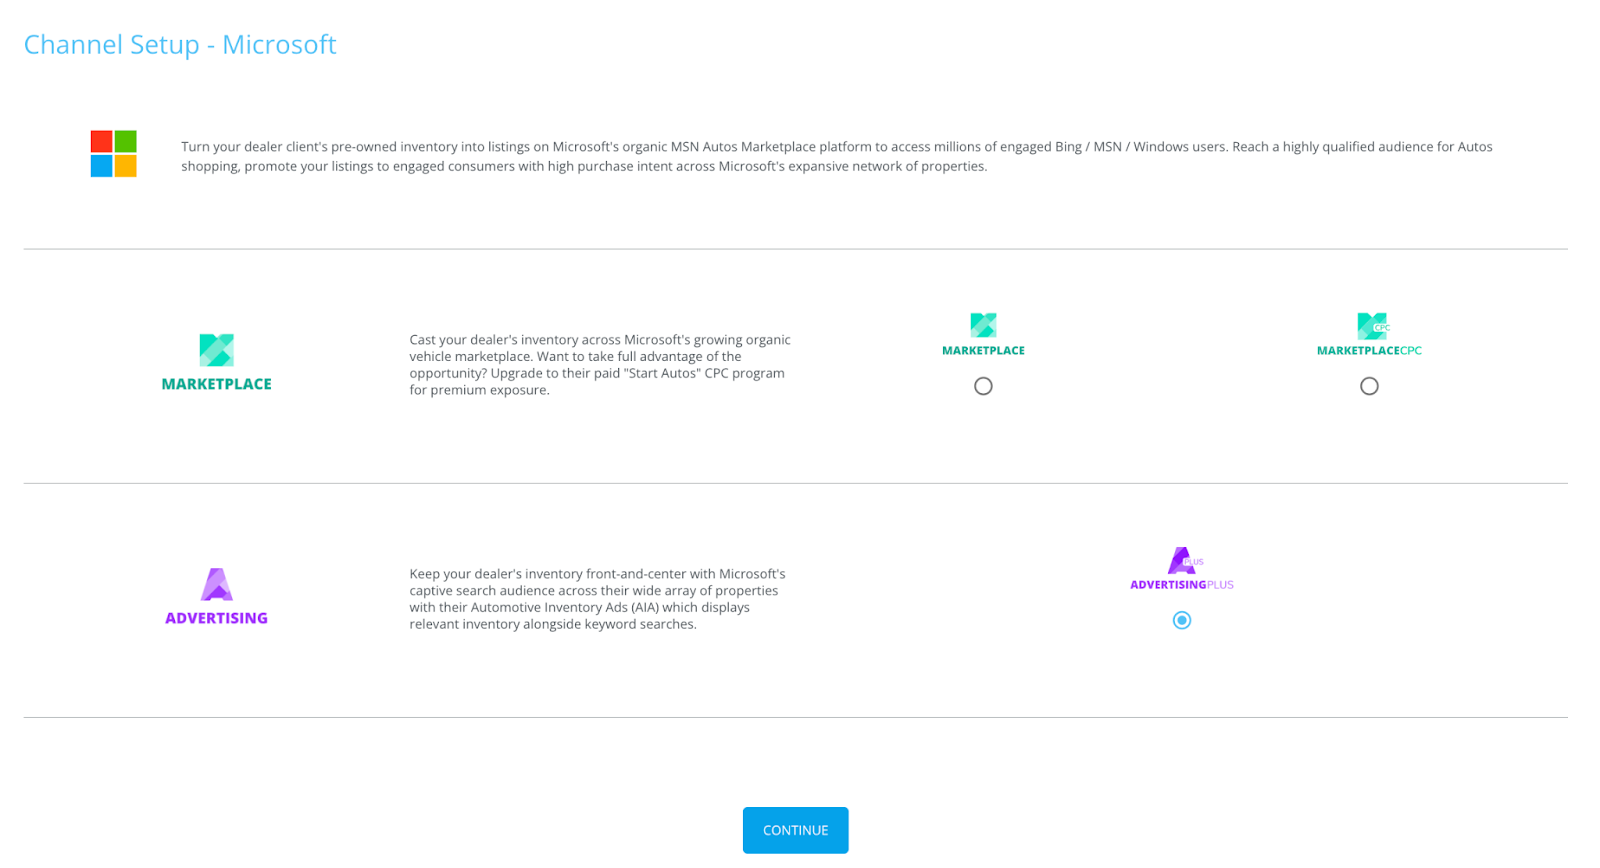
- Choose Account Summary > Click the blue “Create Account” button
-png-1.png)
- Enter the required Account Information.
- Account Name
- Primary Contact
- Billing Language
- Account Timezone
- Auto-tagging
- It is recommended to have Auto-tagging selected.
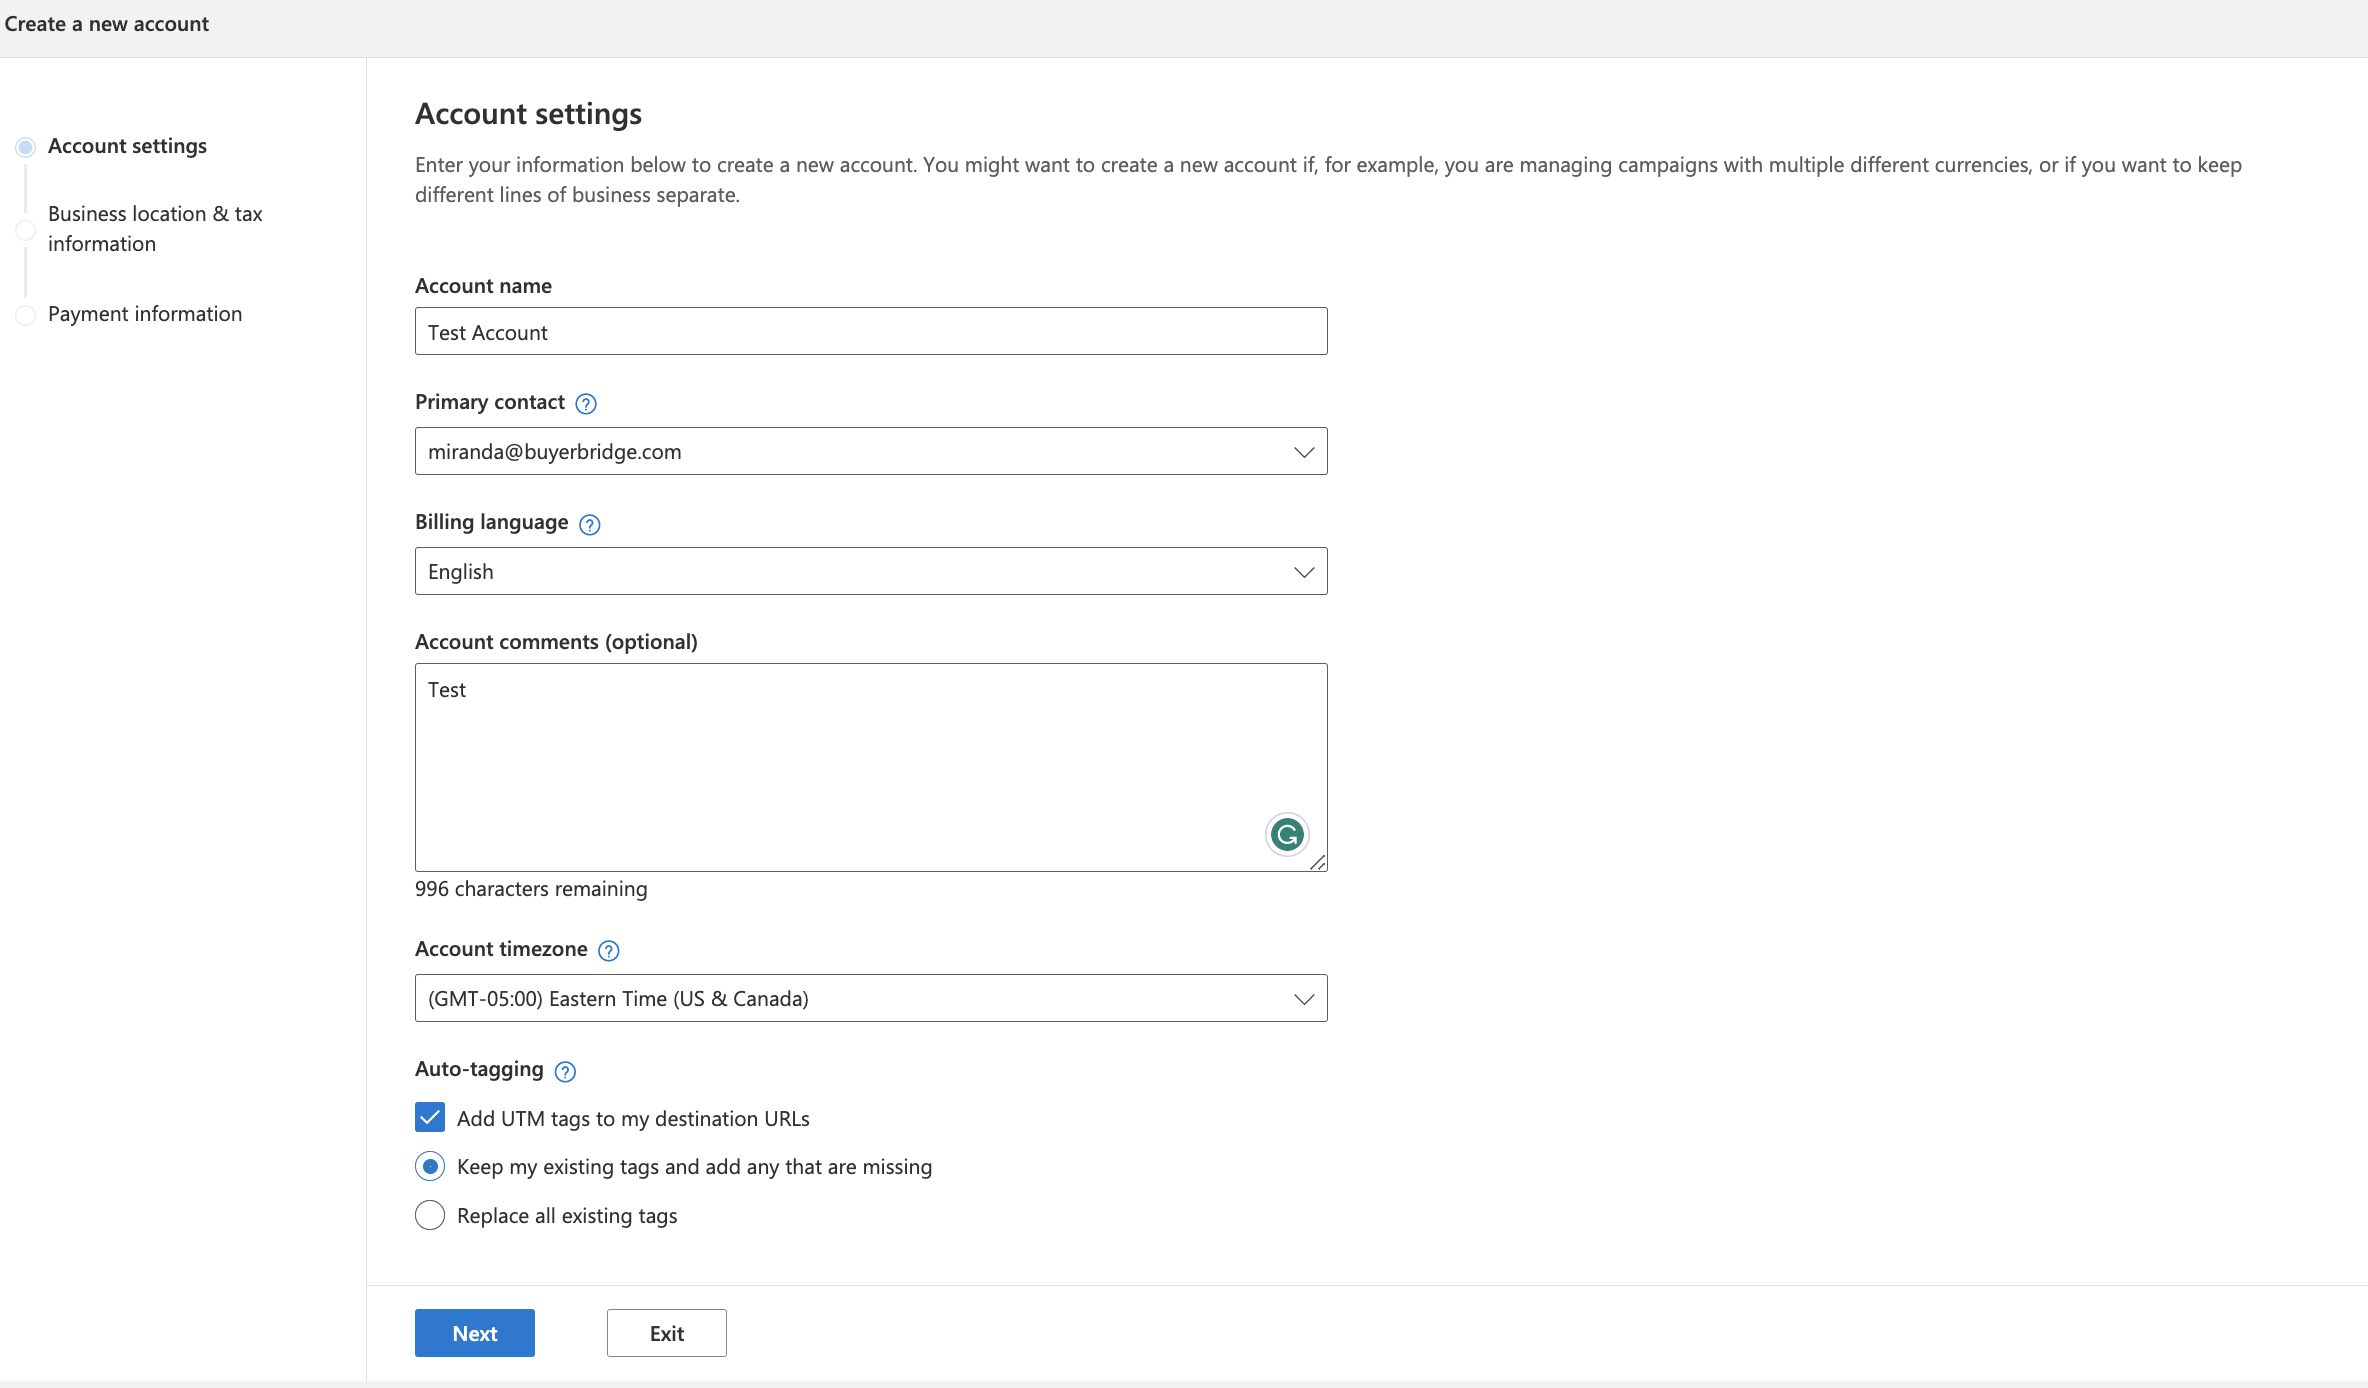
- Hit Next.
- Enter the Business Location & Tax Information.
- Legal Business Name
- Business Location
- Business Address
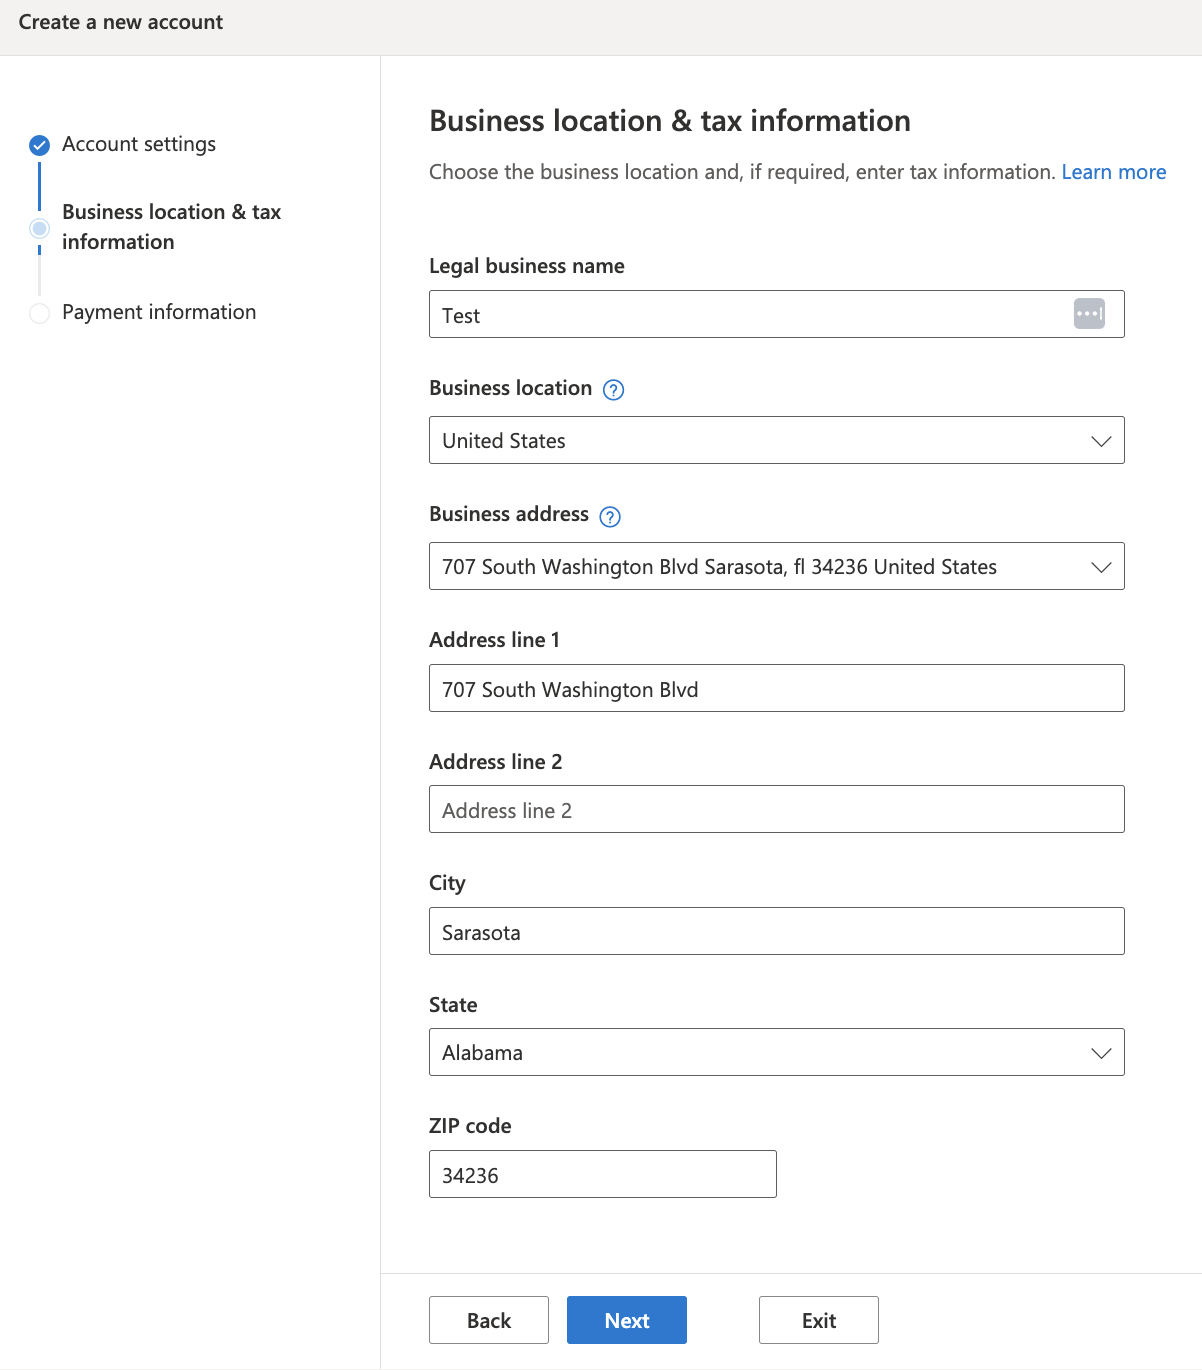
NOTE: Under Business Address, you will have the ability to choose an address from a list of saved addresses if you already have accounts created. If this is the first account, you will not have access to saved addresses.
- Click Next.
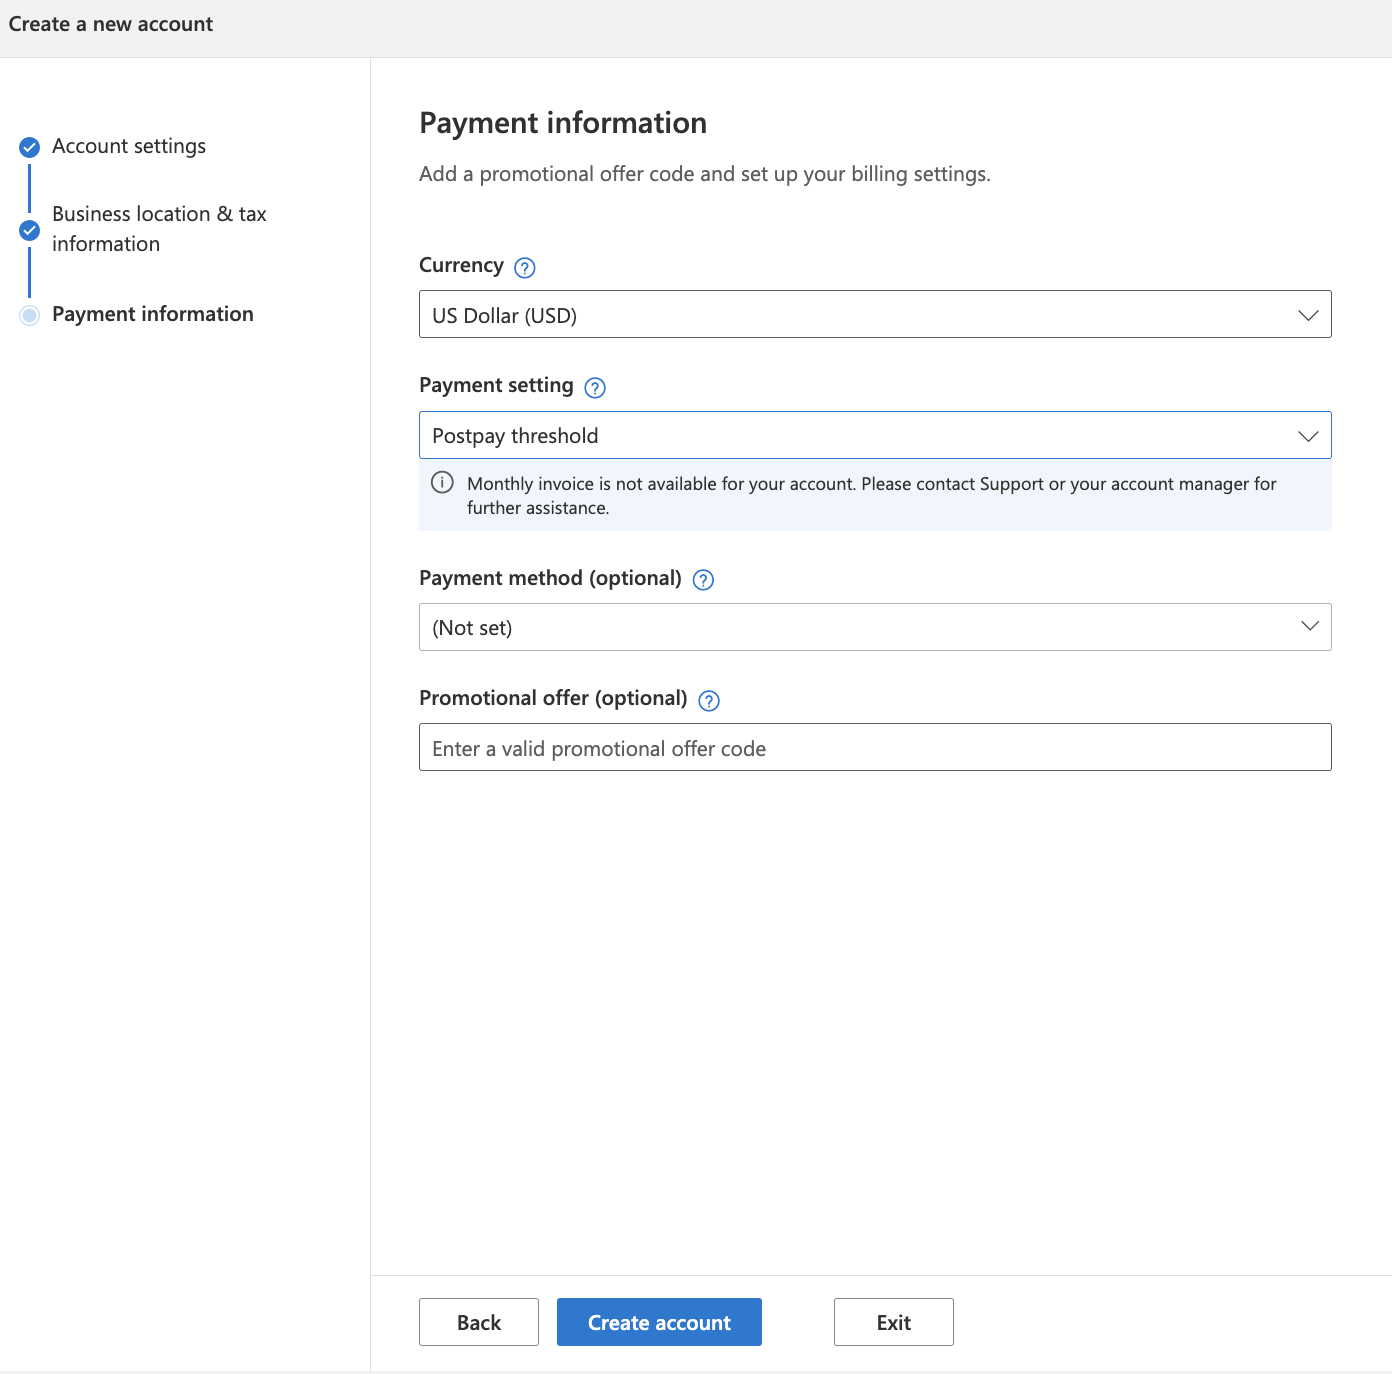
- Enter Payment Information.
- Currency
- Payment Setting
- Hit the blue “Create Account” button.
You will need to copy the Ad Account Number for the Ad Account asset connection step of onboarding.
Step 2: Generate A Pixel/UET Tag
To generate a Pixel/UET Tag:
- First, go to ads.microsoft.com.
- Locate Tools on the right of the top navigation bar > select UET Tag.
-png-1.png)
- Click the blue “Create” button.
- Enter the required fields:
- UET Tag Name
- UET Tag Description
- Choose if you would like to “Enable Microsoft Clarity”
- It is recommended to check the box for this.
- Hit the “Save and Next” button.
You will need to copy the Pixel Id for the Pixel asset connection step of onboarding. To do this:
- Locate Tools on the right of the top navigation bar again > select UET Tag > scroll to the Pixel you wish to use and copy the Tag Id.
-png-1.png)
Step 3: Create A Catalog
- First, go to ads.microsoft.com.
- Locate Tools on the right of the top navigation bar > select Business Data > go to Dynamic Data Feeds > click Upload > Autos > Listing Inventory.
-png-1.png)
- Enter in the Listing Inventory information:
- Name
- Upload Inventory File
- Click “Upload and Preview.”
- You will see errors that there’s no matching campaign but you can ignore these as they will go away once you setup your AIA ads in a later step.
- Once the file is uploaded, hit Done.
Now that the catalog is created, you will need to set the Upload Schedule. To do this:
- Go to Dynamic Data Feeds > choose the catalog you created > Schedules > hit the blue “Schedule Feed Uploads” button.
- The Schedule should be set up like the example image below:
IMPORTANT: The URL will be the URL that is copied from the Onboarding Flow.
- Hit Save.
It is recommended that once the schedule is set, you select “Update Now” so that the catalog is processed with the most up-to-date information.
You will need to copy the Feed Id for the Catalog asset connection step of onboarding. To do this:
- Locate Tools on the right of the top navigation bar > select Business Data > go to Dynamic Data Feeds > find the Feed Id column and copy the ID for the catalog you wish to connect.
-png-1.png)
Step 4: Connecting Microsoft Assets in the BuyerBridge Platform
Following the creation of the above Microsoft assets, it's time to go back inside the BuyerBridge platform to onboard your client to Microsoft!
If you're onboarding an EXISTING client to Microsoft:
- Click the Channel Settings menu located at the top of the platform
In the Channel Settings panel, toggle to Microsoft, and click Setup.
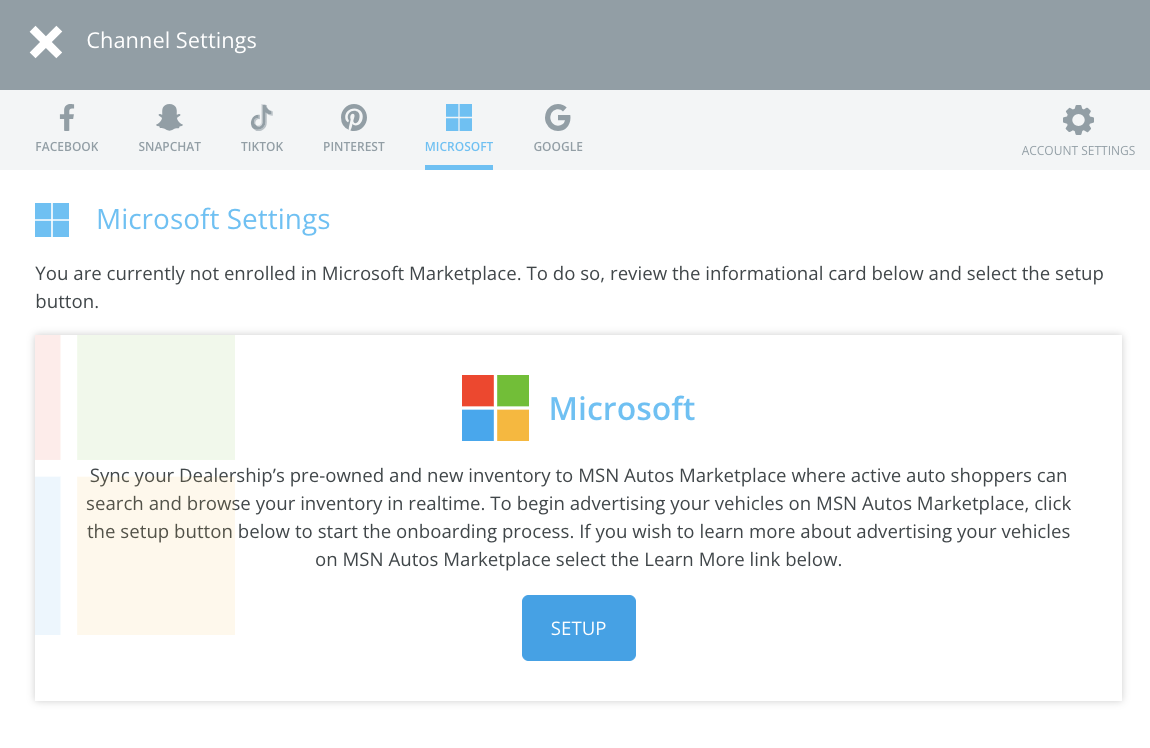
Since the client you are onboarding already exists in BuyerBridge, you will not need to go through the "Account Setup" steps and will go directly to the "Connect Microsoft Assets" section of onboarding.
Once you see the "Connect Microsoft Assets" Page, select the drop-down and choose the matching asset that you just created for each asset.
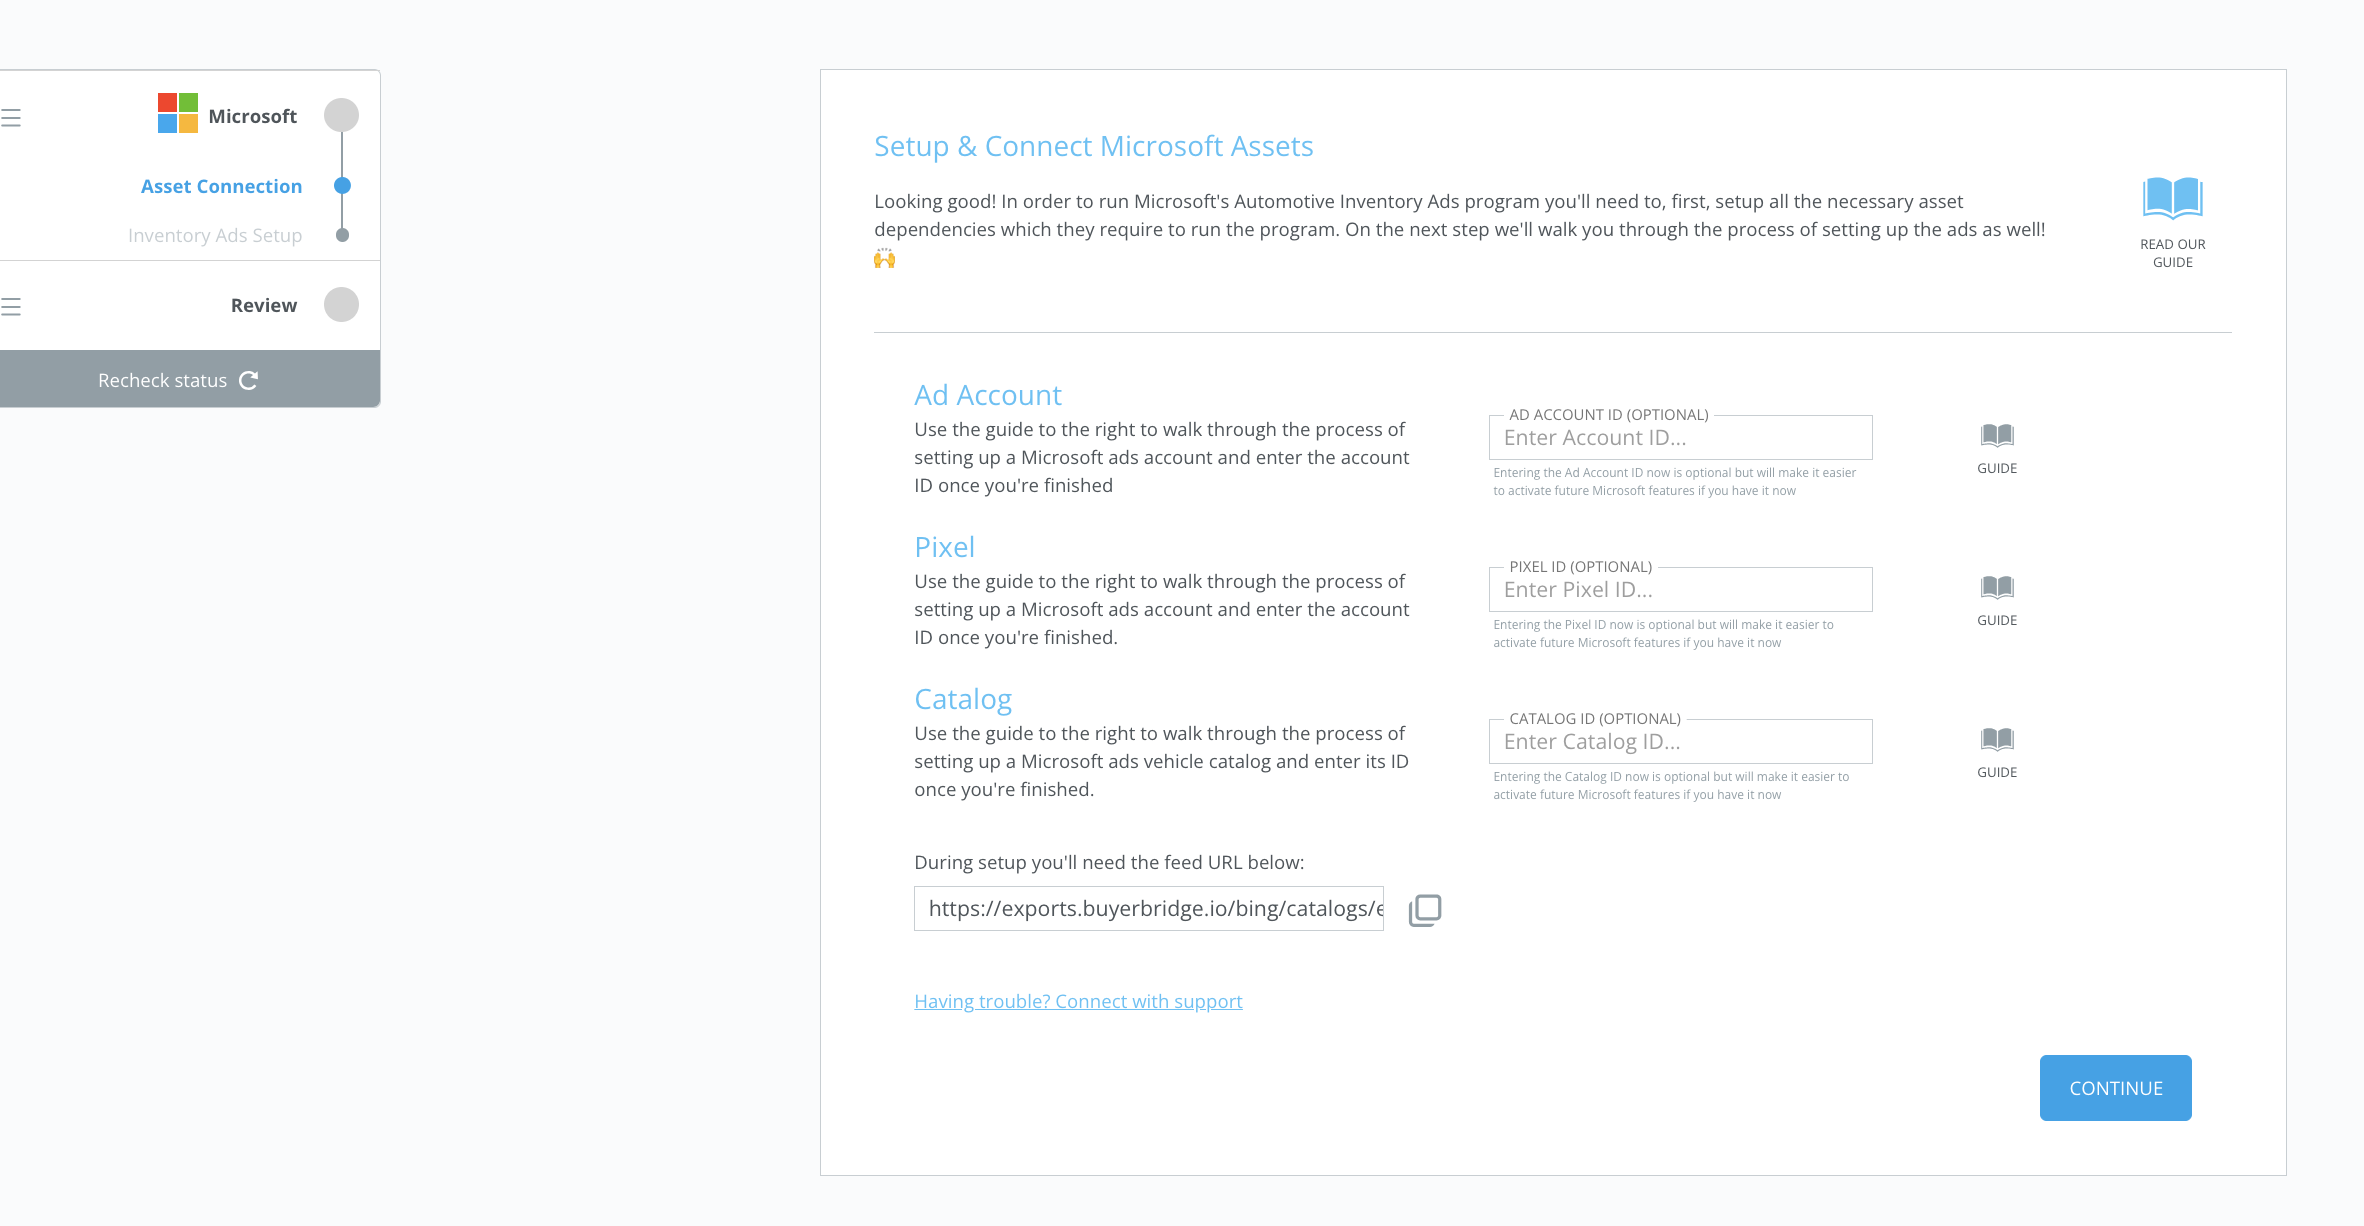
If you do not see your asset in the drop-down, hit the refresh icon on the right side to tell our platform to re-pull information from Microsoft.
- After all of the assets have been connected, select Continue to reach the review process.
- If everything looks accurate, you will click Complete Onboarding
If you're onboarding a BRAND-NEW client to Microsoft:
- Check out our "Getting Started with Omnichannel Onboarding" article for a step-by-step guide on how to get your new client set up and onboarded to Microsoft.
Step 5: Microsoft Inventory Ads (AIA) Setup
Now that your Microsoft assets are connected, let's get the Microsoft Inventory Ads set up!
To get started with Microsoft Inventory Ads, you will need to create a search campaign with a responsive search ad that functions as a placeholder.
Then, you will need to make sure that you have a Catalog created. This is the Catalog you will use for the campaign.
If do not have a Catalog created and you need help creating one, refer back to Step 3 above.
Microsoft Inventory Ads pull information from your feed file to generate ad copy and use the ad's settings for targeting and optimization.
NOTE: The campaign you create will always be an Inventory ads campaign. You cannot use this campaign for any other purpose now or at a later time.
Let’s start the Inventory Ads Creation:
Campaign Creation
- First, go to ads.microsoft.com.
Create the Microsoft Inventory Ads Campaign.
- From the left navigation bar, select Campaigns > click Create.
-png-1.png?width=125&height=452&name=Untitled%20design%20(59)-png-1.png)
- Select the goal of the Campaign.
- Conversions in my Website is the goal that is recommended.
- Choose Search Ads > click Next
-png-1.png)
- Complete the Campaign Information
- Campaign Name
IMPORTANT: This will need to be Automotive Inventory Ads or the setup will not work.
-
- Campaign Budget
- Location
- Who should see your ads
- This is the audience you would like to run the ads to
- Language
- Disclaimer
- Select Save & go to the next step
You will now create an Ad Group.
Ad Group Creation
For the purpose of this walkthrough, we will be creating a Standard Ad Group.
- Enter the Ad Group information:
- Website URL
- Ad group name
- Enter Keywords
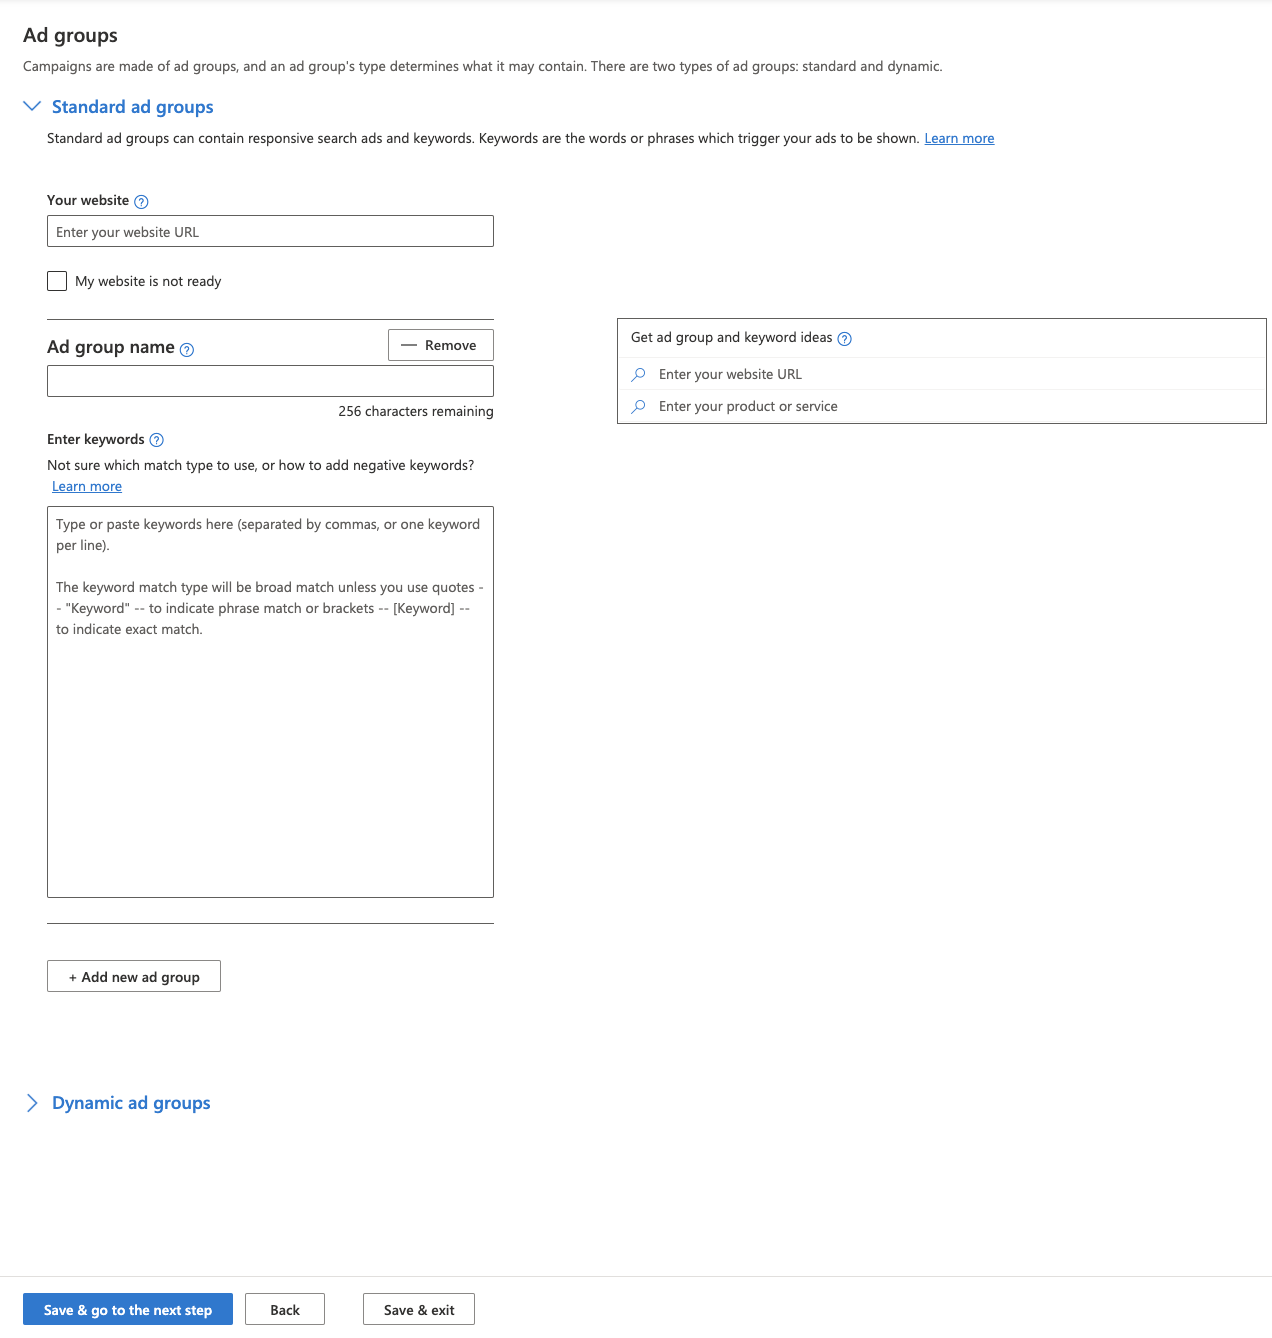
VERY IMPORTANT: Create only one keyword for each ad group. The keyword you input must be: [e3f21e4f-e0cf-46e5-a9c3-811353b68e1c] ([] denotes exact match)
- Select Save & go to the next step.
Next in Ads & Ad Extensions, below Standard ad groups, select Create ad.
- From the Ad type dropdown menu > select Responsive search ad.
- Enter the Final URL,
- This will be the Display URL in your ads.
- Enter placeholder values for each field.
- Since this ad will be dynamically populated by the attributes in your Catalog, your placeholder values can simply be “test”.
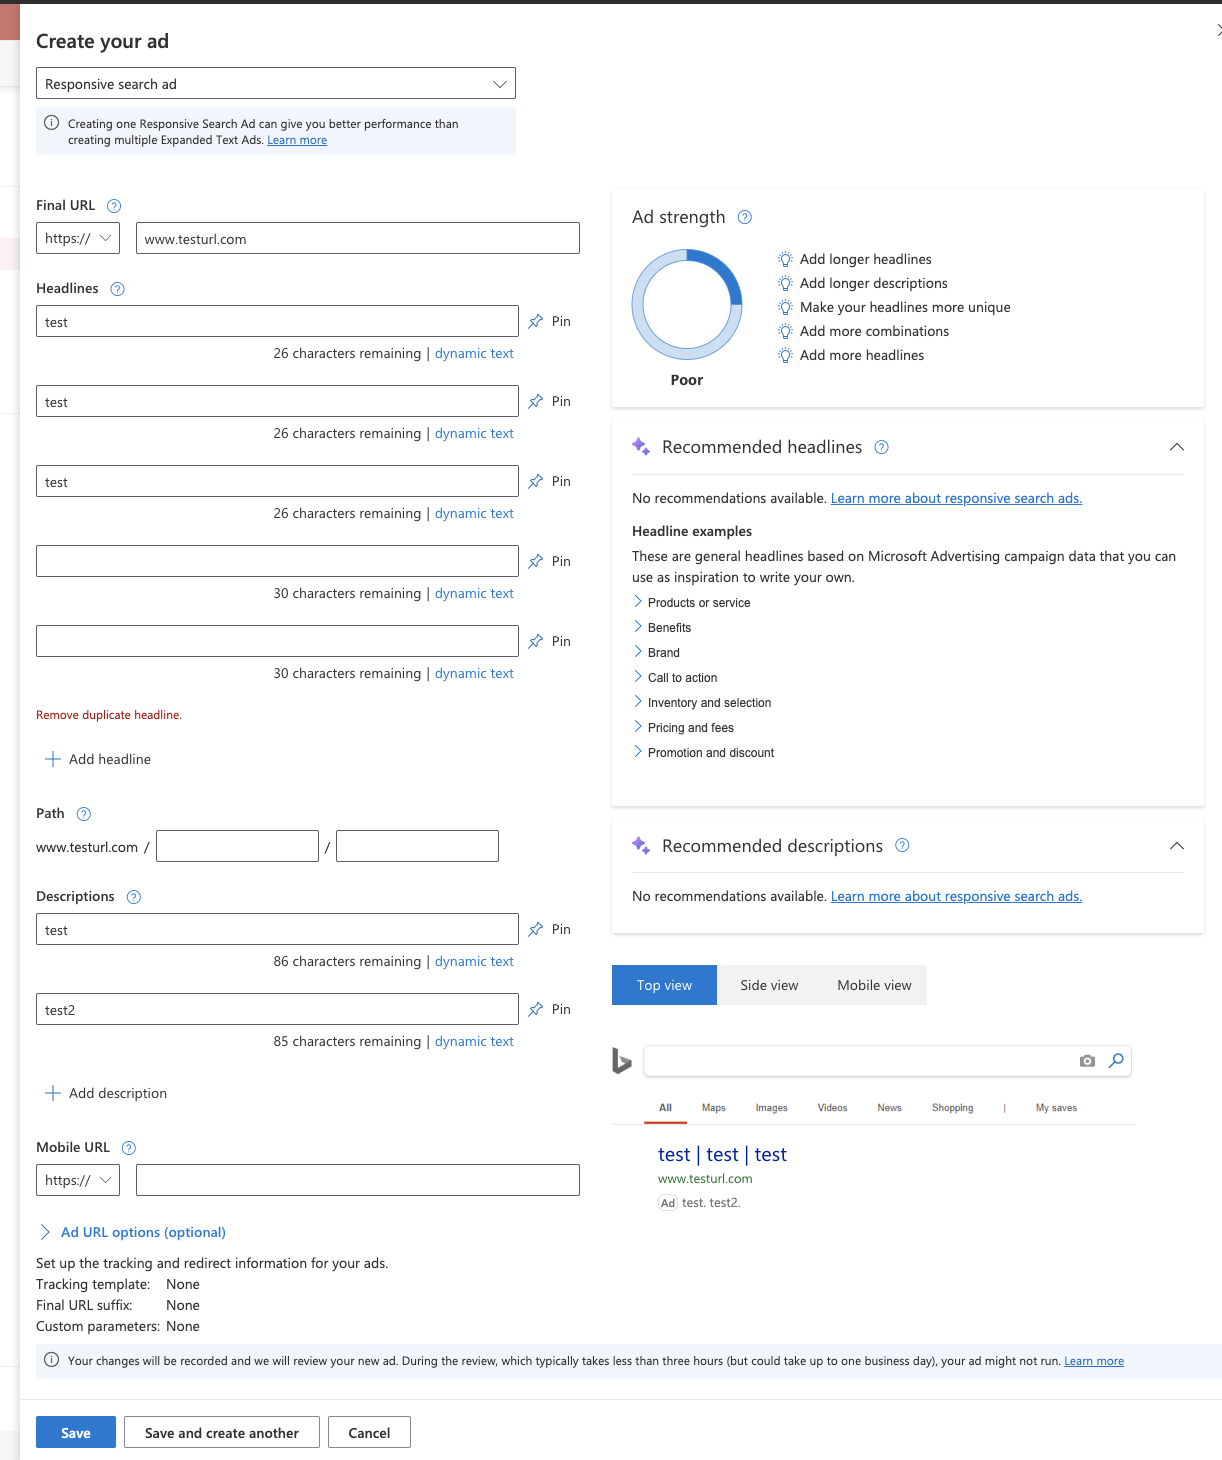
Select Save to continue.
Note: If you created more than one ad group, you'll need to create one responsive search ad for each. Do not create more than one responsive search ad for each ad group.
- Select Save & go to the next step.
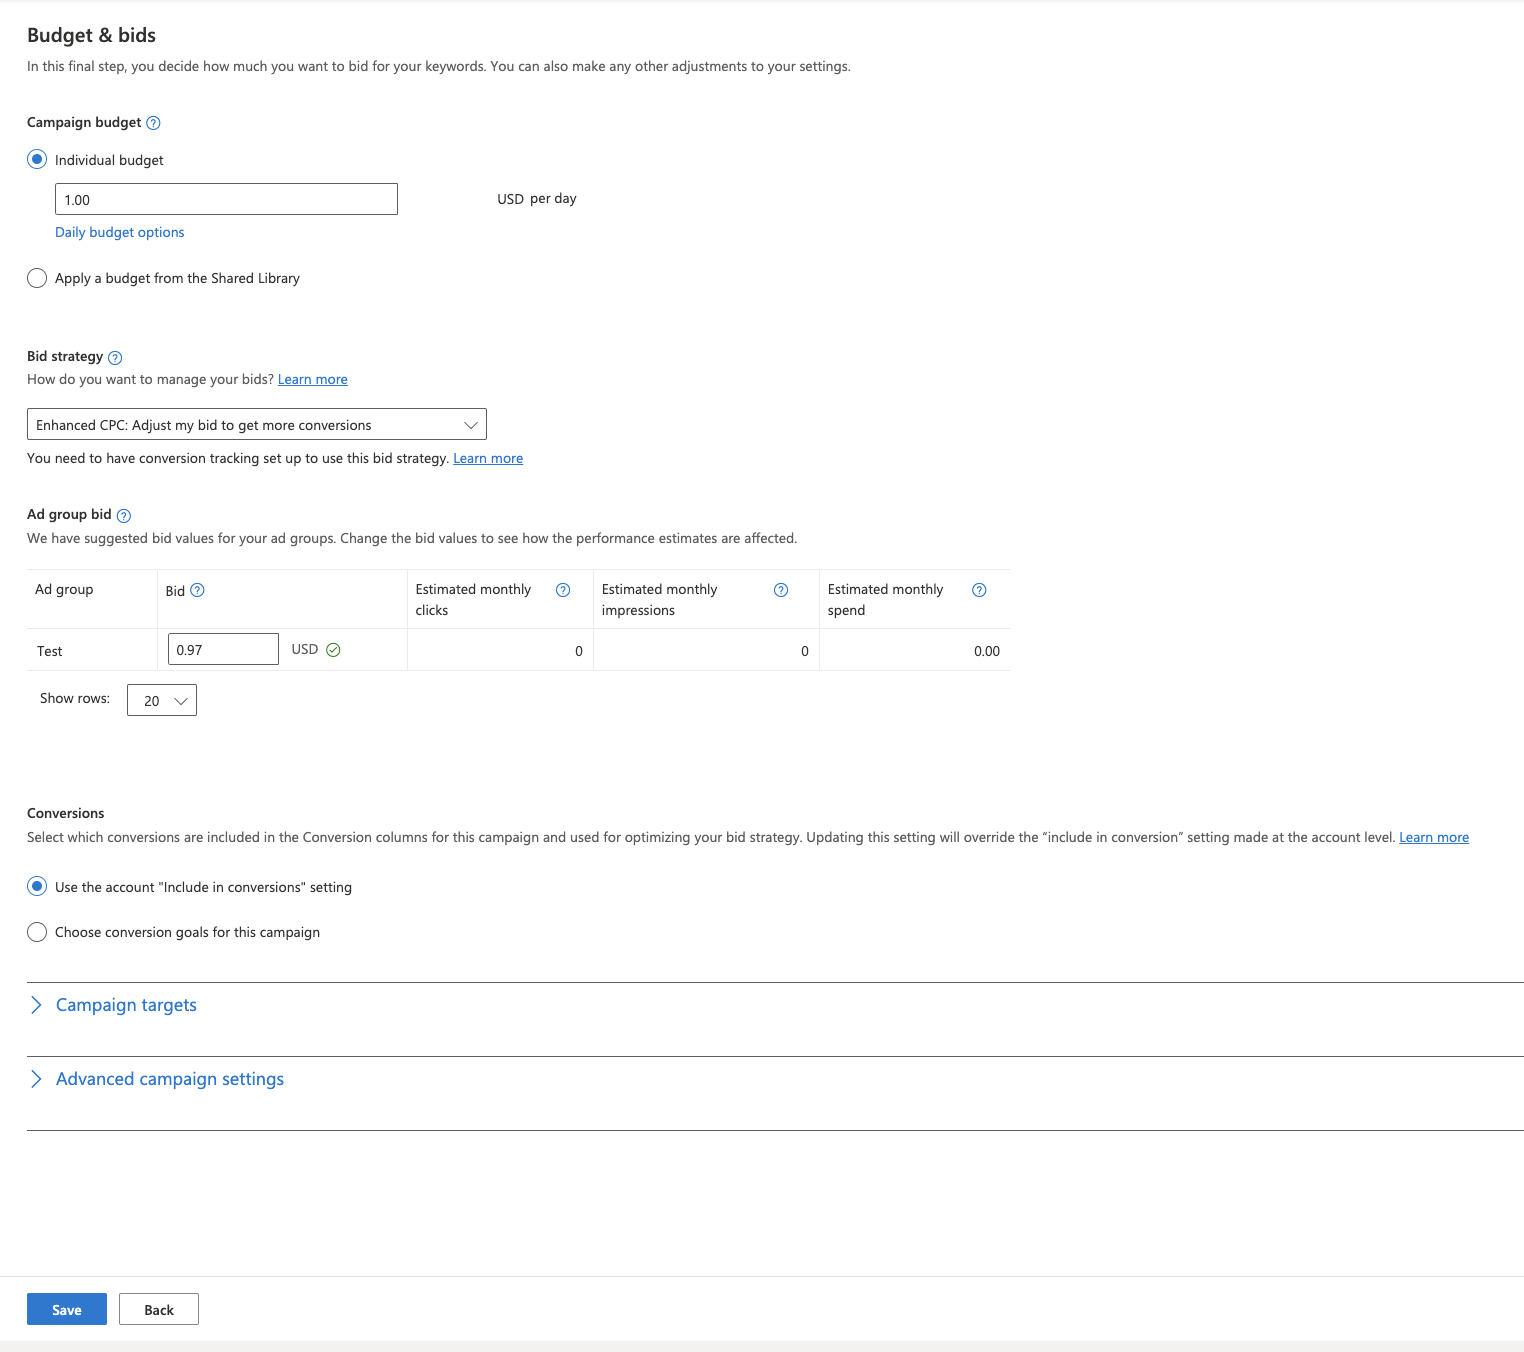
Finally, In Budget & bids,
- Set your Budget Amount.
- Select Enhanced CPC from the Bid strategy dropdown menu.
- Under Conversions, select Use the account “include in conversions” setting.
- Select Save.
If you are having difficulties setting up your Inventory Ads, check out Microsoft’s “Use Automotive ads to showcase your models and inventory” guide for more help.
Once you have completed the Microsoft Inventory Ads setup, you will need to return to the BuyerBridge Dashboard to complete onboarding.
When you return to the BuyerBridge dashboard > select “Click here to confirm once you have completed the setup guide.” > hit Continue.
Congratulations! You have successfully completed onboarding.
As you navigate through the Microsoft AdvertisingPlus onboarding process for you or your clients and still have questions you can reach out to your partner experience manager or contact BuyerBridge Support via email: support@buyerbridge.com.