Overview of Google Vehicle Listing Ads (VLAs)
Google Vehicle Listing Ads (VLAs) is a powerful ad format that allows automotive dealerships to showcase their inventory directly in Google search results. These ads provide dynamic vehicle details, increasing visibility and driving potential buyers to your dealership’s website. Setting up VLAs involves several key agency dependencies, including Google Ads, Merchant Center, and business profile configurations.
Use these helpful links to guide you through the 5-Step Process
Step One: Set Up a Google Ads Account
Step Two: Set Up Google Merchant Center for Vehicle Listing Ads
Step Three: Verify and Claim Your Website
Step Four: Submit Vehicle Inventory Feed
Step Five: Configuring a Google Business Profile Store Code
Bonus Content
How to Set Up a Google Ads Account
(First step in the process)
Before creating Vehicle Listing Ads, you must have a Google Ads account.
Steps to Create a Google Ads Account
- Visit the Google Ads Homepage: Navigate to ads.google.com and click 'Start Now.'
- Sign in with Google Account: Use an existing Google account or create a new one to sign in.
- Set Up Basic Details: You will be prompted to provide billing information and your business website details.
- Select Ad Goals: Choose goals such as sales or leads to align with your agency’s objectives.
- Save Your Account Settings.
Best Practices for Google Ads Account Setup
- Use a dedicated email for each client’s Google Ads account for better organization.
- Ensure accurate billing information to avoid payment issues that could disrupt your campaigns.
How to Set Up Google Merchant Center for Vehicle Listing Ads
(Second step)
Google Merchant Center is where your client's vehicle inventory will be managed and synced with Google Ads.
Steps to Create a Google Merchant Center Account
- Go to the Merchant Center Website: Head to Google Merchant Center.
- Sign in Using Google Account: Use the same account linked with Google Ads to ensure smooth integration.
- Enter Your Business Information: This includes your business name, country, and time zone.
- Verify and Claim Your Website: Add a snippet of code to the client’s website or use Google Analytics for verification.
- Submit Vehicle Inventory Feed: Upload a data feed with details about the vehicles available in inventory.
Google Merchant Center Feed Format Tips
- Ensure that your vehicle data feed includes accurate details such as make, model, price, and availability.
- Keep the feed updated regularly to reflect any changes in stock or pricing.
Visit Google's Merchant Center Setup Guide: Google Merchant Center Setup Guide
Steps to Verify and Claim Your Website
(Third Step - Part of the Google Merchant Center setup)
-
Sign in to Google Merchant Center:
- Go to Google Merchant Center and sign in with your Google account.
- Make sure you are using the same Google account associated with your Google Ads account to streamline the setup process.
-
Navigate to the 'Business Information' Section:
- Once inside the Merchant Center, go to the 'Tools' icon in the upper-right corner.
- Under the 'Settings' tab, select Business Information.
-
Enter Your Website URL:
- In the 'Website' section, enter the full URL of the dealership’s website you are verifying (e.g., https://www.yourdealership.com).
- Click 'Save'.
-
Choose a Verification Method: Google provides multiple methods to verify your website. You can choose the one that best fits your technical capabilities:
- HTML File Upload: Download an HTML verification file provided by Google and upload it to the root directory of your website. Once uploaded, return to Merchant Center and click Verify URL.
- HTML Tag: Copy a provided meta tag and paste it into the
<head>section of your website’s homepage. This method is useful if you don’t have access to your website’s server. - Google Analytics: If your dealership’s website already uses Google Analytics, you can verify your website using the associated Google Analytics account.
- Google Tag Manager: Similarly, if Google Tag Manager is installed on your website, you can verify the site through it.
-
Verify and Claim the Website:
- After selecting your preferred verification method and implementing it on your website, go back to Merchant Center and click 'Verify'.
- Once the verification process is successful, click 'Claim URL' to finalize the process.
Tips for Successful Website Verification
- Ensure the HTML File or Tag is Accessible: If you're using HTML file upload or HTML tags, double-check that these are correctly placed in your website’s root directory or
<head>section. - Use Google Analytics or Tag Manager for Faster Setup: If your dealership’s website is already using Google Analytics or Tag Manager, this may be the quickest verification method since no additional code or files need to be uploaded.
- Ensure Ownership of the Domain: You must have ownership or administrative access to the domain name for verification to work.
Useful Links
How to Submit a Vehicle Inventory Feed - And How BuyerBridge Streamlines This Process
(Step Four: Next after website verification)
After verifying and claiming your website in Google Merchant Center, the next critical step is to submit your vehicle inventory. This feed ensures that your ads display accurate and up-to-date vehicle information like make, model, price, and availability.
Managing a vehicle inventory feed can be complex and time-consuming, particularly for large-scale operations with multiple dealerships or constantly changing inventory. Thankfully, BuyerBridge offers a scalable, automated solution to simplify this process.
Learn more about how BuyerBridge can streamline your VLA feed management.
-
Prepare Your Vehicle Data Feed:
- The vehicle inventory feed is a file (typically in CSV, XML, or Google Sheets format) that contains details about your dealership's available vehicles. It includes attributes such as make, model, price, condition, and availability.
- Ensure that your feed follows the Google Merchant Center specifications for vehicle listings.
Required fields include:- ID: A unique identifier for each vehicle.
- Title: The title of the vehicle (e.g., 2024 Ford Mustang).
- Description: A brief description of the vehicle.
- Price: The price of the vehicle (required).
- Link: The URL to the vehicle’s landing page on your dealership’s website.
- Condition: New or used.
- Availability: The current stock status (e.g., in stock, out of stock).
- Image Link: A URL pointing to an image of the vehicle.
💡Note: For a full list of required and optional attributes, refer to Google’s Merchant Center feed specification guide here.
-
Choose a Method for Uploading Your Feed: Google Merchant Center offers multiple methods for submitting your vehicle inventory feed. Choose one that works best for your technical setup:
- Google Sheets: Google offers a template that allows you to manually input your vehicle data into a Google Sheets document and link it to the Merchant Center.
- Scheduled Fetch: You can store your feed on an external server, and Google Merchant Center will fetch it at a set frequency.
- Manual Upload: You can manually upload a CSV or XML file through the Google Merchant Center interface.
- Content API: This is a more advanced option for dealerships that want to submit inventory feeds programmatically. It allows for real-time data updates and is ideal for larger inventories that change frequently. If you're in this category, learn more about how BuyerBridge can streamline this process.
BuyerBridge's Solution for Content API Feeds:
Managing vehicle feeds, especially with frequent inventory changes, can be labor-intensive. That’s where BuyerBridge comes in. We provide automated feed management using Google’s Content API, ensuring your vehicle listings are always accurate and up-to-date, without manual intervention.
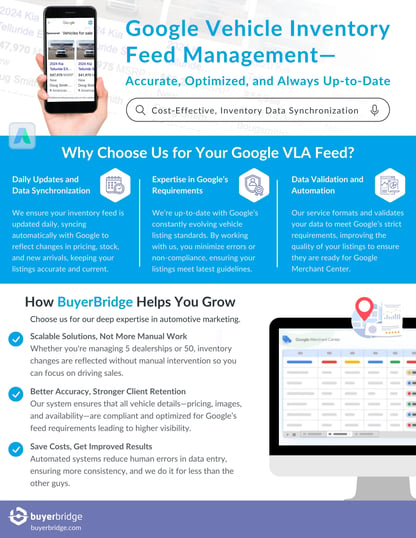
Why Choose BuyerBridge for Your Inventory Feed Solution?
- Daily Inventory Synchronization: We automatically update your inventory feed daily, reflecting changes in stock, pricing, and new arrivals.
- Compliance and Optimization: Our system ensures your feed meets Google’s strict requirements, minimizing errors and improving visibility.
- Scalability: Whether managing 5 dealerships or 50, our automated systems handle the heavy lifting, so you can focus on driving sales and scaling your operations.
By partnering with BuyerBridge, you avoid the hassle of manual feed uploads and data validation. We handle the process for you, ensuring better accuracy and compliance at a lower cost than doing it in-house.
3. Set Up Feed Rules (Optional): If you choose to manage your feed manually, Google Merchant Center offers feed rules to map your data fields to Google’s required attributes. However, BuyerBridge can take this burden off your busy plate by ensuring your feed is correctly formatted and optimized from the start. But if you'd rather tackle it yourself, continue reading.
-
- Create Feed Rules: In the Merchant Center, navigate to the “Feeds” section, select your feed, and click on the “Feed Rules” tab.
- Map Data Fields: For instance, if your internal system uses a field called “VehicleName” and Google requires “Title,” you can map that field to the correct attribute.
4. Submit the Feed to Google Merchant Center:
-
- Once your feed is prepared and linked, go to the Products section in Merchant Center and select Feeds.
- Click on Primary Feeds, then select Add Feed to begin the upload process.
- Choose the appropriate feed type (e.g., Vehicle Listings) and follow the prompts to link your feed file.
- Google will process your feed and review it for any errors or warnings.
Or let BuyerBridge handle the entire process with automated data synchronization, so you don’t have to worry about errors or constant feed updates.

5. Review Feed Diagnostics:
-
- After submitting, Google will process the feed and provide diagnostics on any issues that may prevent your inventory from displaying correctly in ads.
- Common errors include missing required attributes, invalid URLs, or incorrect pricing information. You can view these issues under the Diagnostics section within your Merchant Center account.
- Fix any flagged issues and resubmit the feed if necessary.
If you work with BuyerBridge, we ensure that these issues are reduced, keeping your listings optimized and compliant with Google’s latest standards.
6. Enable Inventory Syncing:
-
- Set your feed to sync at regular intervals, particularly if your dealership’s inventory changes frequently. This ensures that ads reflect real-time availability and pricing.
Best Practices for Vehicle Inventory Feeds
- Use High-Quality Images: Ensure that vehicle images are clear and meet Google’s image requirements. This will enhance ad performance and user engagement.
- Keep Inventory Updated: Regularly update your feed to ensure that vehicles listed in ads are available, avoiding customer frustration.
- Test Feed Before Launch: Always test a sample feed before launching full campaigns to identify any potential issues early.
Get in touch with BuyerBridge today to automate your Google Vehicle Listings feed management and streamline your dealership’s online presence.
Configuring a Google Business Profile Store Code
(Final step in the process)
The store code is essential for linking physical dealership locations with your ads.
Steps to Configure a Business Profile Store Code
- Sign in to Google My Business: Use the same Google account tied to Google Ads.
- Add Store Locations: If the dealership has multiple locations, add each one separately in your business profile.
- Assign a Store Code: A unique store code is required for each location, which helps Google identify and match inventory to a specific dealership.
- Link to Google Merchant Center: Sync the store code with Google Merchant Center for seamless integration between locations and inventory.
Benefits of Configuring a Store Code
- Accurate attribution of leads and traffic from specific dealership locations.
- Simplified reporting and performance tracking across multiple locations.
Ad Formats for Google Vehicle Listing Ads
There are different formats for showcasing vehicles on Google. Here are the most commonly used options:
Google Vehicle Listing Ad Formats
- Search Ads with Vehicle Listings: These show up when users search for specific vehicles, displaying images, prices, and basic details about the car.
- Image Carousels: Dynamic images of available vehicles rotate on Google’s search results page.
- Local Inventory Ads: Highlight in-stock vehicles at nearby dealerships, driving local customers to visit the physical location.
Statistics on the Effectiveness of VLAs
- 53% of auto shoppers use search engines like Google during the car-buying process.
- Dealers using Google VLAs report an increased inventory visibility by 40%.
- VLAs see a 15% higher conversion rate than traditional search ads for car dealerships.
Final Checklist Before Launching VLAs
- Ensure Google Ads account is active and billing information is up to date.
- Verify the Google Merchant Center feed is accurate and up to date.
- Confirm the Business Profile store codes are linked to each dealership location.
- Sync all accounts for a smooth VLA setup.
Additional Helpful Resources