The Offline Events Uploader Tool lets you upload offline customer data (like leads, purchases, or service) right inside BuyerBridge to four platforms at once. Those events can then be matched back to people who viewed or clicked your ads, so you can measure real results beyond clicks.
🚨Important: BuyerBridge encrypts and protects customer data during this process. Platforms receive hashed data for matching—raw contact details aren’t exposed.
Quick links
What are Offline Events?
Offline Events are customer actions that happen “off the website,” like:
-
A purchase
-
A service appointment / RO
-
A lead that came in by phone, walk-in, or another system
Uploading these events helps you answer the big question: “Did our ads influence real business?”
Before you start
Here’s what you’ll want ready:
-
A CSV file (required)

-
Events that are one event type per file (example: only Purchases in a file)

-
At minimum, include a name and one strong identifier (email or phone)
Export your customer data
-
Log into your CRM / DMS / data provider.
-
Export the list of events you want to measure.
-
Example: “Purchases from last month” or “Service ROs from last month”
-
-
Save the export as a CSV.
💡 Pro tip: Keep your export clean. Remove test records, blanks, and duplicate rows when possible.
Prep your CSV for a higher match rate
Your match rate depends on how well platforms can identify the customer.
File rules (important)
- CSV format only
- No empty column headers
- No duplicate column header names
- One file = one event type
- Use clear, consistent formatting (especially emails + phone numbers)

Minimum recommended fields
At minimum, include either:
-
full_name(orfirst_name+last_name)
AND -
emailorphone
Best-practice fields for stronger matching
The more reliable identifiers you include, the better the match rate usually gets:
-
email, plusemail_2/email_3 -
phone, plusphone_2/phone_3 -
date_of_birth -
Address fields:
street,city,state,postal_code,country
Match Rate “power moves” ✅
-
Use both email + phone when possible
-
Make emails lowercase (example:
name@email.com) -
Use phone numbers in a consistent format (include country code if you can)
-
Add DOB + ZIP when available
Field descriptions (what to put in each column)
Use the Field Descriptions link inside the upload box anytime you need a refresher. Here are the key fields your file can include:
| Field | When it matters | What it means |
| full_name | Helpful when first/last missing | Full name (system may split into first/last) |
| first_name | Required if full_name missing | Customer first name |
| last_name | Required if full name missing | Customer last name |
| Required if no phone | Primary email | |
| email_2, email_3 | Recommended | Extra emails to improve matching |
| phone | Required if no email | Primary phone |
| phone_2, phone_3 | Recommended | Extra phones to improve matching |
| date_of_birth | Recommended | DOB can be a strong match signal |
| street | Recommended | Primary address |
| state | Recommended | Primary state |
| country | Used if not set | Defaults to dealer’s country if missing |
| postal_code | Recommended | ZIP / postal code |
| date | Recommended | Event date (defaults to today if missing; can’t be older than 62 days) |
| vin | Optional | VIN tied to the event (if relevant) |
| value | Optional | Value of the transaction (local currency) |
| currency | Optional | Currency code (defaults if not supplied) |
Step 1: Find the Offline Events Uploader
-
In BuyerBridge, open the left-side navigation.
-
Click Offline Event Uploader (or Upload Offline Events, depending on your menu layout).

Step 2: Upload + validate your file
-
Drag and drop your CSV into the upload box (or click to select).

-
Choose the Event Type for the whole file (example: Purchase or Service).
-
Select the platforms you want to upload to:
-
Meta
-
TikTok
-
Snapchat
-
Pinterest

-
-
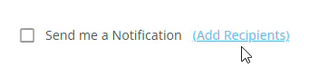
Optional: Turn on Send me a Notification and add recipients.
-
Check the box to agree to BuyerBridge data usage policies.

-
Click Validate File.

Fixing validation issues
After validation, you may see:
-
Fatal errors → rows won’t upload (platform will reject them)
-
Warnings → rows can upload, but matching may be weaker

You can fix the file and re-upload, or continue if warnings are acceptable.
Step 3: Check Upload Status
After upload, scroll to the Upload Status table.
Search or Sort by:
- Platform
- Event Type
- Upload Time
- Processed At
- File/Upload Tag
- Status

Here’s what you’ll see:
-
Status (example: Completed, Processing)
-
Upload time and Processed at
-
File / Upload Tag (helps you identify what you uploaded)
-
Pre-Processing KPI (example: “received vs sent” and a %)
-
Match Rate (platform-provided matching details when available)

What “Pre-Processing” means
This shows how many rows BuyerBridge:
-
Received from your file
-
Sent forward to the platform
-
The % is a quick “health check” that your file is clean and usable.
What “Match Rate” means
Match Rate is how many events were successfully matched to platform users after processing (example: “valid / matched”). Higher match rate = stronger matchback reporting.
💡 Pro tip: If Match Rate is lower than expected, go back to your CSV and add more identifiers (extra email/phone, DOB, address fields).