When onboarding your client to Snapchat inside of the BuyerBridge platform, we require the creation and connection of specific Snapchat assets.
This article will help your organization create the necessary Snapchat assets and complete the Asset Connection step (below) during BuyerBridge onboarding.
We will be going over how to:
- Create a Snapchat Business Manager
- Set Up the Snapchat Ads Manager
- Create & Connect Snapchat Public Profile
- Create a Snapchat Pixel
- Create a Snapchat Catalog
- Connect Snapchat Assets Inside the BuyerBridge Platform
👀 Watch the video walkthrough below and follow along with our guide:
IMPORTANT: Before being able to onboard to Snapchat, your organization must authenticate the Snapchat Connection User in BuyerBridge - which requires a Snapchat Business Manager account.
For details on Omnichannel Authentication, read: How to Authenticate the Connection User For New Channels in BuyerBridge [Omnichannel Authentication]
- If you already have an existing Snapchat Business Manager account, you can either:
- Authenticate the Snapchat Connection User in BuyerBridge, then complete the remaining Snapchat assets required during onboarding
-
- OR follow along with our guide to find out how to create the Ad Accounts, Catalogs, and Pixels prior to establishing the Snapchat Connection User
- If you do NOT have an existing Snapchat Business Manager account, you can follow our step-by-step guide below to create one.
Now let's get started...
Step 1: Snapchat Business Manager Creation (Video Timestamp: 01:09)
To begin, you will need to set up a Snapchat Business Manager account for your organization - which is similar to the way you set up Business Manager accounts for other social media platforms.
- First, go to business.snapchat.com
You will be brought to the Snapchat login screen.
For the purpose of this step-by-step guide, we will be taking you through the process of Signing Up for a new Snapchat Business Manager account...
-
Click “Sign Up” > enter the information being asked for > click “Sign Up & Accept”
- If you already have an existing Snapchat account, you will simply log in
- Next, you need to choose your business type: Select “Business” > Click “Create an ad” > Enter your Business Name and other information about your Business > hit NEXT
Step 2: Snapchat Ads Manager Setup (Video Timestamp: 01:38)
Creating Ad Accounts
After you have completed the initial sign-up steps you will be redirected to the Ad Accounts page - this is where you will begin the process of creating an Ad Account
- Select New Ad Account
Then, the "Advertiser Details" screen will display and you will need to answer a few questions.
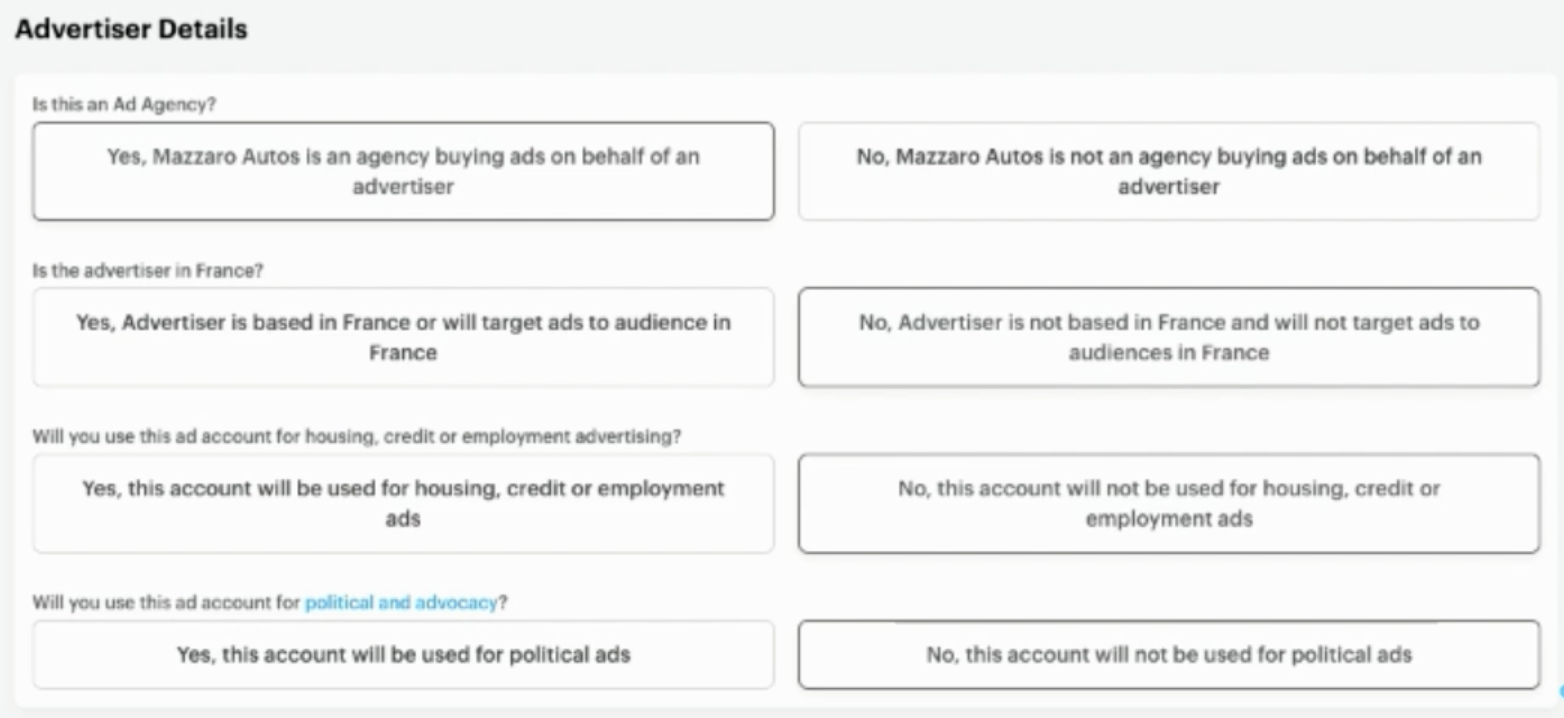
- Once you have filled out the "Advertiser Details," click Account Details in the bottom right corner
Entering Account Details
Now it's time to fill out the Account Details page.
- When you have completed Account Details, click CREATE ACCOUNT
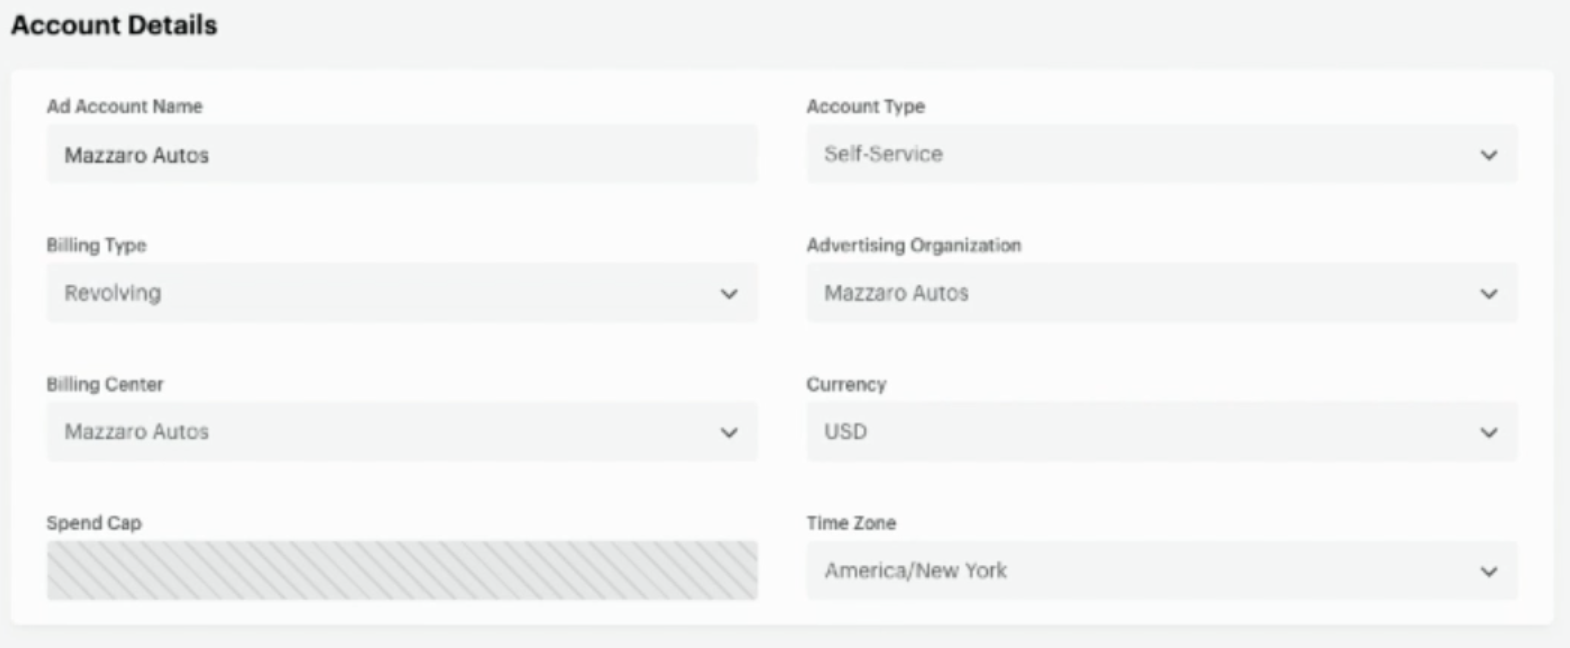
🚨VERY IMPORTANT: The Time Zone needs to be accurate. If it not accurate than the API can not function properly and will cause performance issues.
Finalize Account Set Up
A payment method will need to be selected at this step. You will have the option to select an existing card, if you have already added one, or you can choose to add a new card.
To add a new card:
- Select Create New Payment Method > Credit Card > Enter the Payment details > click Save Payment Method
Once the Payment Method is selected you will need to go back to the Ad Account to add Members of your business to the Business Manager.
Add Members To Your Snapchat Business Manager
For any members of your business you wish to be added to your Business Manager, use the left-side navigation to navigate to "Members."
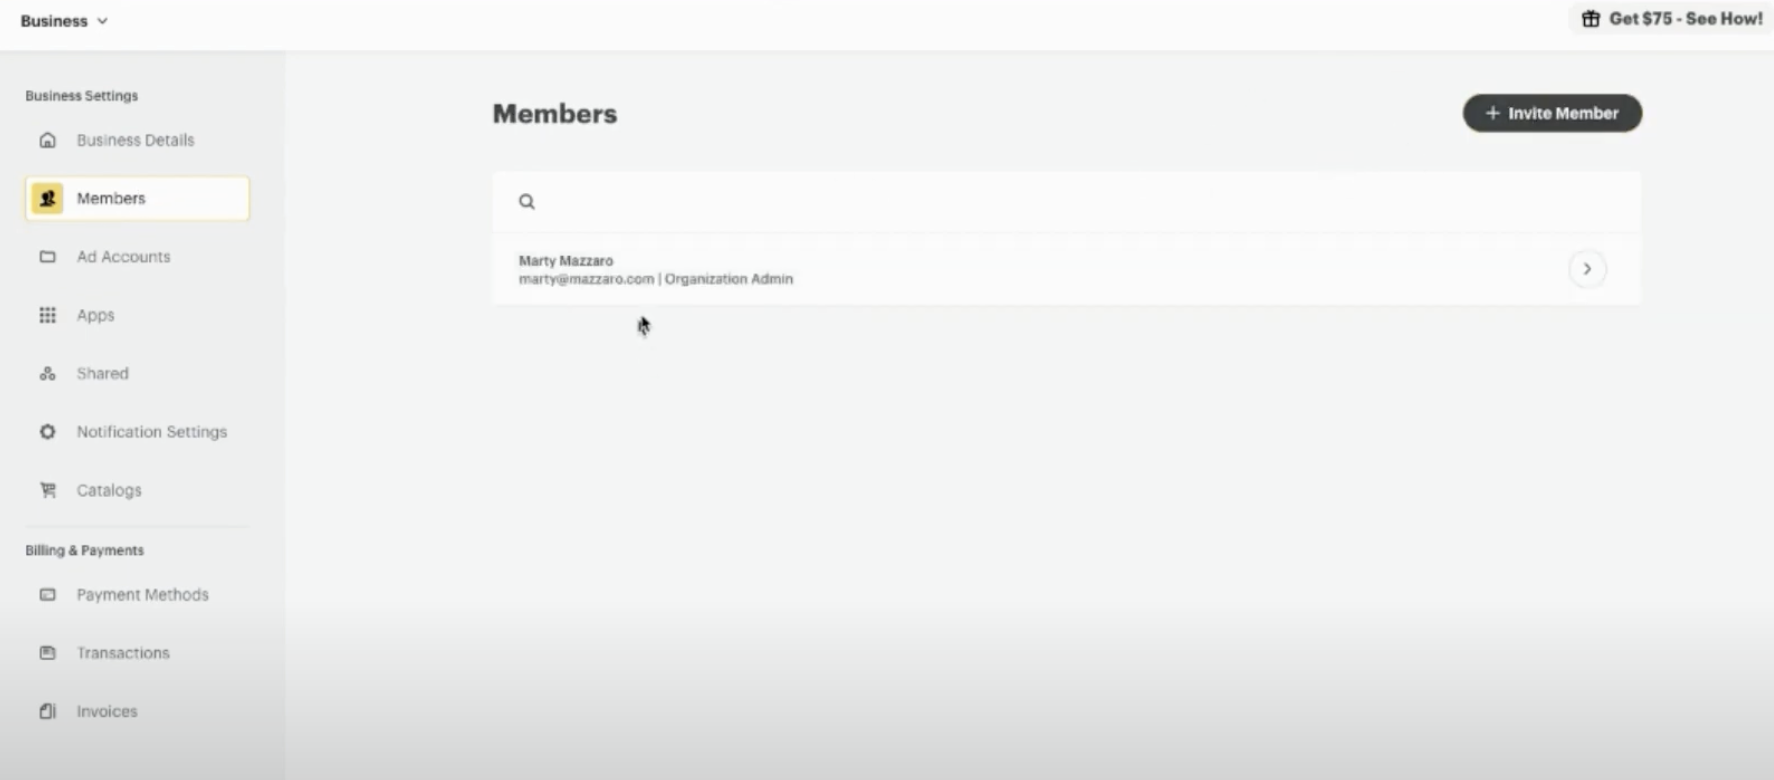
- Under the Members Page, click Invite Member
- Enter Name, Email address, and Role > then click Invite Member
You will ALSO need to add your Partner Experience Manager(s) to be Members of your Business Manager. The email to use to do this is digital@buyerbridge.io.
IMPORTANT: Your Partner Experience Manager's role needs to have the highest permission levels - make sure that Member, Business Admin and Organization Admin are selected before sending the invite. Why is this?
Step 3: Create & Connect A Snapchat Public Profile
Now that you have created a Business Center and an Ad Account. We will walk you through the simple steps of creating/connecting a Snapchat Public Profile.
There are 2 ways that you can ensure a Public Profile is created and connected to BuyerBridge, you can create a new Snapchat Public Profile, or connect an existing one.
If an account already has an existing Public Profile, you can skip to "How To Connect An Existing Public Profile To Your Business Manager" below.
How To Create A New Snapchat Public Profile
- Login into Snapchat Business Center
On the left-hand side locate the drop-down menu, select Public Profiles > click Create Profile. - Create a Snapchat Account or Login into an existing account
Click Sign Up & Accept or Sign-In > this will now take you back to Create Profile page.
Note: If you are creating a new account, fill in the requested information. The username can only be less than 15 characters
- Click Create Public Profile
At this step confirm the information is correct > hit Create Public Profile. - You have created a Public Profile
Once you have successfully created a Public Profile you will need to add a few key components to it.
Start by clicking on the User Profile image circle > select a Profile Image > hit OK.
Fill in the requested information:
-
Bio
- This is information about your business
- Category
- Select Business
- City
- State
- Website
-
How To Connect An Existing Snapchat Public Profile To Your Business Manager
In order for BuyerBridge to easily pull in an account's Public Profile during onboarding, the Public Profile will need to be shared with your organization's Snapchat Business Manager.
To check if a Public Profile is shared with your Business Manager:
- Login into your organization's Snapchat Business Center
- Click the menu in the upper left-hand corner of Snapchat Ads Manager > under Business, select Public Profile
- From the Profile Manager, you will have visibility into all of the Public Profiles attached to your Business Manager
- Search for the name of the Profile you need to share
- If the Profile IS shared with you, you will see an orange "Shared with me" tag on the right side of the profile's row
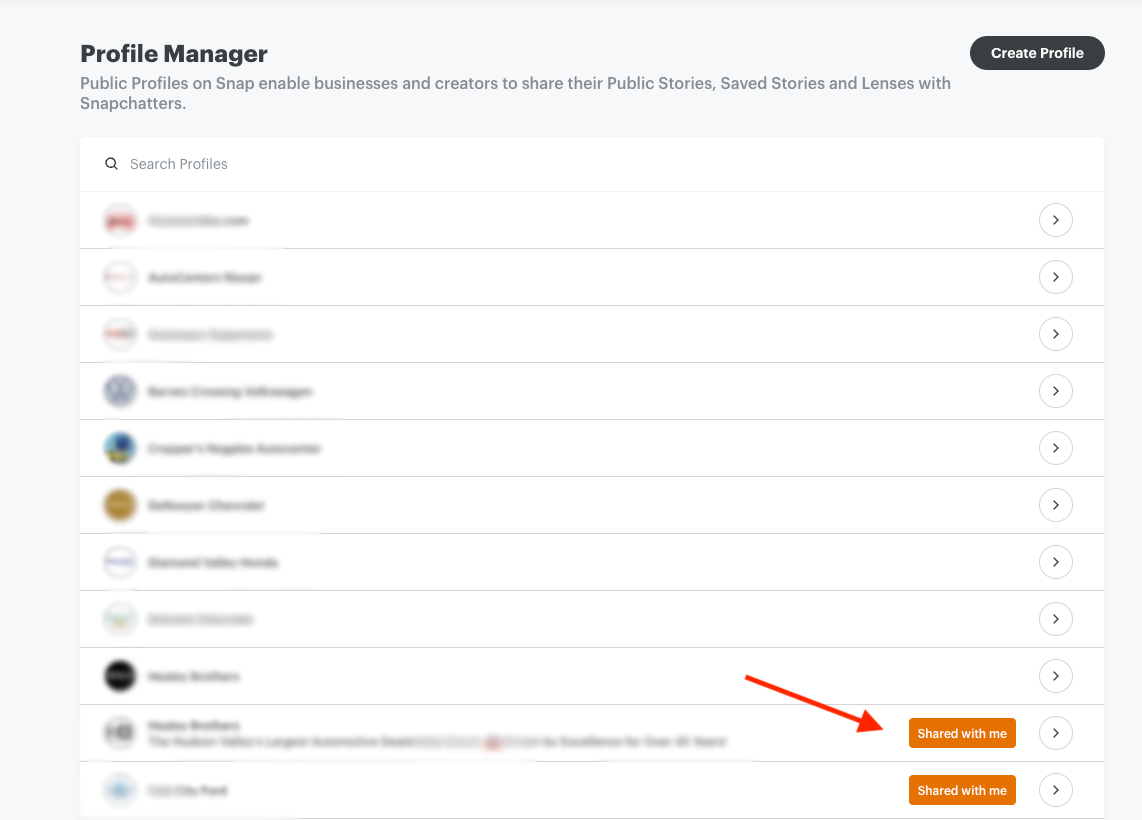
- If the Profile is NOT shared with you, there will be no "Shared with me" tag displayed
To share a Public Profile with your organization's Business Manager:
- Login into your organization's Snapchat Business Center
- From the menu in the upper left-hand corner of Snapchat Ads Manager > under Business, select Business Details
- Under Organization Info, locate and copy the Organization ID
- Provide your Organization ID to the business whose Public Profile you need to be shared with you
Once you've provided your Organization ID, your client will be required to share their Public Profile with your organization:
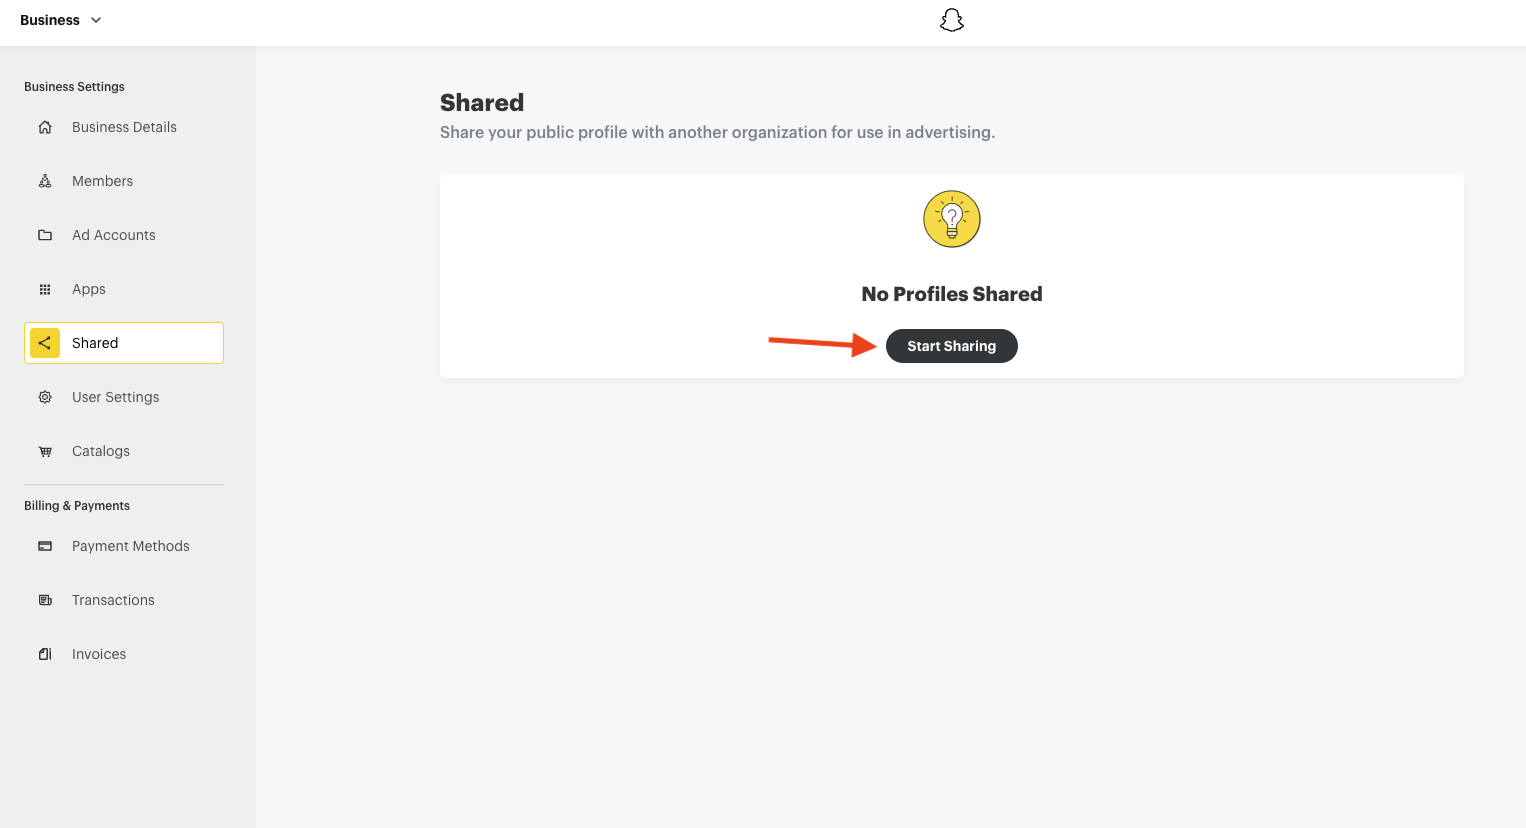
- Login into their businesses Snapchat Business Center
- From the menu in the upper left-hand corner of Snapchat Ads Manager > under Business, select Business Details > Shared
- Click Start Sharing
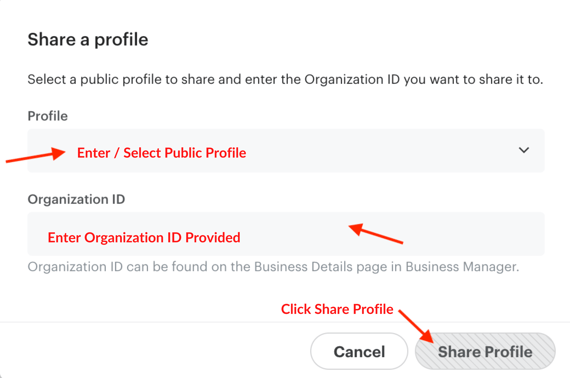
- Enter and select the Public Profile to share
- Enter the Organization ID that your organization provided
- Click Share Profile
Once the account has shared its Public Profile, your organization will need to connect the Public Profile to your own Snapchat Business Manager account.
How To Attach Public Profile to Ad Account
- On the left-hand side locate the drop-down menu, select Ad Accounts > choose the Ad Account you wish to attach the Public Profile to
- Click Assets on the left > type the name of the Public Profile or select it from the drop-down menu
- Select Connect Profile to attach to Ad Account
Step 4: Creating a Snapchat Pixel (Video Timestamp: 04:09)
In order to create a Pixel, you will need to:
- Select Business in the top left corner > choose Events Manager from the drop-down

- Click New Event Source > Web > Confirm > Pixel Code > Copy the Pixel ID and save it in the BuyerBridge dashboard
Now that you have created the Pixel, let's go over how to create the Catalog.
Step 5: Creating a Snapchat Catalog (Video Timestamp: 04:48)
Heads up! Catalogs are only needed for Advertising and AdvertisingPLUS product packages, which are specific to clients within the automotive vertical. If you are on AdvertisingLITE, you can skip to Step 5.
From Events Manager at the top right corner to view the drop-down menu > choose Catalogs.
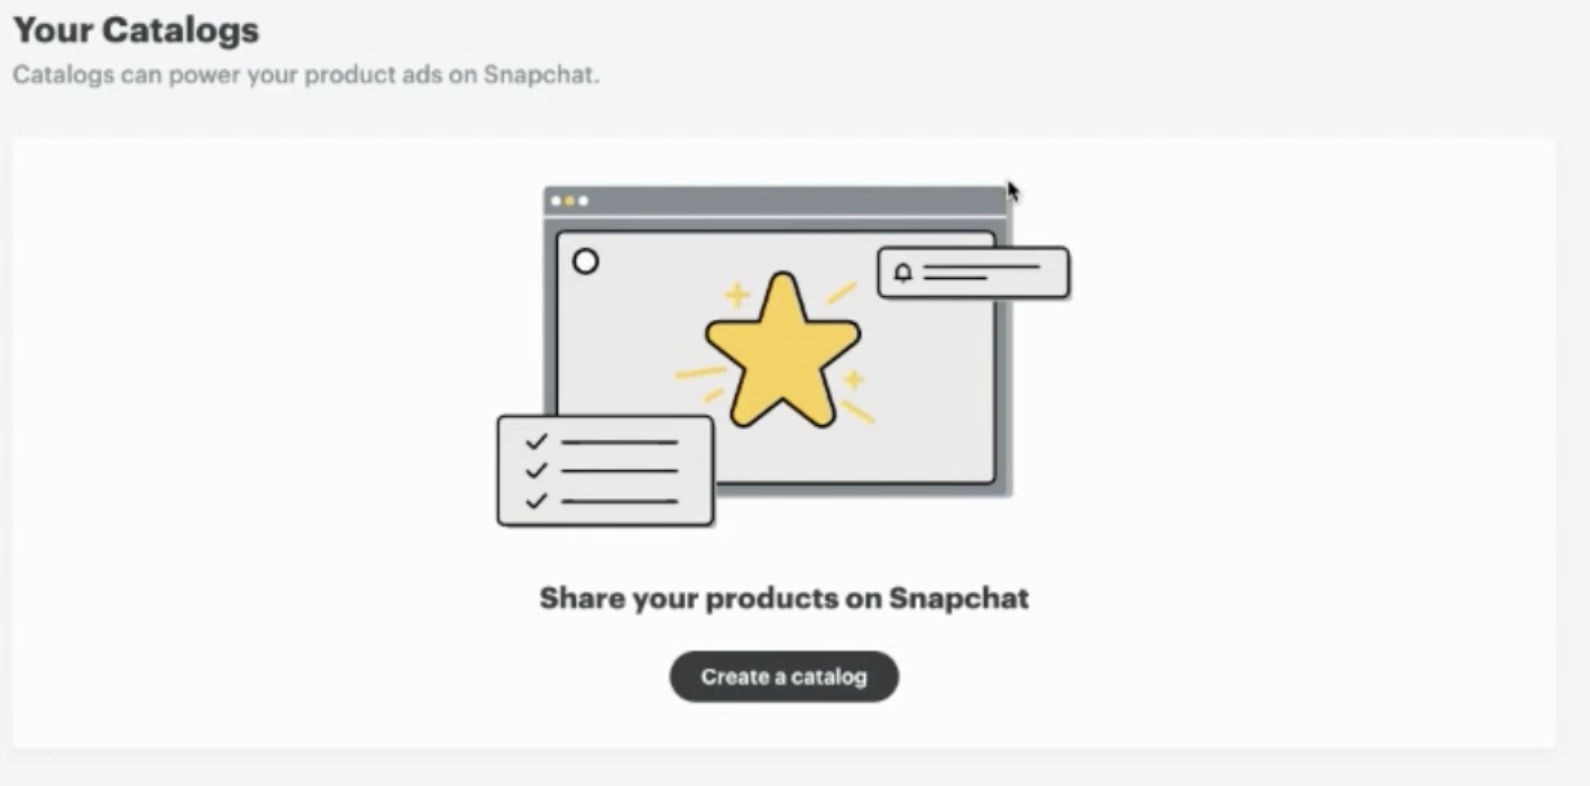
- Select Create a catalog (the catalog type will be eCommerce) > Enter Catalog Details
- Catalog Name: The naming convention that is used is {Client Name} XYZ Catalog
- Example: {Dealership Name} Automotive Catalog
- Select Use Product Feeds
- Put in the Feed URL
- Username and Password: You do not need to enter these at this step
- Feed Schedule: Choose Hourly so that the feed/inventory is updated multiple times throughout the day
- Catalog Name: The naming convention that is used is {Client Name} XYZ Catalog
Note: For the Feed Schedule, you do have the option to choose a different schedule but the recommended best practice is to choose hourly + make sure that UTC is selected.
- Select the Pixel you want to use > Click CREATE CATALOG.
- You will now need to add members to the Catalog as Catalog Admins > Click ADD > OK.
When the catalog has begun being generated, you will be brought to the Catalog page where you will be able to see your Catalogs as well as the status of the Catalog.
If you just created the catalog, the status will say Catalog Feed Uploading - but once the Catalog is done uploading, you will have visibility into the amount of inventory successfully uploaded alongside the amount of inventory that was not uploaded.
Once this is complete, you are ready to complete the final Snapchat Onboarding steps - connecting Snapchat Assets inside of the BuyerBridge platform.
Step 6: Connect Snapchat Assets Inside the BuyerBridge Platform (Video Timestamp: 06:15)
Following the creation of the above Snapchat assets, it's time to go back inside of the BuyerBridge platform to onboard your client to Snapchat!
If you have not already done so, you will need to Authenticate the Snapchat Connection User:
- Using the BuyerBridge navigation menu, under Reseller > select Settings
- Locate the Snapchat "card" on the screen > click Update Snapchat Connection User
- The "Change Connection User" panel will slide out, click Continue Changing Snapchat Connection User > Authenticate With Snapchat > Log in with the Snapchat account
Get more details on how to authenticate the Snapchat Connection user here.
If you're onboarding an EXISTING client to Snapchat:
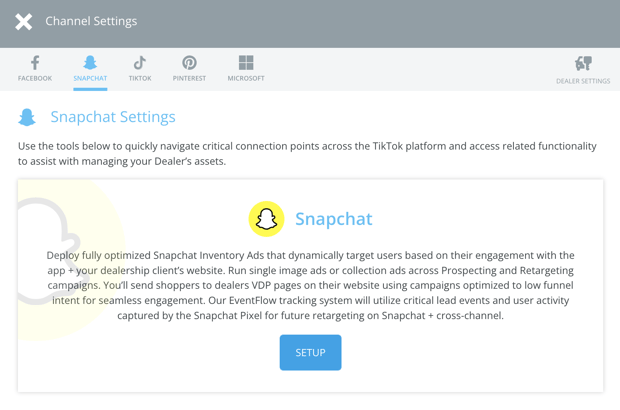
- Click the Channel Settings menu located at the top of the platform
- In the Channel Settings panel, toggle to Snapchat, and click Setup
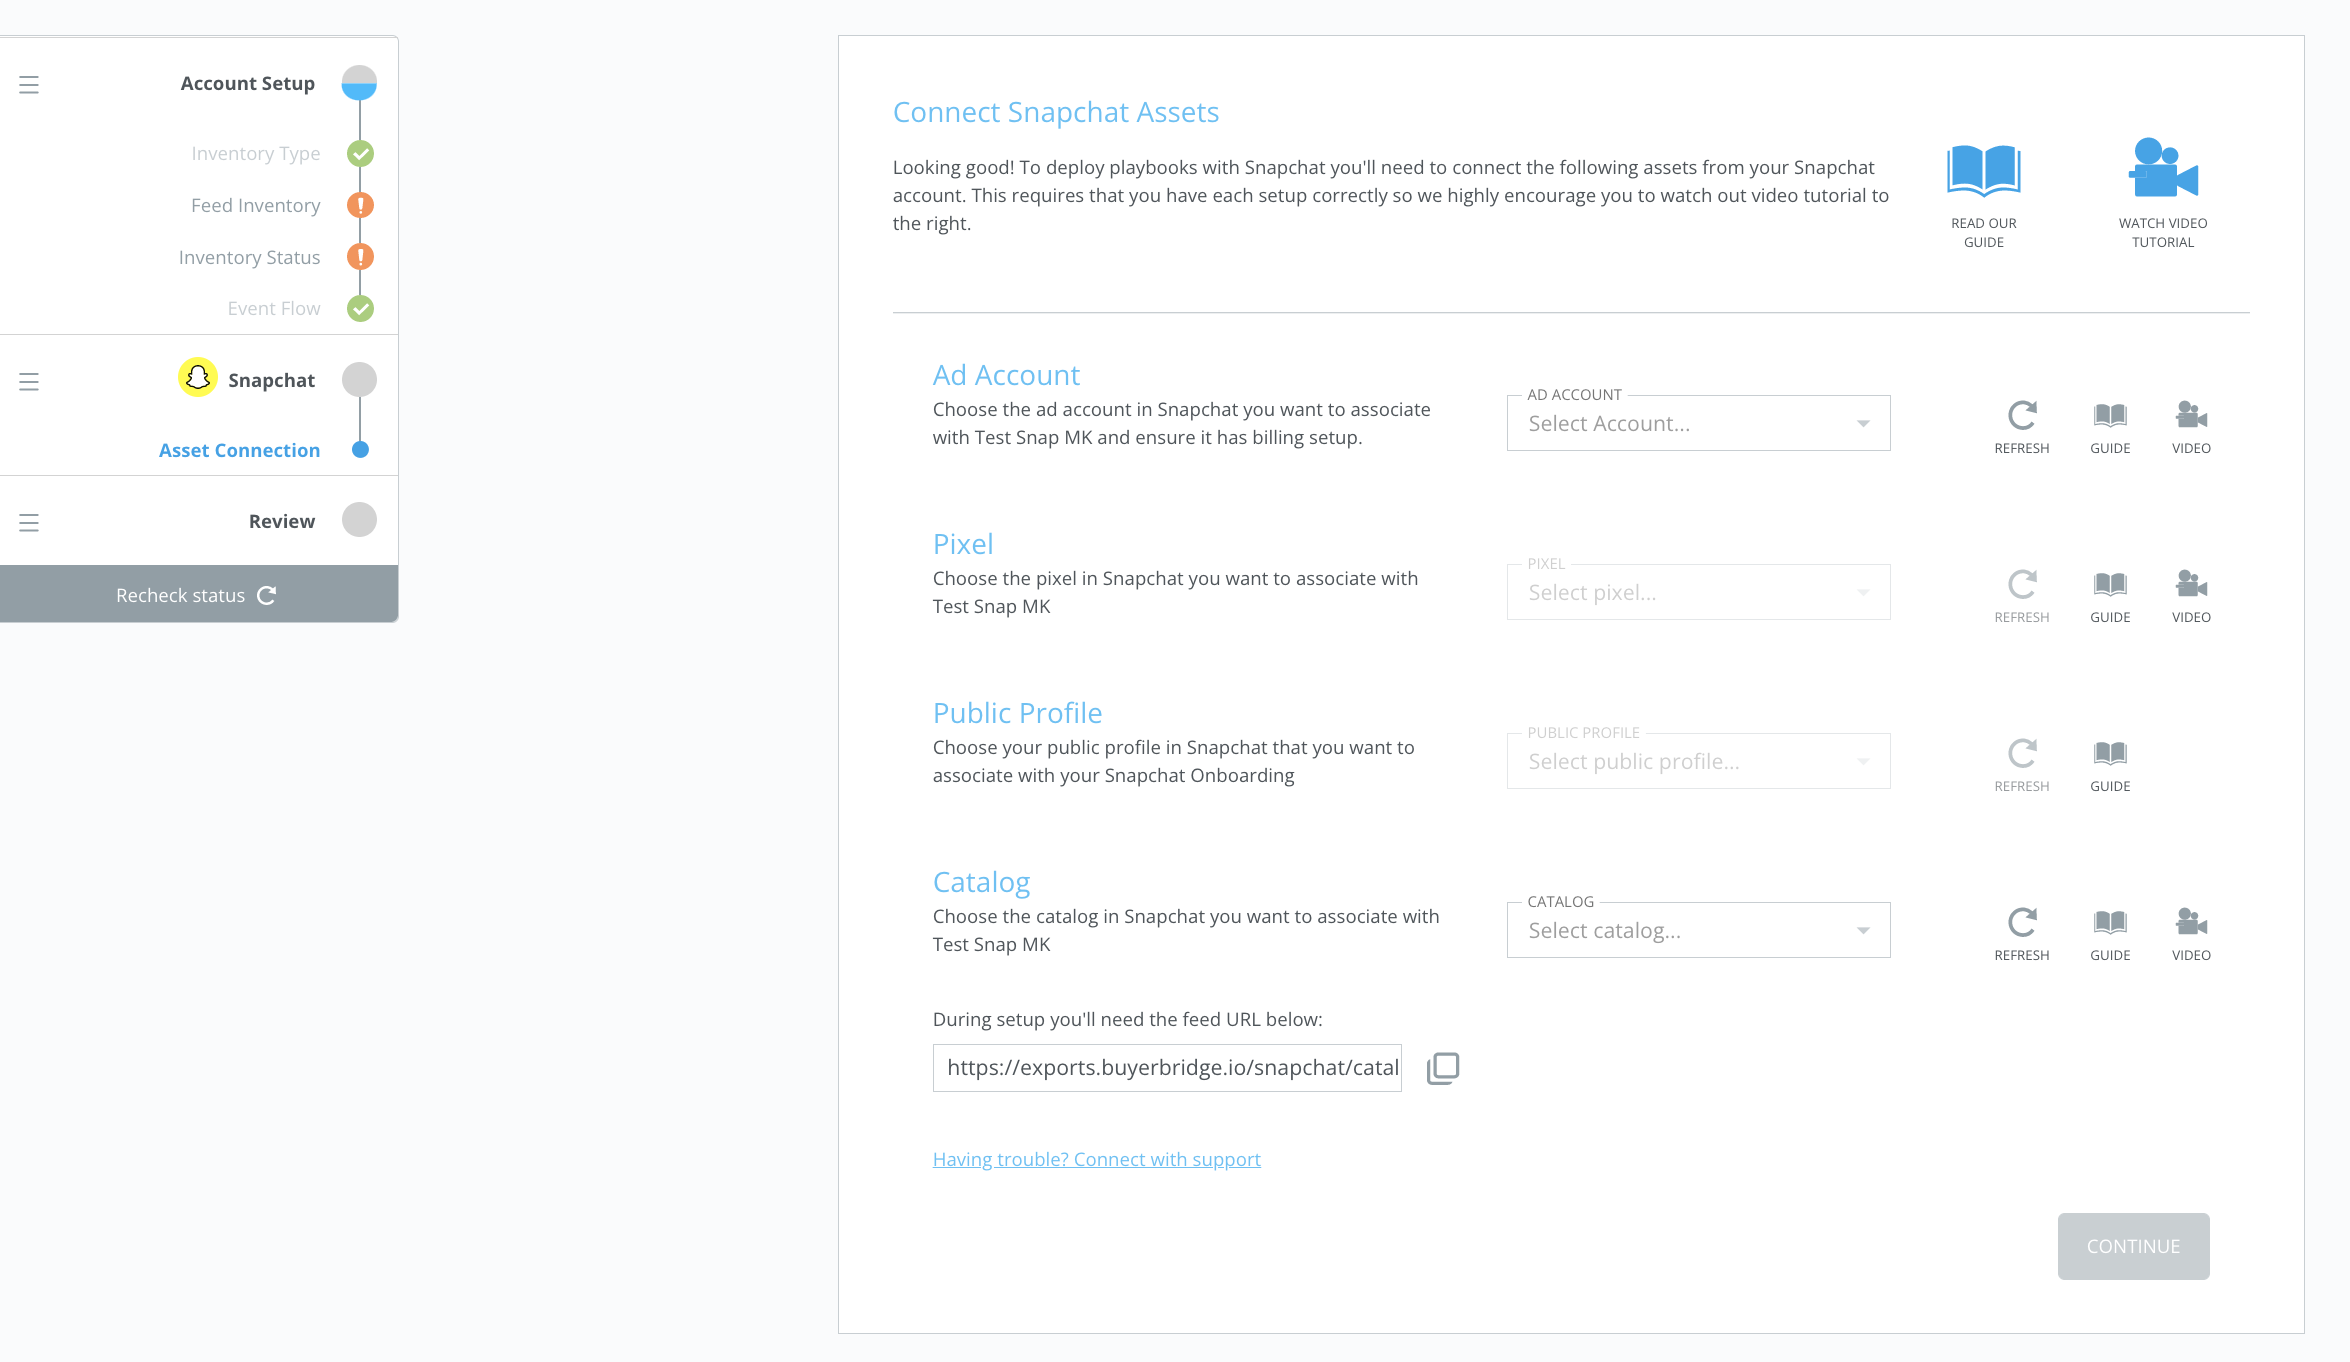
Since the client you are onboarding already exists in BuyerBridge, you will not need to go through the "Account Setup" steps and will go directly to the "Connect Snapchat Assets" section of onboarding.
Once you see the "Connect Snapchat Assets" Page, select the drop-down and choose the matching asset that you just created for each asset.
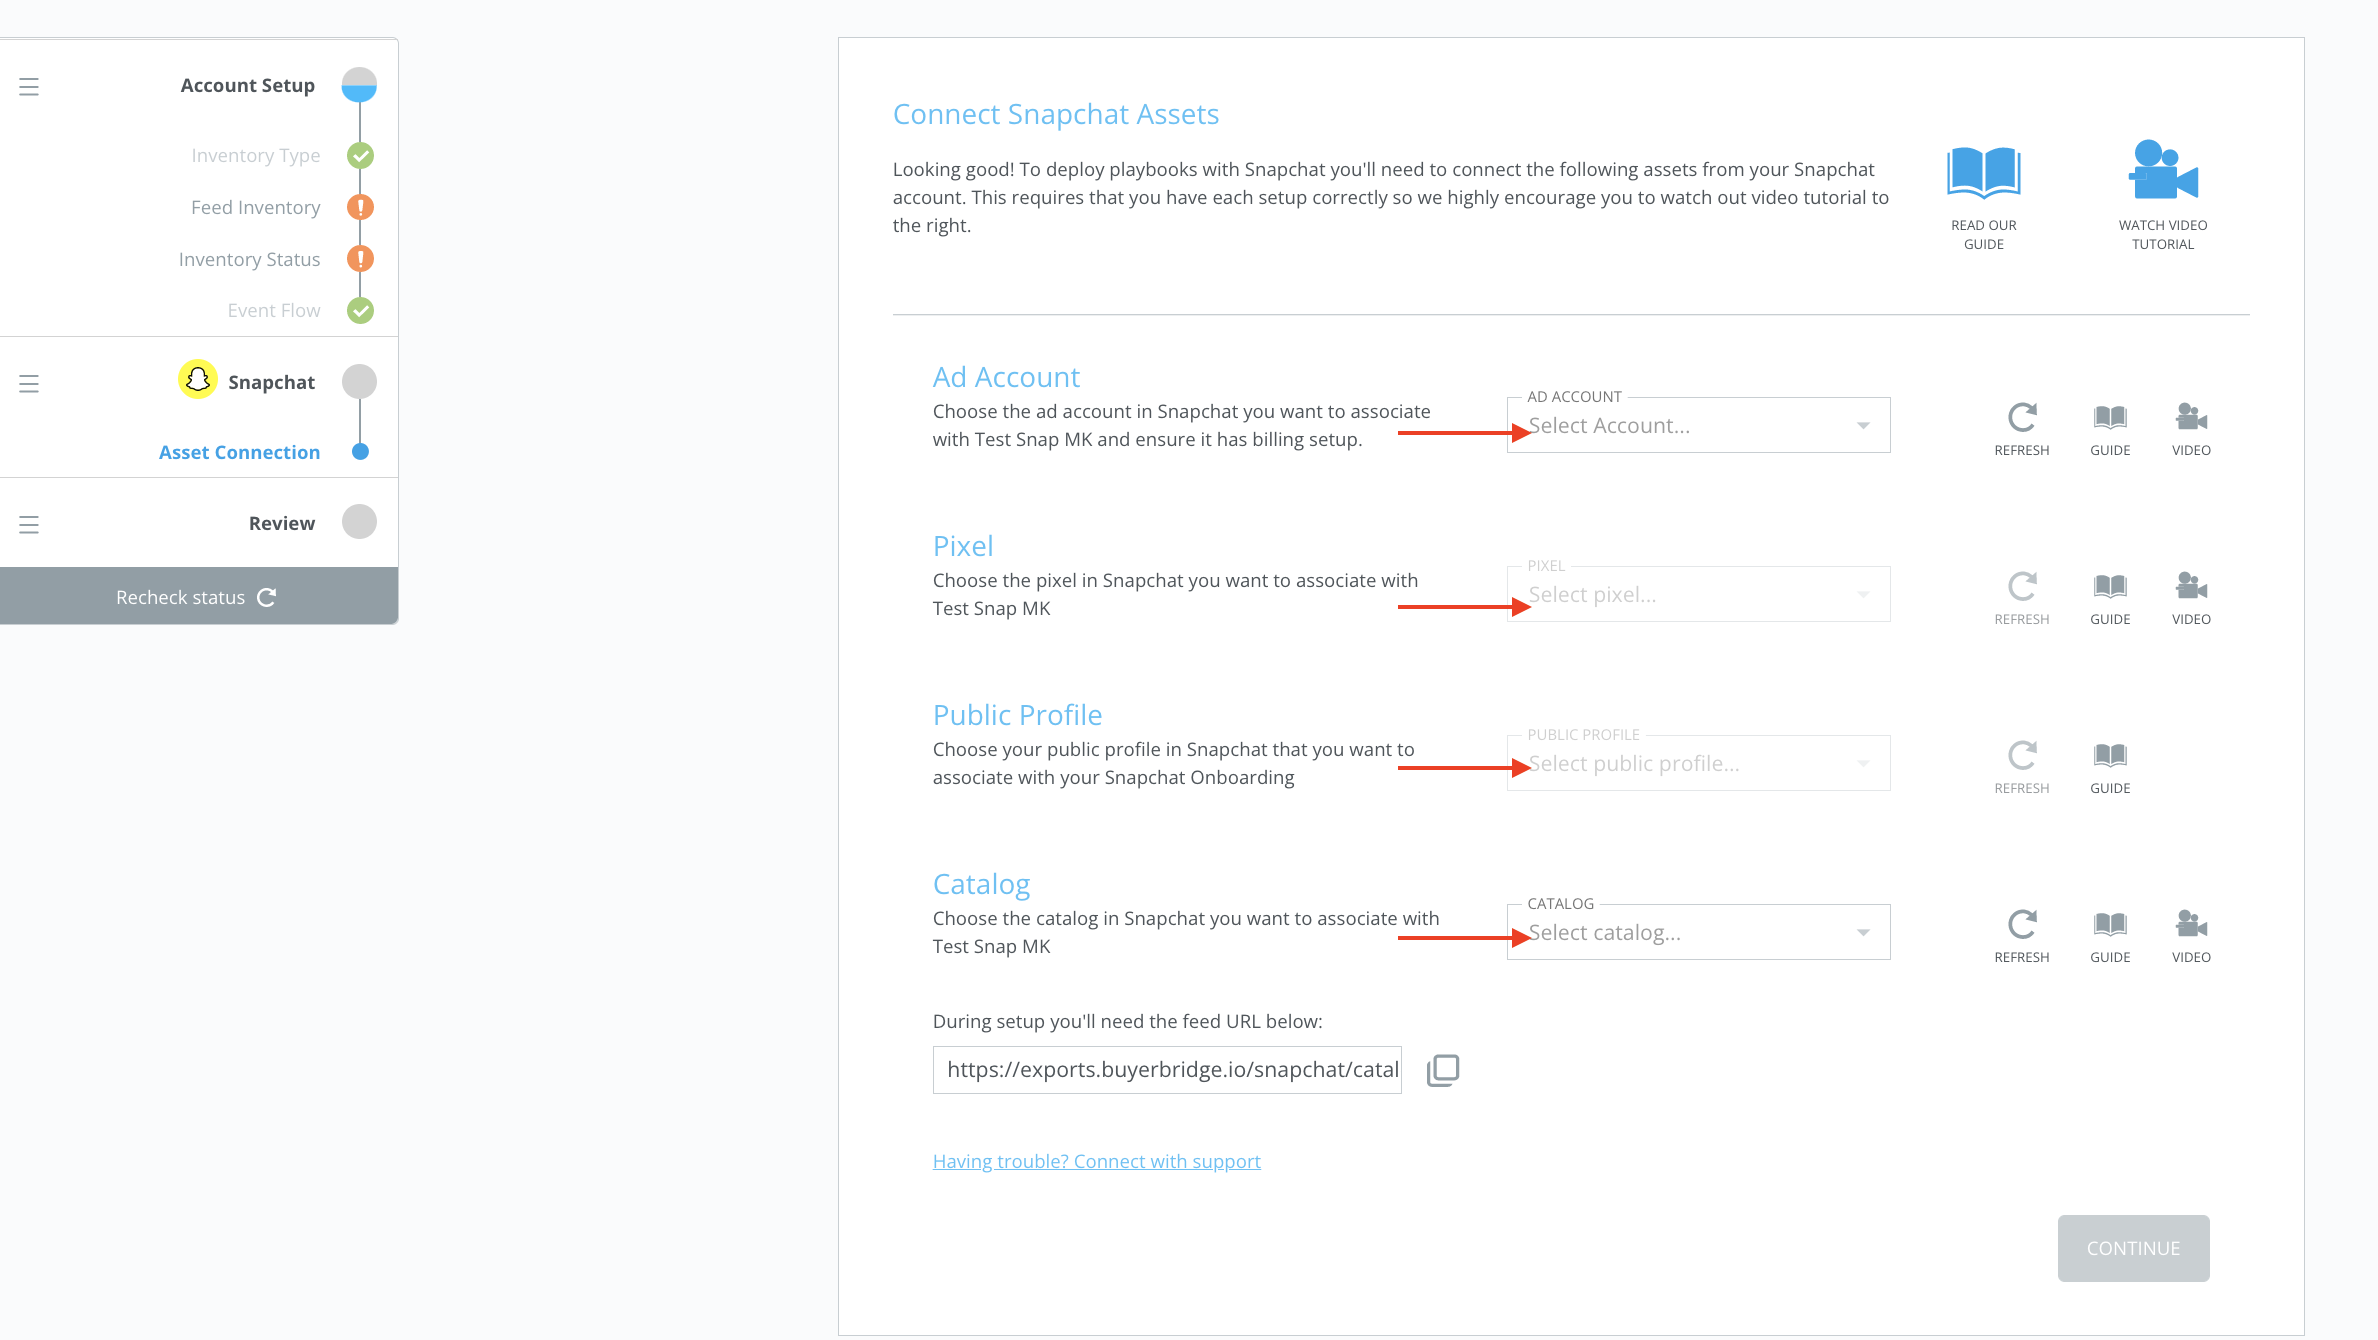
If you do not see your asset in the drop-down, hit the refresh icon on the right side to tell our platform to re-pull information from Snapchat.
- After all of the assets have been connected, select Continue to reach the review process.
- If everything looks accurate, you will click Complete Onboarding
If you're onboarding a BRAND-NEW client to Snapchat:
- Check out our "Getting Started with Omnichannel Onboarding" article for a step-by-step guide on how to get your new client set up and onboarded to Snapchat.
As you navigate through the Snapchat Ad Account creation process for you or your clients and still have questions you can reach out to your partner experience manager or contact BuyerBridge Support via email: support@buyerbridge.com.