Ready to onboard your first clients on TikTok with BuyerBridge?
Here’s a step-by-step guide that will help you create necessary TikTok assets, such as your TikTok Business Center and Client Ad Accounts, and then connect them inside the BuyerBridge platform.
Once you complete the steps in this guide, you will be able to complete this step in the BuyerBridge onboarding section (below).
We will cover:
- Business Center Creation via TikTok
- Setting Up Ad Accounts and Adding Members
- Creating TikTok Identity
- Creating A Pixel
- Creating The Catalog
- Connecting Assets in BuyerBridge
🎥 Here's a video walkthrough for you to watch as you follow along with our guide:
Heads up! The creation of a TikTok Business Center account is the only TikTok asset required to Authenticate the Connection User in BuyerBridge and initiate onboarding. If you have already created a TikTok Business Center account, you can either:
- Continue creating the Ad Accounts, Catalogs, and Pixels prior to establishing the Connection User
- Authenticate the Connection User in BuyerBridge, then complete the remaining TikTok assets required during onboarding
To learn more about Omnichannel Authentication, read: How to Authenticate the Connection User For New Channels in BuyerBridge [Omnichannel Authentication]
Let’s get started!
Step 1: TikTok Business Center Creation via TikTok (Video Timestamp: 00:22)
TikTok’s Business Center provides your organization with the ability to access and manage your clients’ TikTok ads/their ad account, including:
- Users
- Ad Accounts
- Audiences
- Billing and Payments
To ensure your TikTok account is given the highest level of service, TikTok will create a “Managed Business Center” for your organization.
This allows them to be able to whitelist your account, aid with support, and allow various billing settings across your Ad Accounts.
To request your Managed TikTok Business Center creation, go here.
Note: Dealers United is powered by BuyerBridge, and is the listed LLC on the BuyerBridge Business Manager. Your clients will not see Dealers United on their TikTok accounts.
Step 2: Create a TikTok Advertiser Account for Your Client (Video Timestamp: 00:54)
Once you have your Managed TikTok Business Center created, you can create the Advertiser Account for your client.
- Log in to business.tiktok.com.
- On the left navigation panel, go to Assets > Advertiser accounts.
- Select the pink button at the top left, “Add advertiser account.”
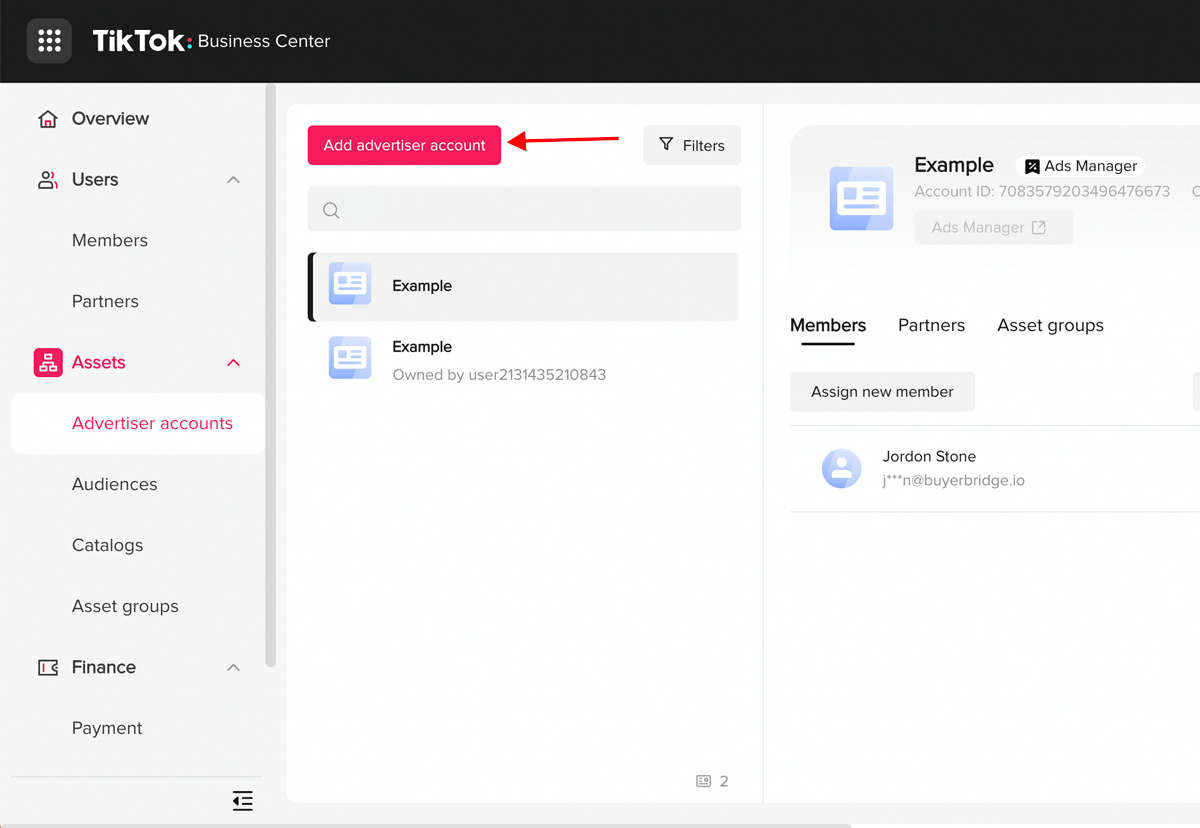
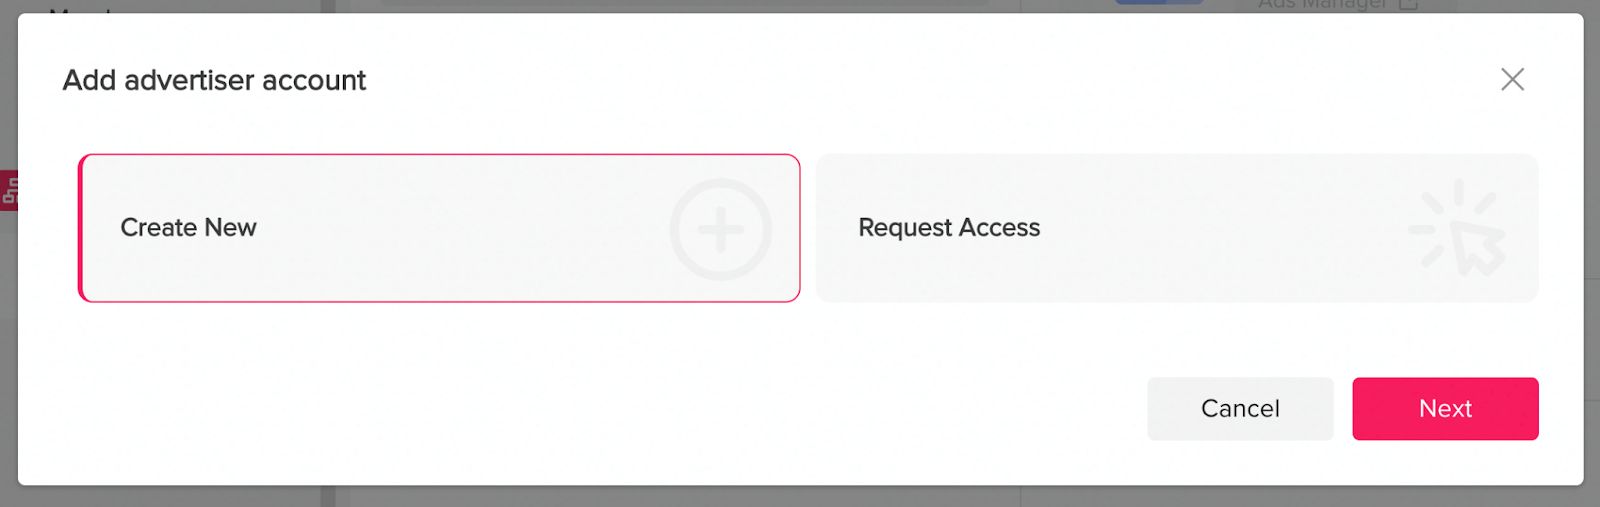
- Select Create New.
- Fill out the following fields on the pop-up form’s “Account Info” step for your client:
- Company name (of your client)
- Industries
- Place of registration
- Account type - Choose “Ads Manager account”
- Account name
- Account time zone
- Company website
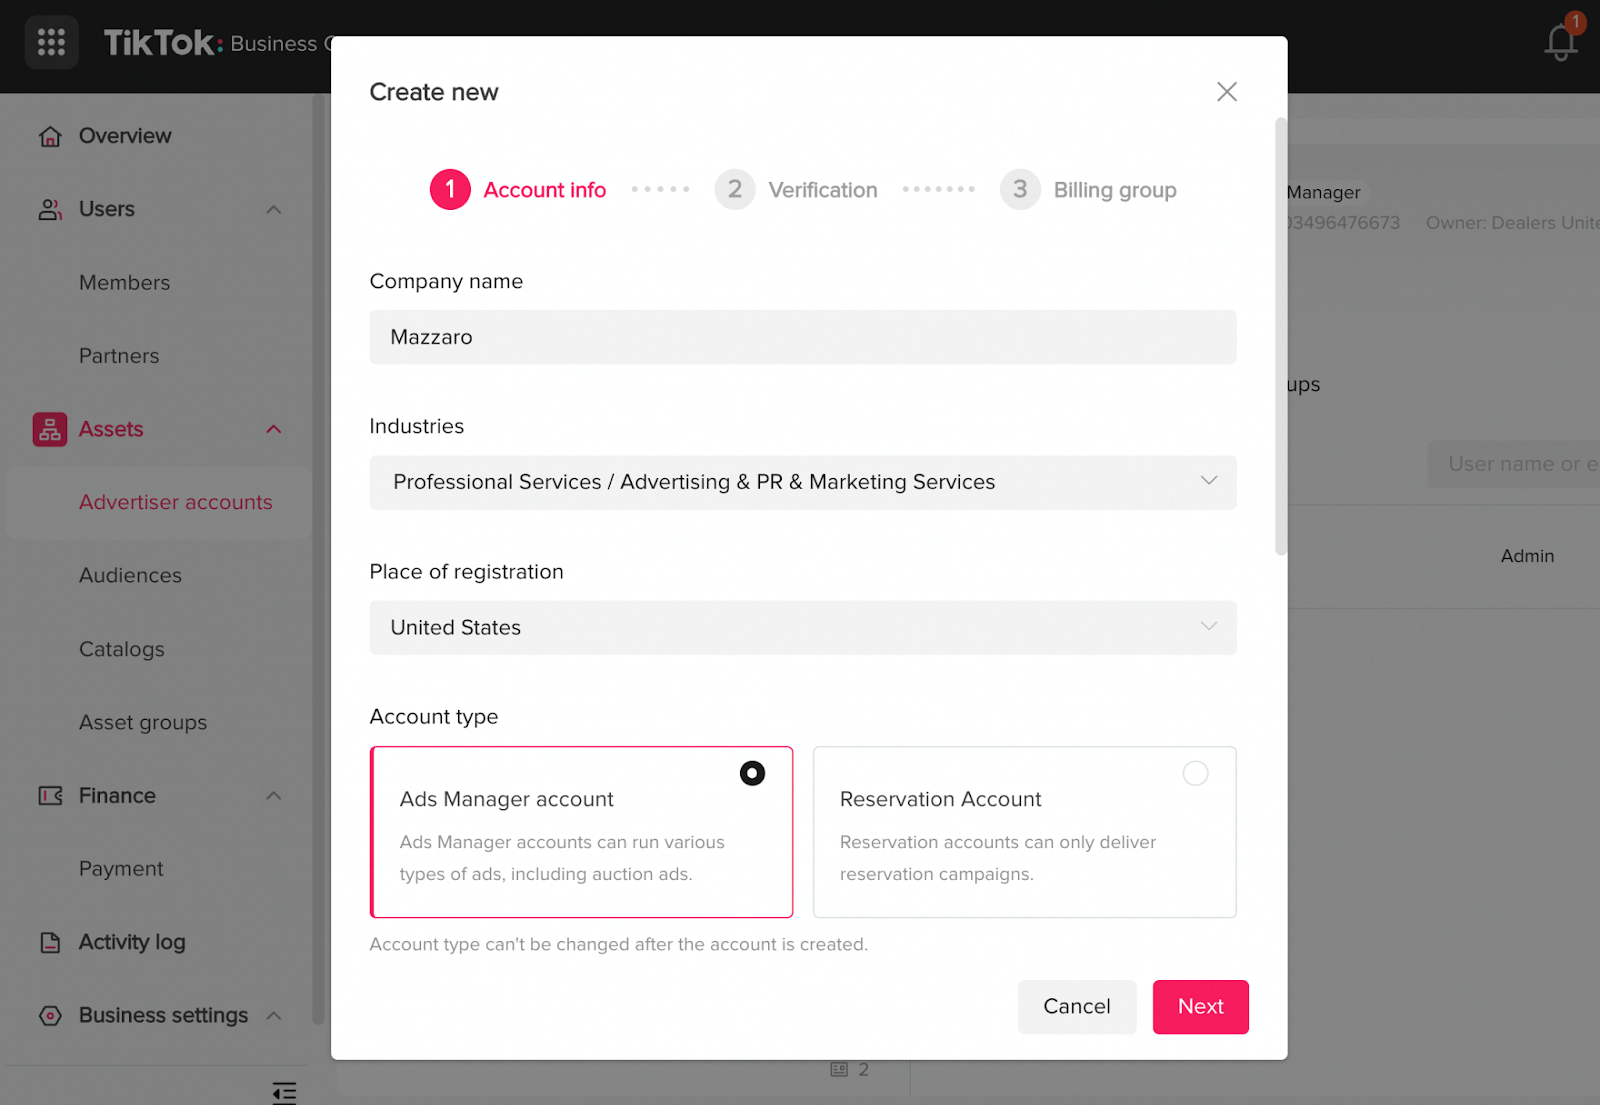
- Hit Next > For the following “Verification” step, you can skip all fields > hit “Next.”
In the next “Billing Group” step:
- Select “No - Issue invoices for this ad account separately.”
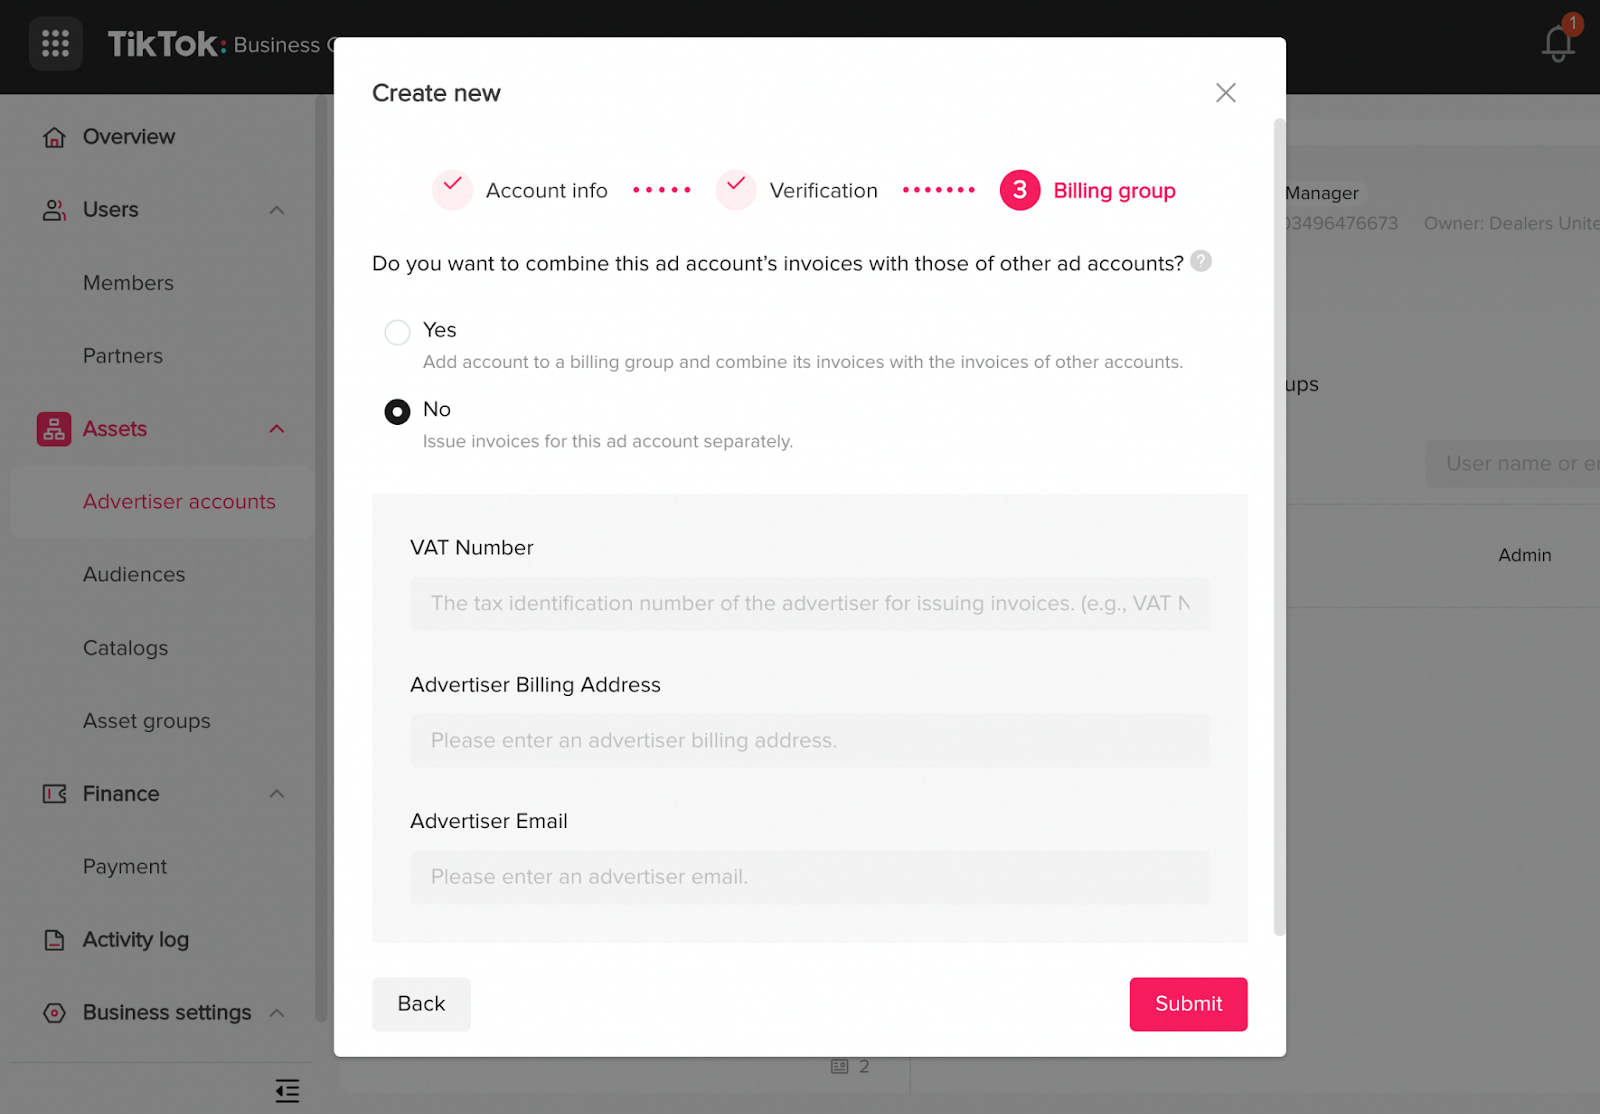
The following information (CAT number, Advertiser Billing Address, etc) can be skipped.
- Hit “Submit.”
Your Ad Account has officially been created!
Add Members to Your Ad Account
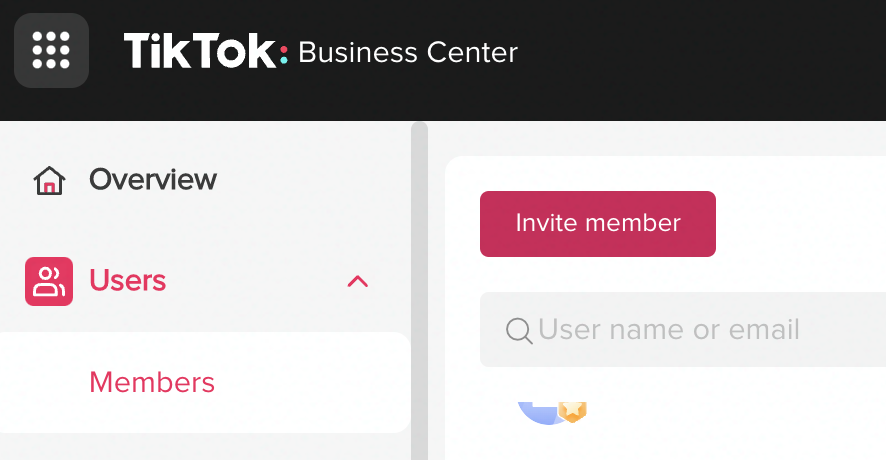
First, you need to assign users to your TikTok Ads Manager account to ensure the Users already exist in your Business Manager:
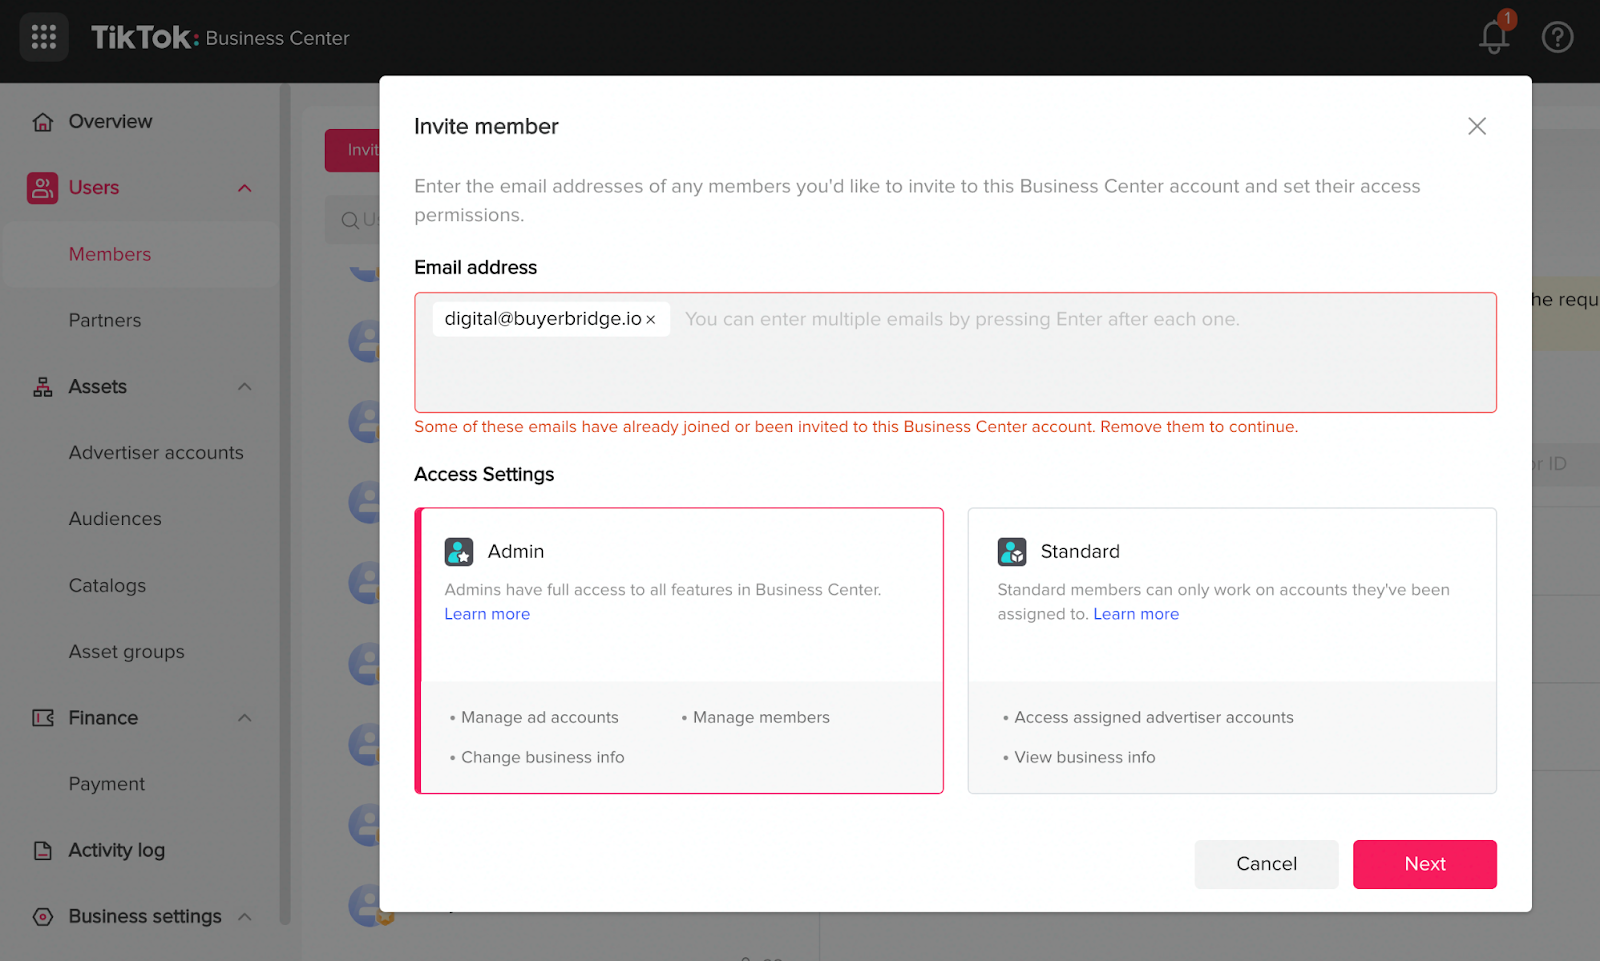
- Under Users > Members > click Invite Member > enter in the new member's email address > then select their Access Settings > Admin.
Once the Users are in your Business Center, you can assign them to your Ad Accounts.
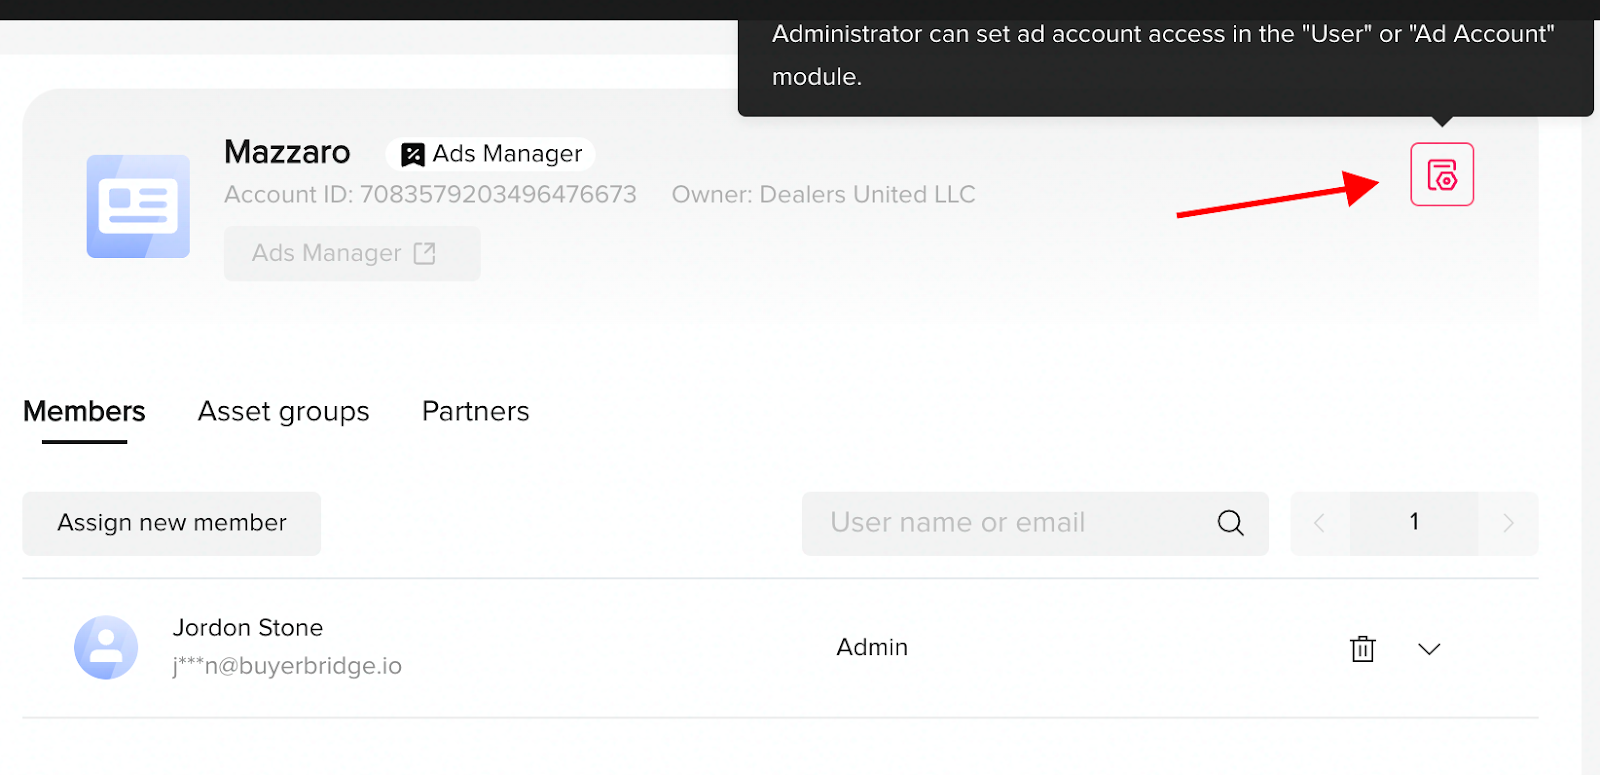
- Navigate back to your Ad account under Assets.
- Under the Members tab, select “Assign new member”.
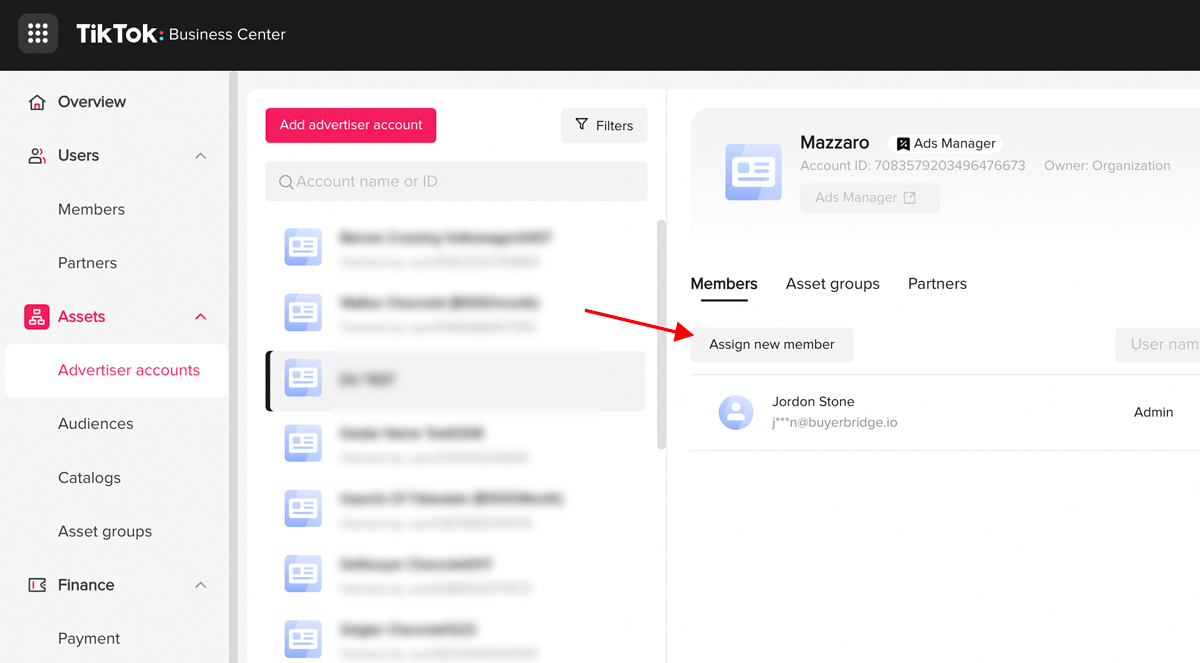
Any users related to your Business Center will show up in the left panel.
- Select the users you would like to add > click Admin access.

You will ALSO need to add your Partner Experience Manager(s) to be Members of your Business Center. The email to use to do this is digital@buyerbridge.io.
IMPORTANT: Your Partner Experience Manager's role needs to have the highest permission level - make sure that Admin is selected before sending the invite.
Add Billing/Payment in Account Settings
To set up Billing/Payment, go to your Account Settings - you can navigate to Account Settings by clicking the top-right icon on the page.
- Under Account Settings, navigate on the left navigation menu to “Payment.”
- Under “Manage Payment Methods,” select “+ Add a New Payment Method.”
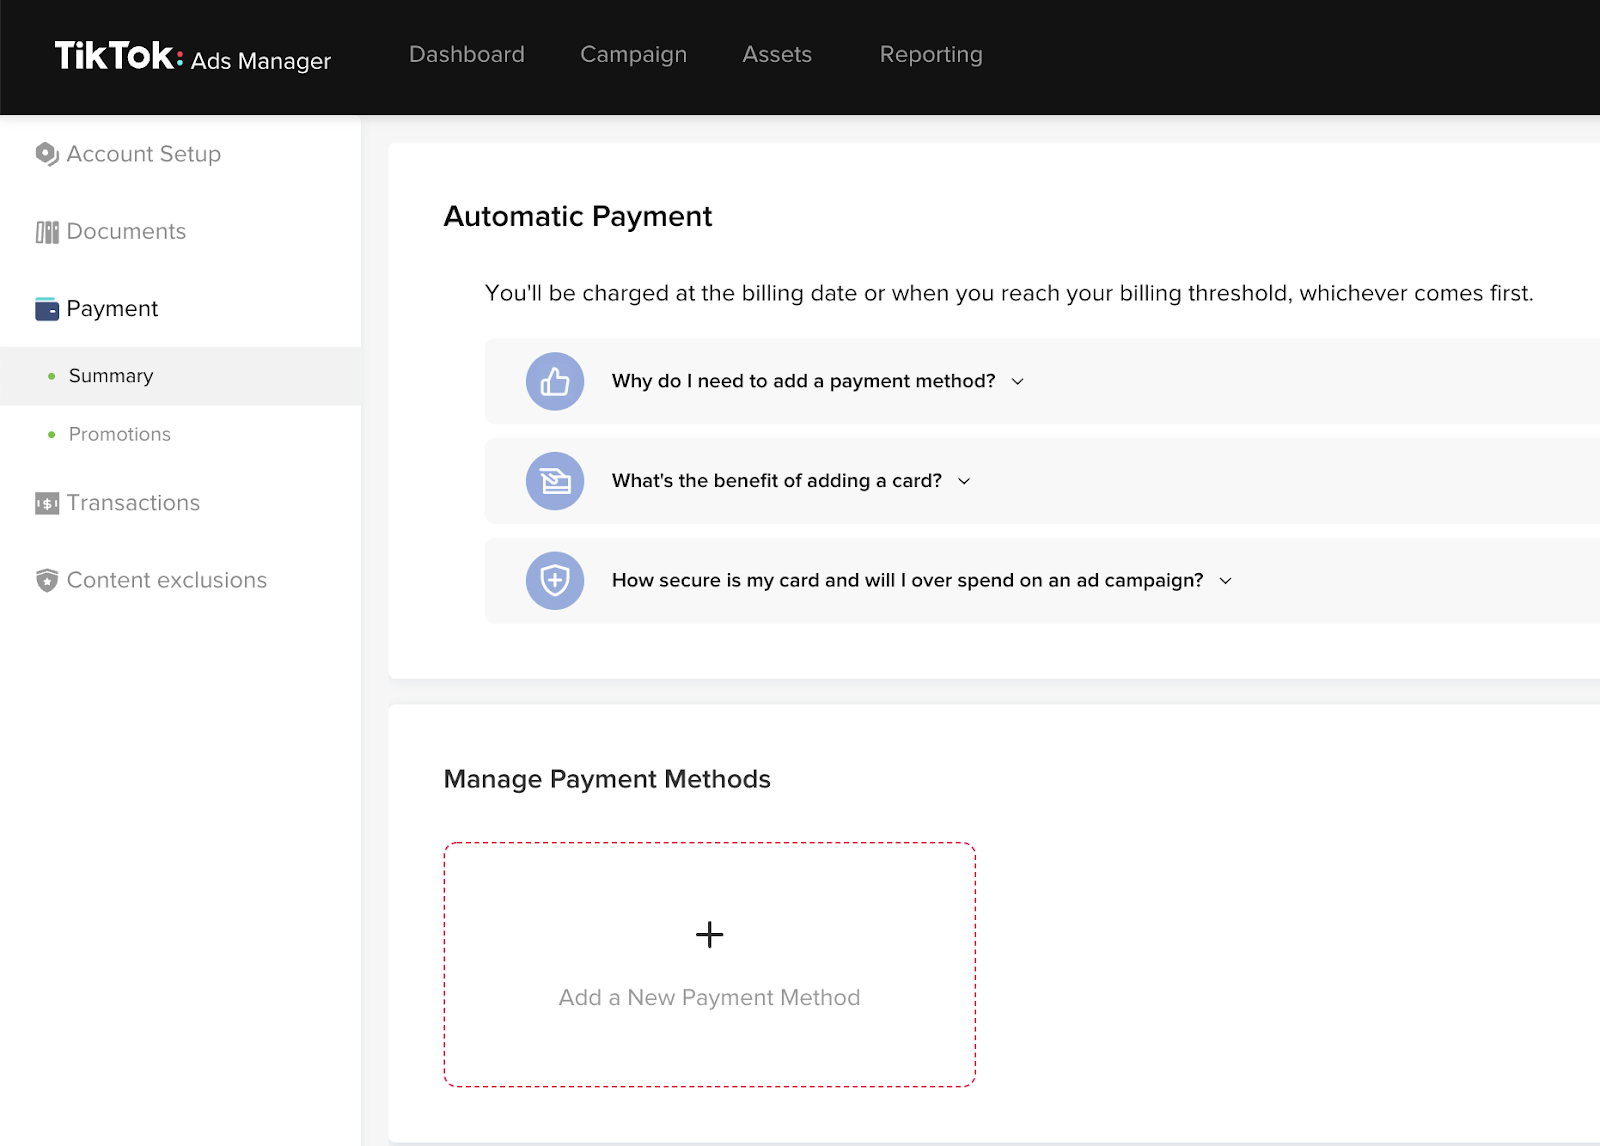
- Select Credit or Debit card and enter in billing information > hit Submit.
Step 3: Create A TikTok Identity
In order to deploy ads on TikTok, businesses are required to have an “identity” for TikTok to generate a Display Name and Brand Logo on ads.
Luckily, this is SUPER simple, and all you have to do is enter the information during onboarding...we'll take care of the rest!
During the "TikTok Identity" step in onboarding, you will be required to provide the following information:
- Display Name
- Brand Logo
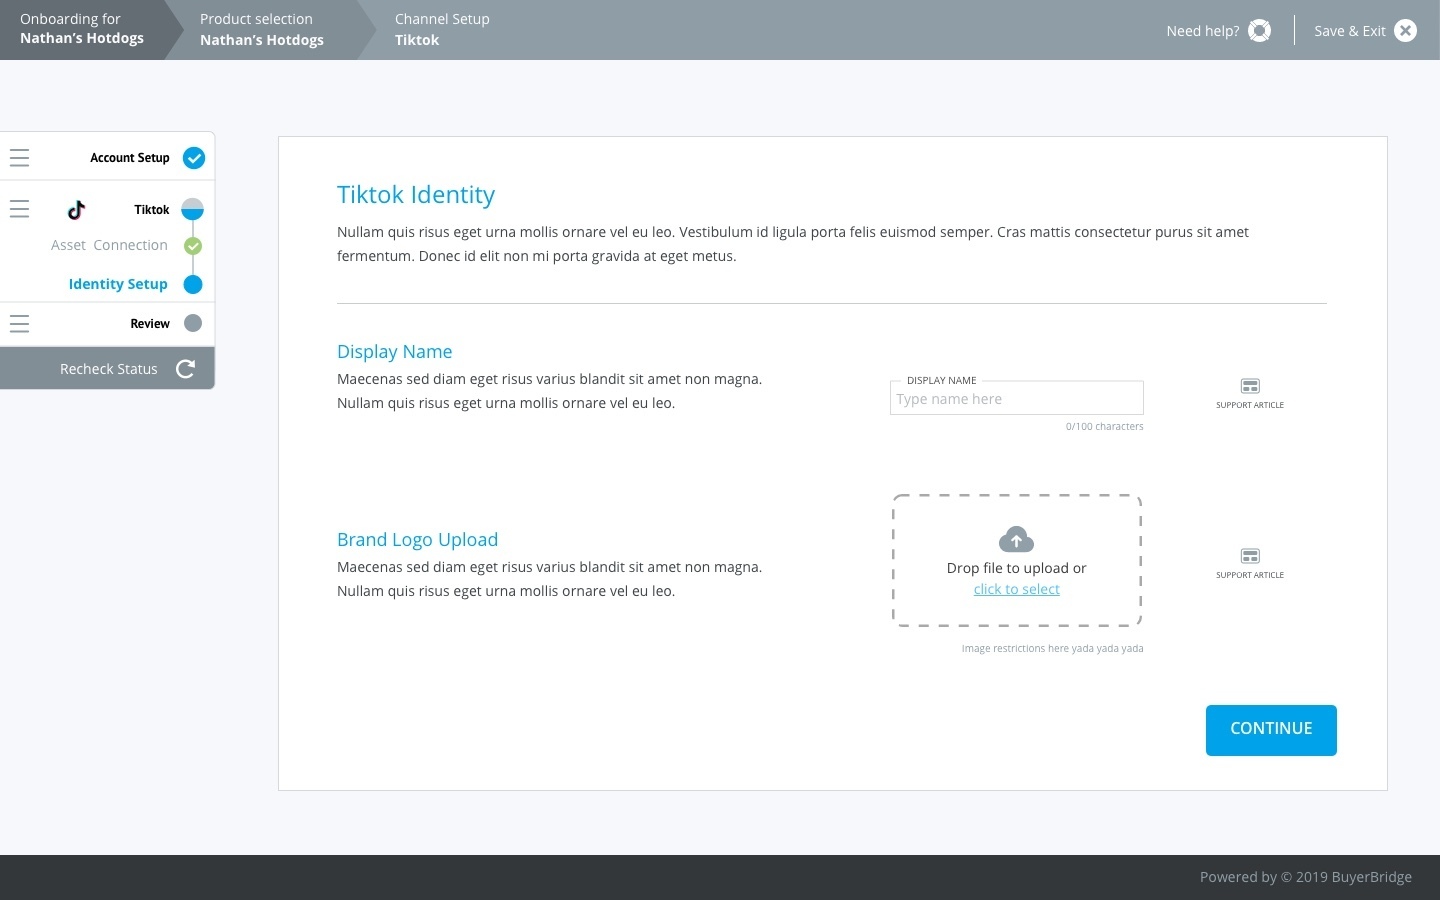
Display Name: Enter the name of the business that you want the TikTok ads to display.
By default, we will use the account name within the BuyerBridge dashboard, but you can modify the TikTok “Display Name” at any time.
Brand Logo: Upload a Brand Logo to represent the business being advertised in the TikTok Ads. If a brand logo of the appropriate size has already been provided, it will be pre-populated.
The logo image uploaded must be sized appropriately, using a 1:1 (1080 x 1080 px) aspect ratio.
Once you have entered your Display Name, and uploaded an appropriate sized Brand Logo, the BuyerBridge platform will automatically generate the TikTok Identity for an account!
Step 4: Creating The TikTok Pixel (Video Timestamp: 02:50)
While you are viewing the Ad Account in your Business Center, navigate to the associated Ads Manager by selecting the “Ads Manager” button.

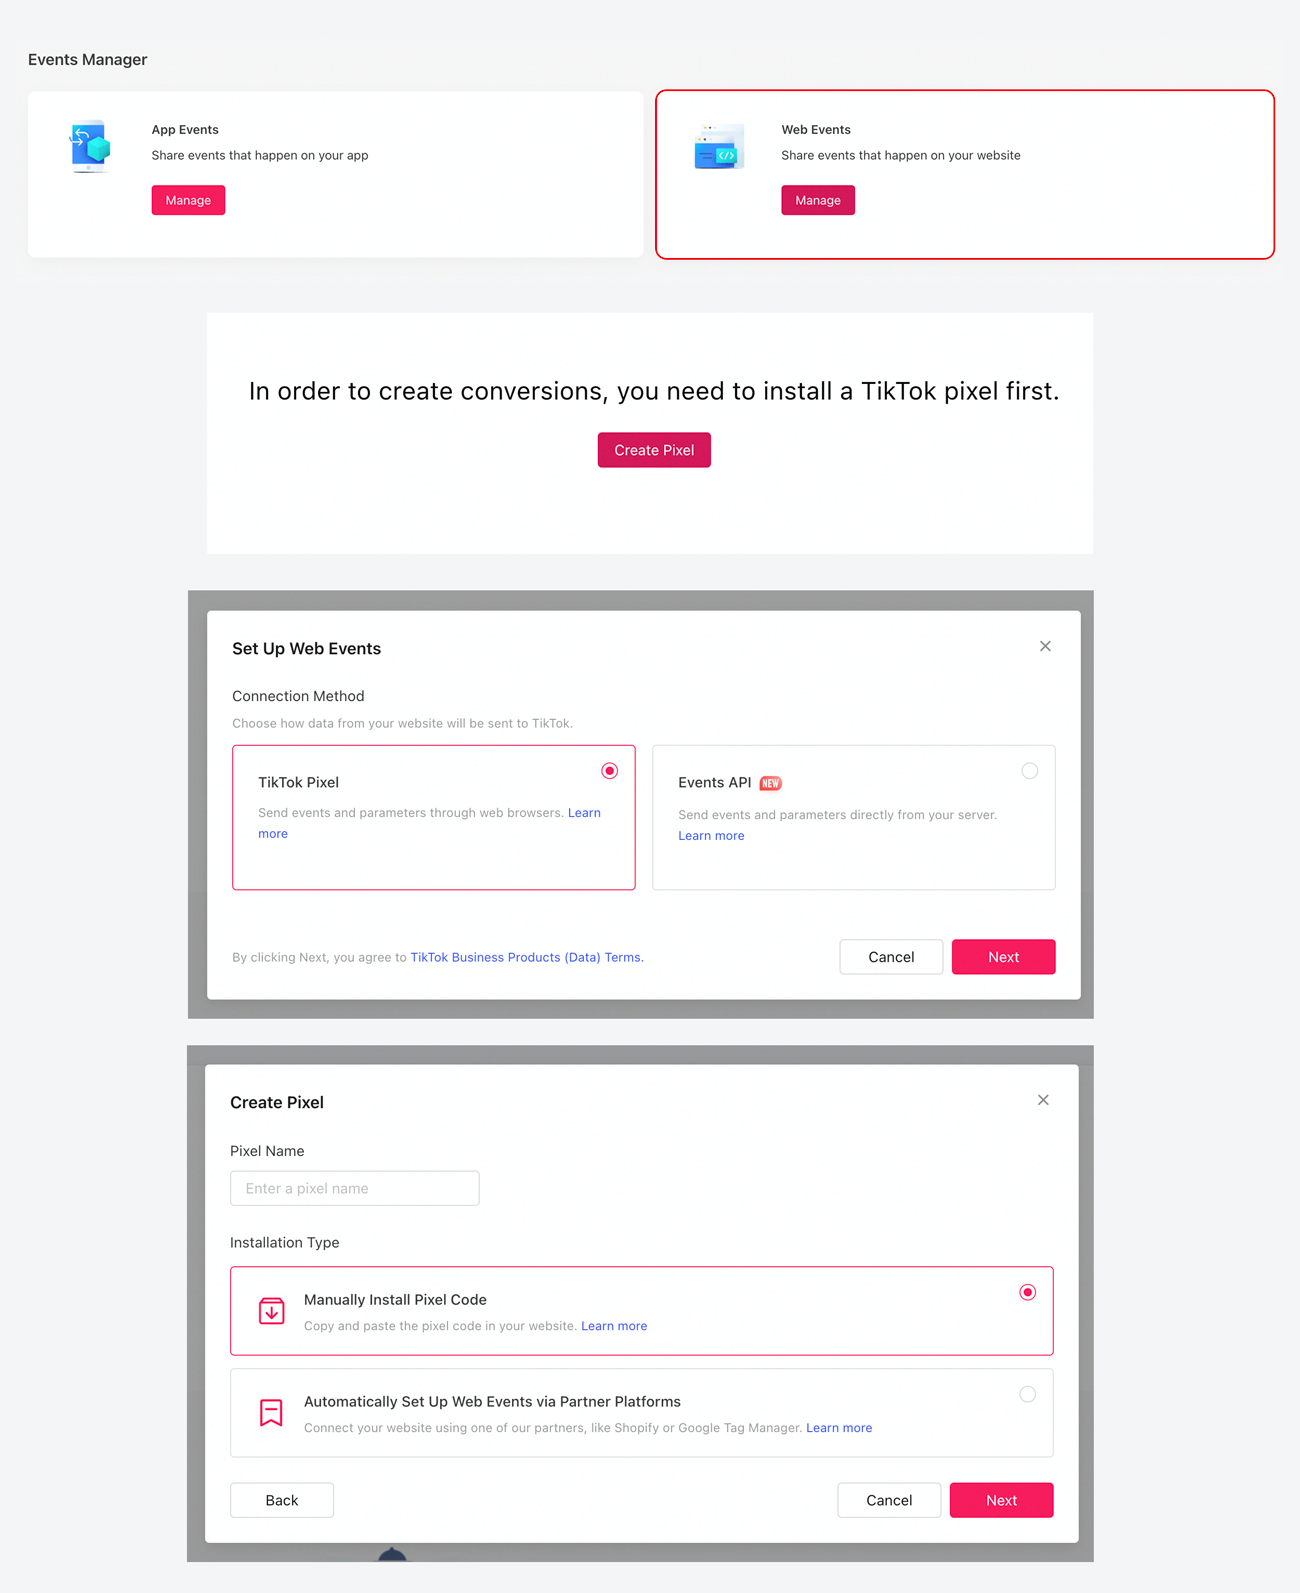
- From the Dashboard, go to Assets > Events.

- Select “Web Events,” then select “Create Pixel.”
- For the Connection Method in Web Events setup, select “TikTok Pixel.”
- Enter in your Pixel name (recommended naming convention is your Client Name - TikTok Pixel), then select “Manually Install Pixel Code" > click Next.
Follow these screenshots for each step above:
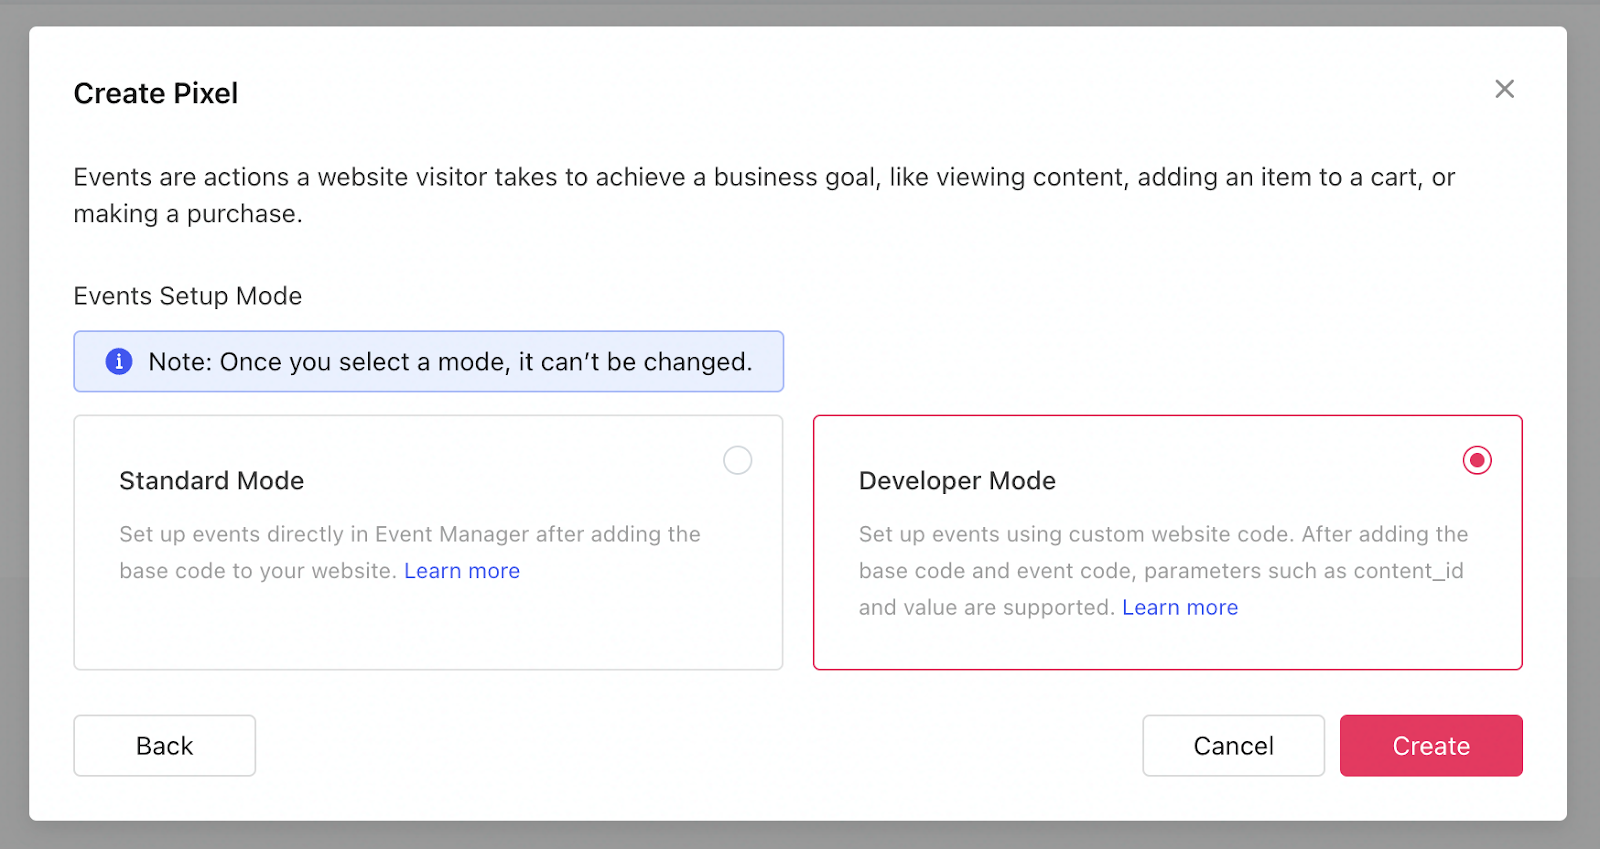
- On the next screen, select Developer Mode.
- (IMPORTANT: Once you select a mode, it can’t be changed, and you will have to delete and recreate the Pixel to change the mode.)

On the “Install pixel code” page, follow the installation instructions:
- Step 1: Copy the Pixel Code
- Step 2: Paste the Pixel Code in the header section of your website
- Step 3: Manage Cookies
- Here you want to make sure that “Allow first-party cookies” is toggled to on
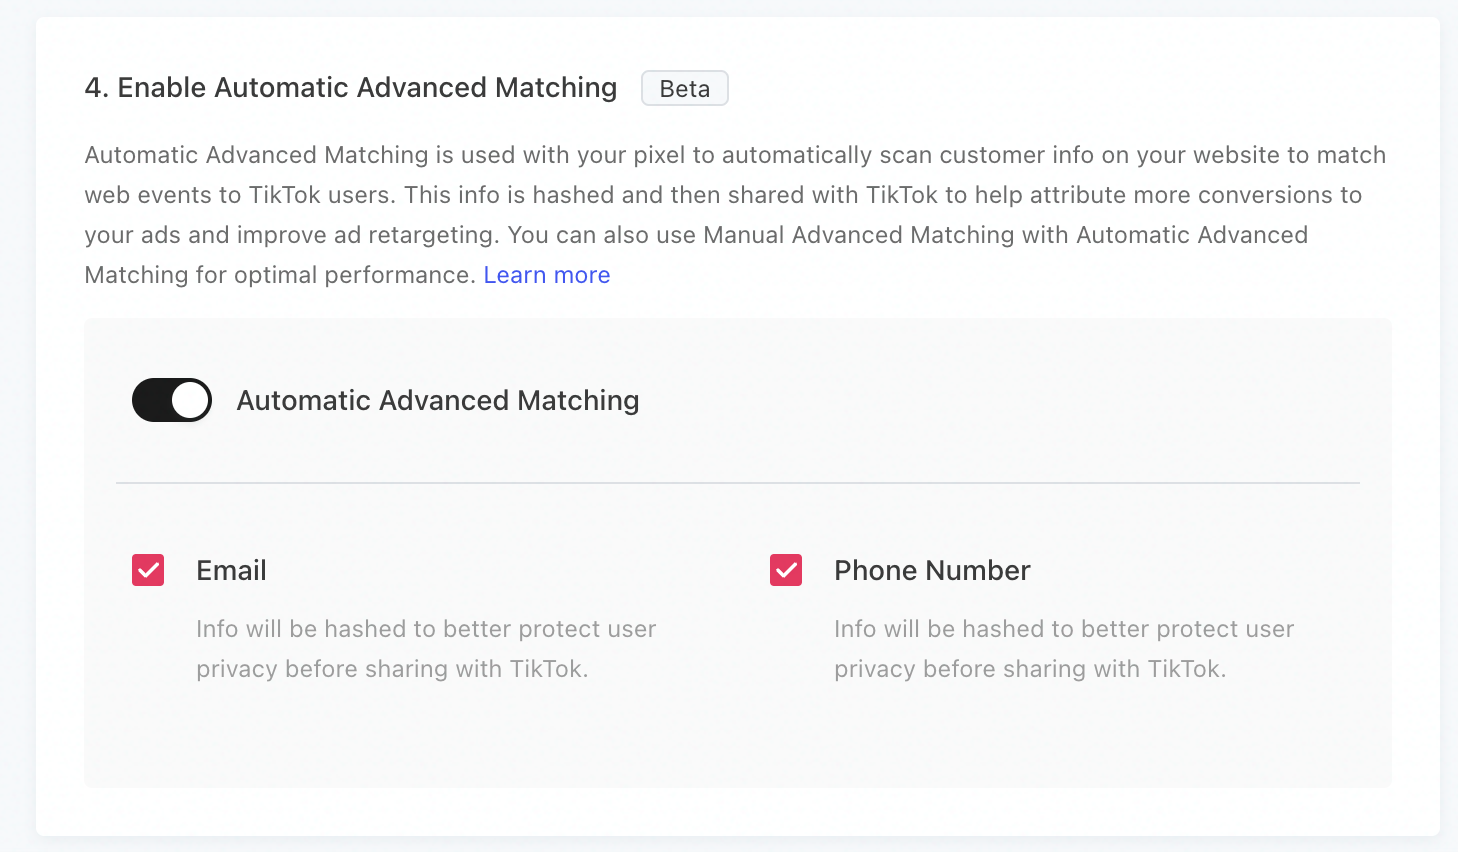
- Step 4: Enable Automatic Advance Matching
- Ensure that “Automatic Advanced Matching” is enabled and that the checkboxes for Email and Phone Number are both selected.
- After the above is completed, click Next.
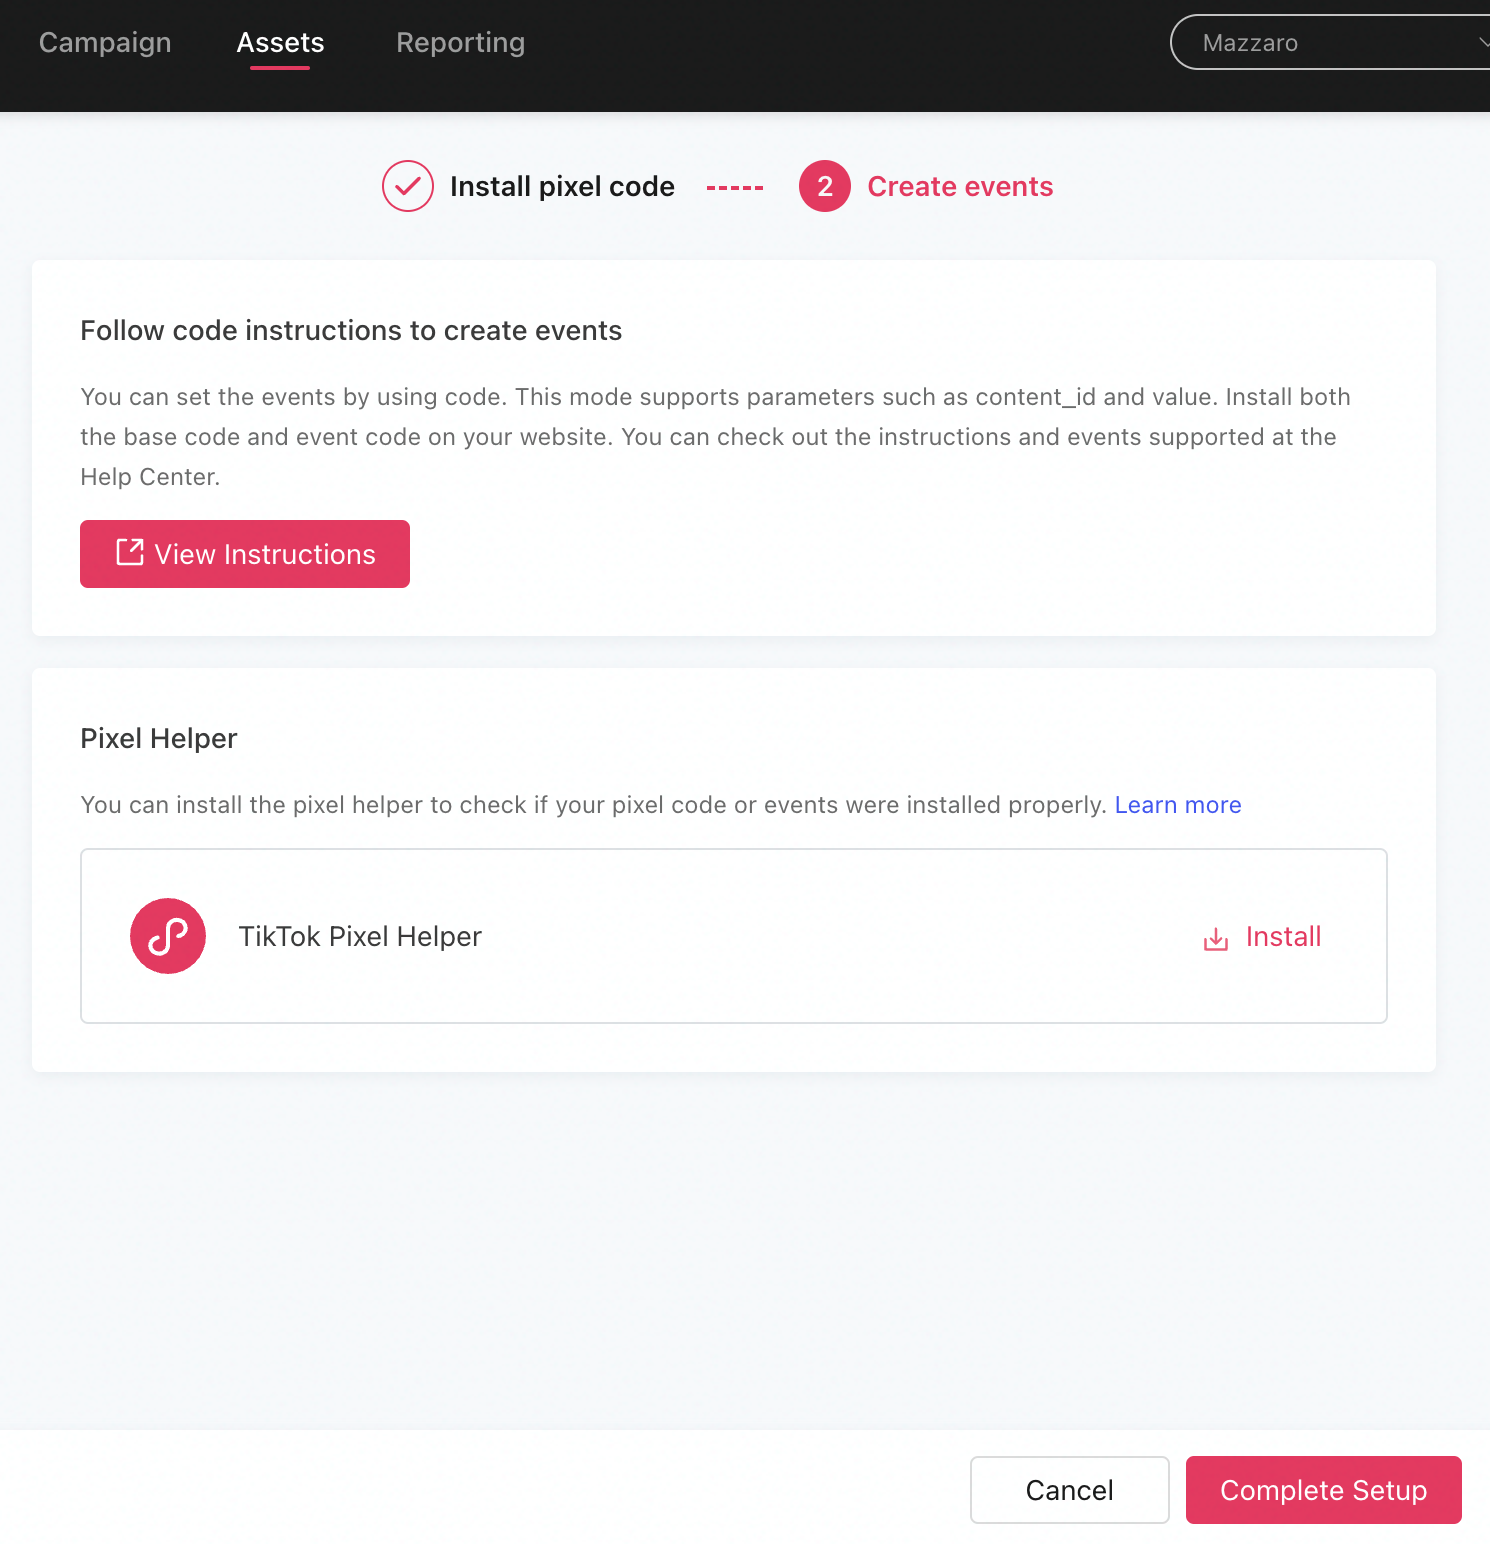
On the next screen, you will see the option to install the TikTok Pixel Helper - it is recommended that if you do not have this tool installed that you install it.
If you already have the TikTok Pixel Helper or don’t wish to install it go ahead and click Complete Setup.
Note: From the next screen displayed, you will be able to pull the Pixel Id at the top left of the screen, under the Pixel name.
Step 5: Creating a TikTok Catalog (Video Timestamp: 04:38)
Heads up! Catalogs are only needed for Advertising and AdvertisingPLUS product packages, which are specific to clients within the automotive vertical. If you are on AdvertisingLITE, you can skip to Step 5.
To create a TikTok Catalog:
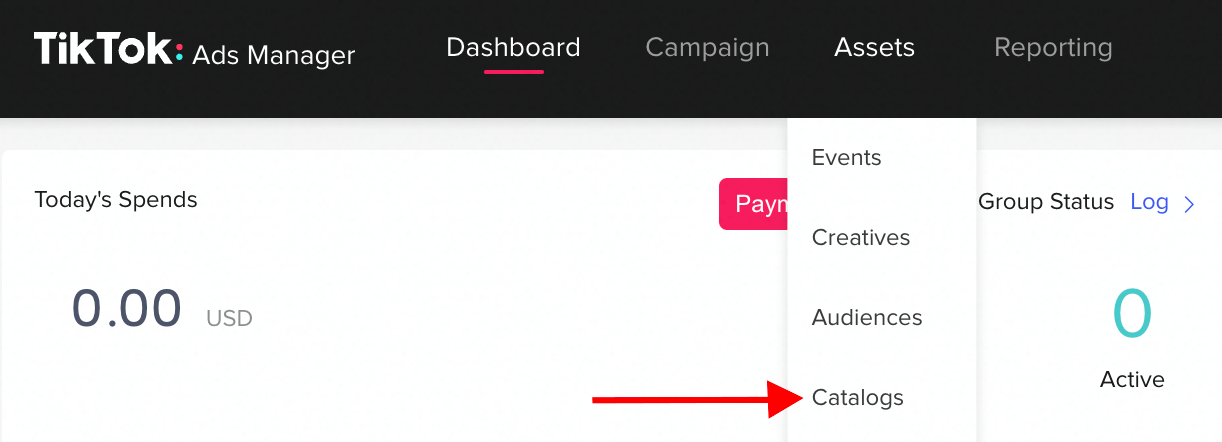
- Locate Assets at the top of the screen > select Catalog from the drop-down menu. (Doing this will take you to the Catalog Manager page!)
- On the Catalog Manager page, click Create > complete the information being requested:
- Catalog Name (Suggested naming convention is “Client Name - TikTok Catalog”)
- Industry (by default, E-Commerce will be selected)
- Catalog Owner (this is auto-filled and can not be changed)
- Default Location (United States will be selected unless your client is located outside of the United States)
- Default Currency (US Dollars is the default currency unless your client is located outside of the United States, in which case it will be that country’s currency)
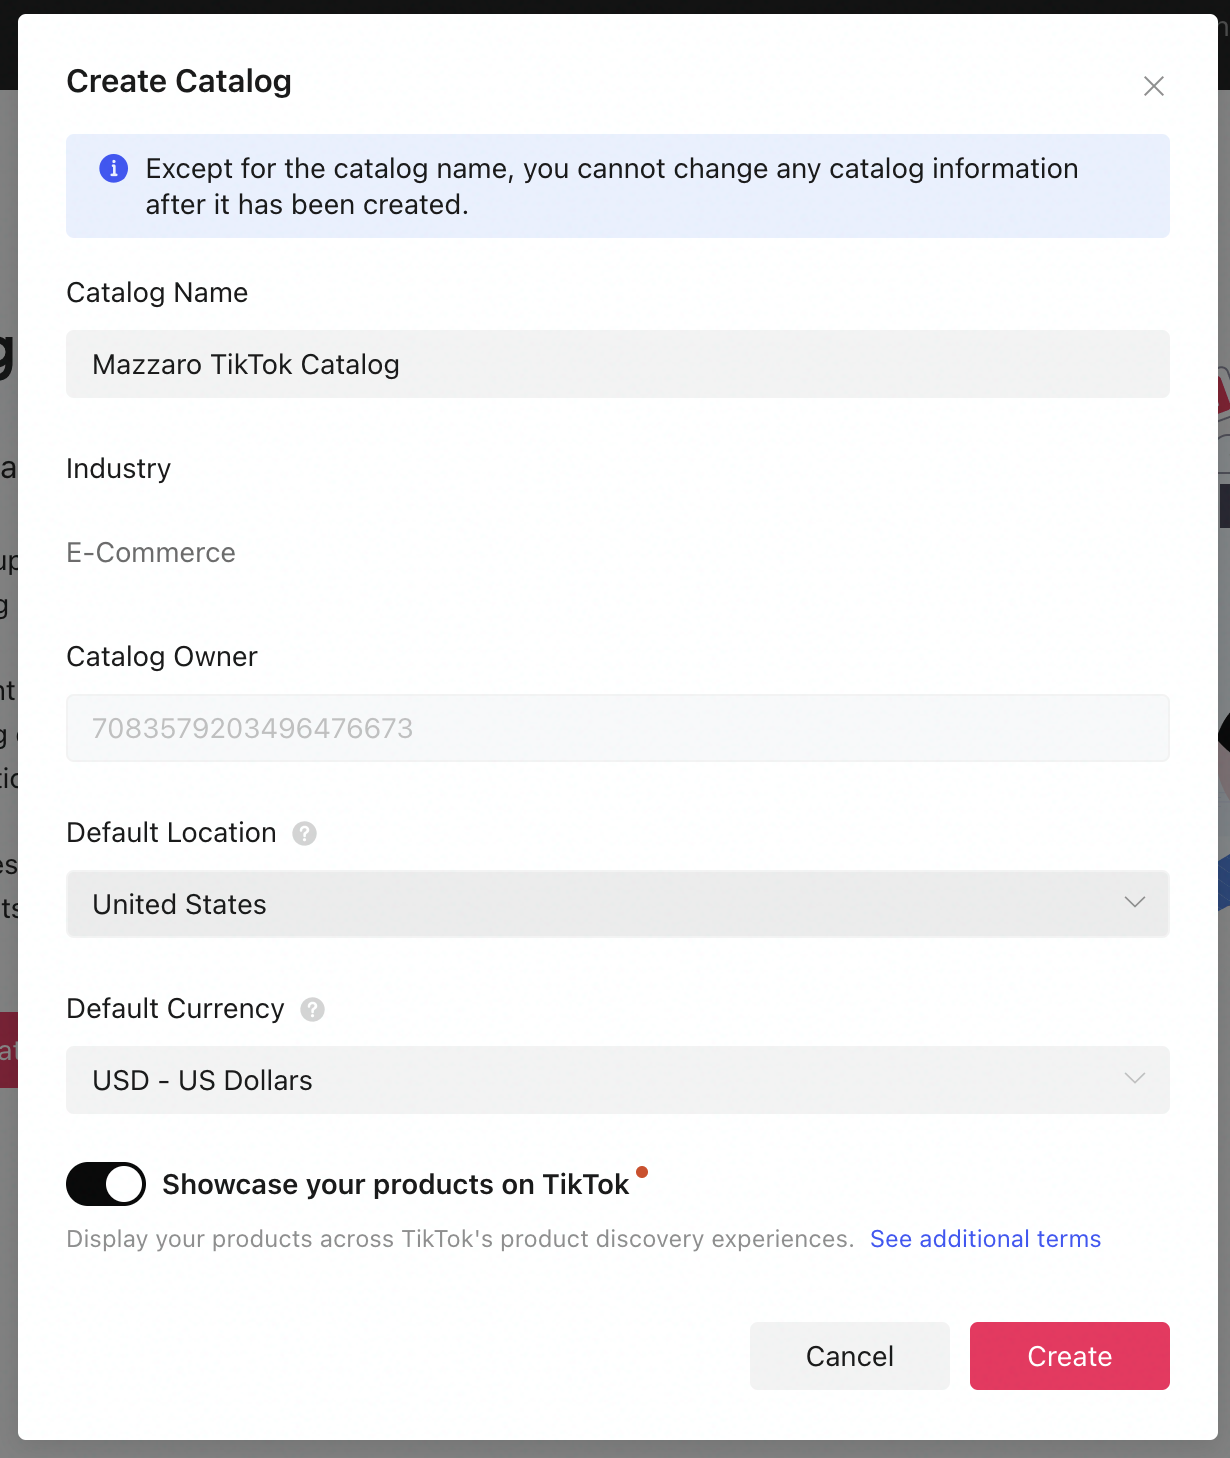
Note: Ensure that “Showcase Your Products on TikTok” is on.
- Next, click Create and your Catalog is now made!
Then it's time to add the products to the Catalog that was just created. To do this:
- Navigate to the left-hand side and select Product Sources > click Add Products.
To add your products, you will be presented with 3 options.
- Select Data Feed Schedule so that the inventory is uploaded to the platform on an automatically scheduled basis.
- Fill out the Feed Schedule information.
- Data Feed Name (suggested naming convention is “Client Name - TikTok Data Feed”)
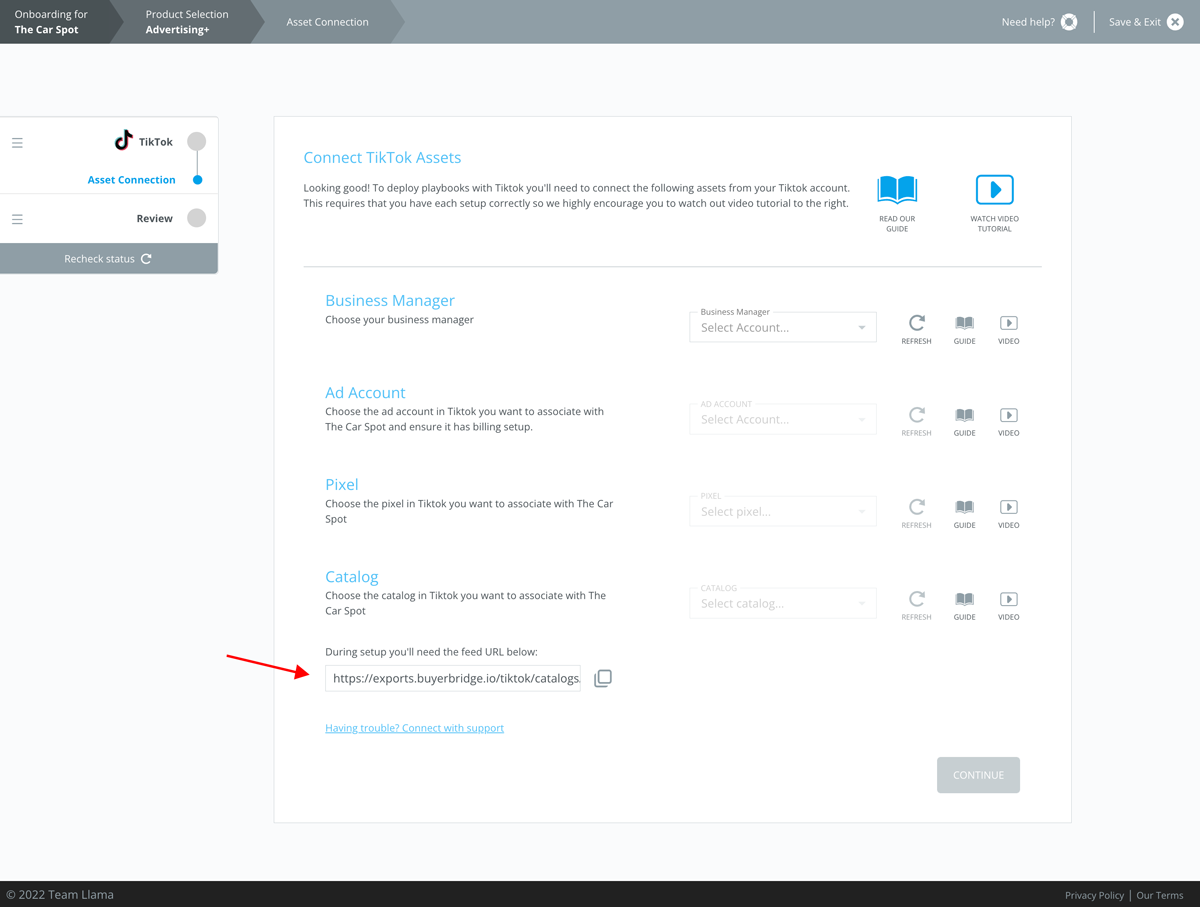
- Data Feed URL (you will find this URL in the BuyerBridge platform under “Catalog" - see image below)
-
- Data Feed URL Login Details (you can skip these!)
- Set the Automatic Upload Schedule (hourly, repeat Every Hour)
- Update Method (replace your data feed)
- After you have entered the required information, select Import.
Once Imported you can view your products under the Products tab. The import process usually takes around 8 hours to complete.
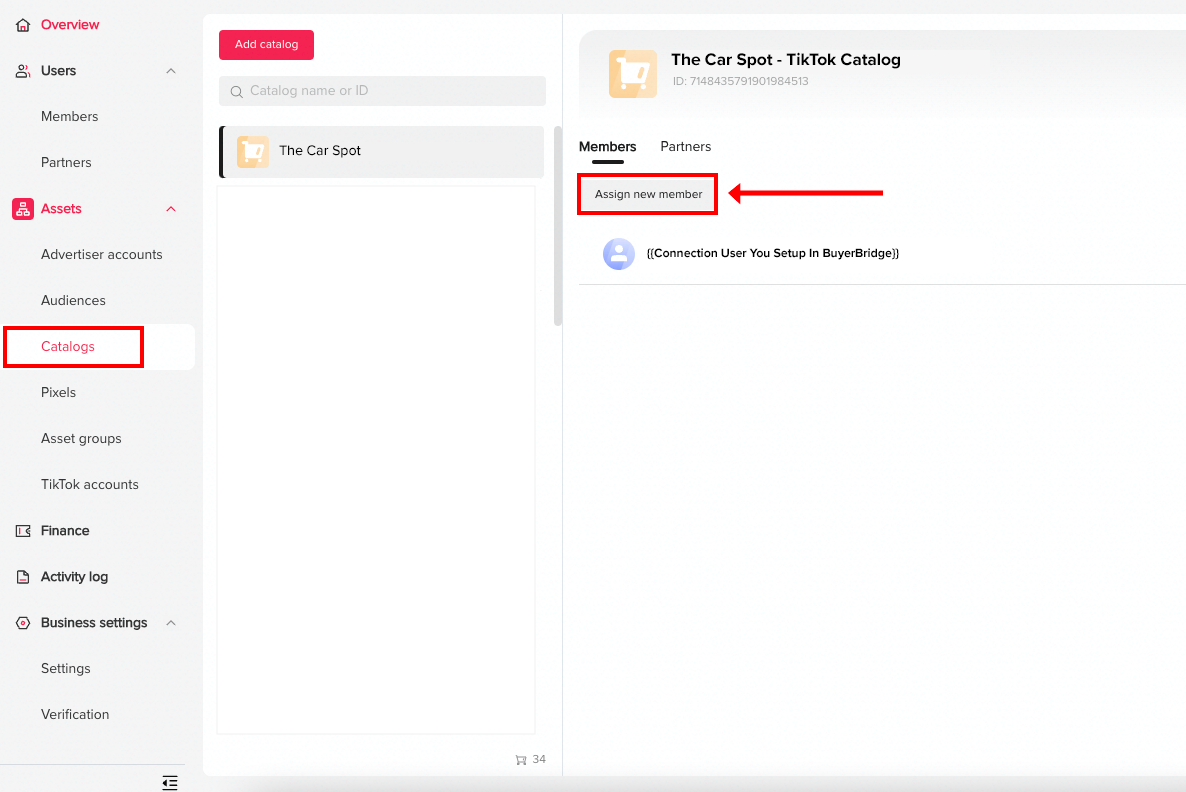
- Before finishing the Catalog setup, you now need to assign the Connection User to the Catalog so BuyerBridge can pull it back via the API.
- To do this, in the Business Center under Assets > Catalogs, select the catalog you've just created, then click on Assign New Member.
- Add the same Member via email address that you used to setup your Connection User in BuyerBridge. (What is a Connection User?)
Step 6: Connecting TikTok Assets in the BuyerBridge Platform (Video Timestamp: 06:22)
Following the creation of the above TikTok assets, it's time to go back inside of the BuyerBridge platform to onboard your client to TikTok!
If you have not already done so, you will need to Authenticate the TikTok Connection User:
- Using the BuyerBridge navigation menu, under Reseller > select Settings
- Locate the TikTok "card" on the screen > click Update TikTok Connection User
- The "Change Connection User" panel will slide out, click Continue Changing TikTok Connection User > Authenticate With TikTok > Log in with the TikTok account
Get more details on how to authenticate the TikTok Connection user here.
If you're onboarding an EXISTING client to TikTok:
- Click the Channel Settings menu located at the top of the platform
- In the Channel Settings panel, toggle to TikTok, and click Setup
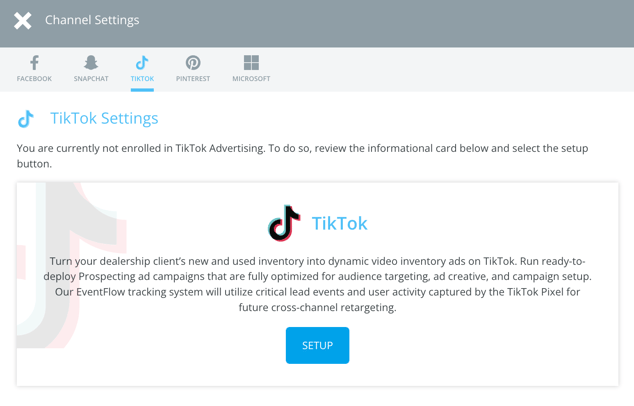
Since the client you are onboarding already exists in BuyerBridge, you will not need to go through the "Account Setup" steps and will go directly to the "Connect TikTok Assets" section of onboarding.
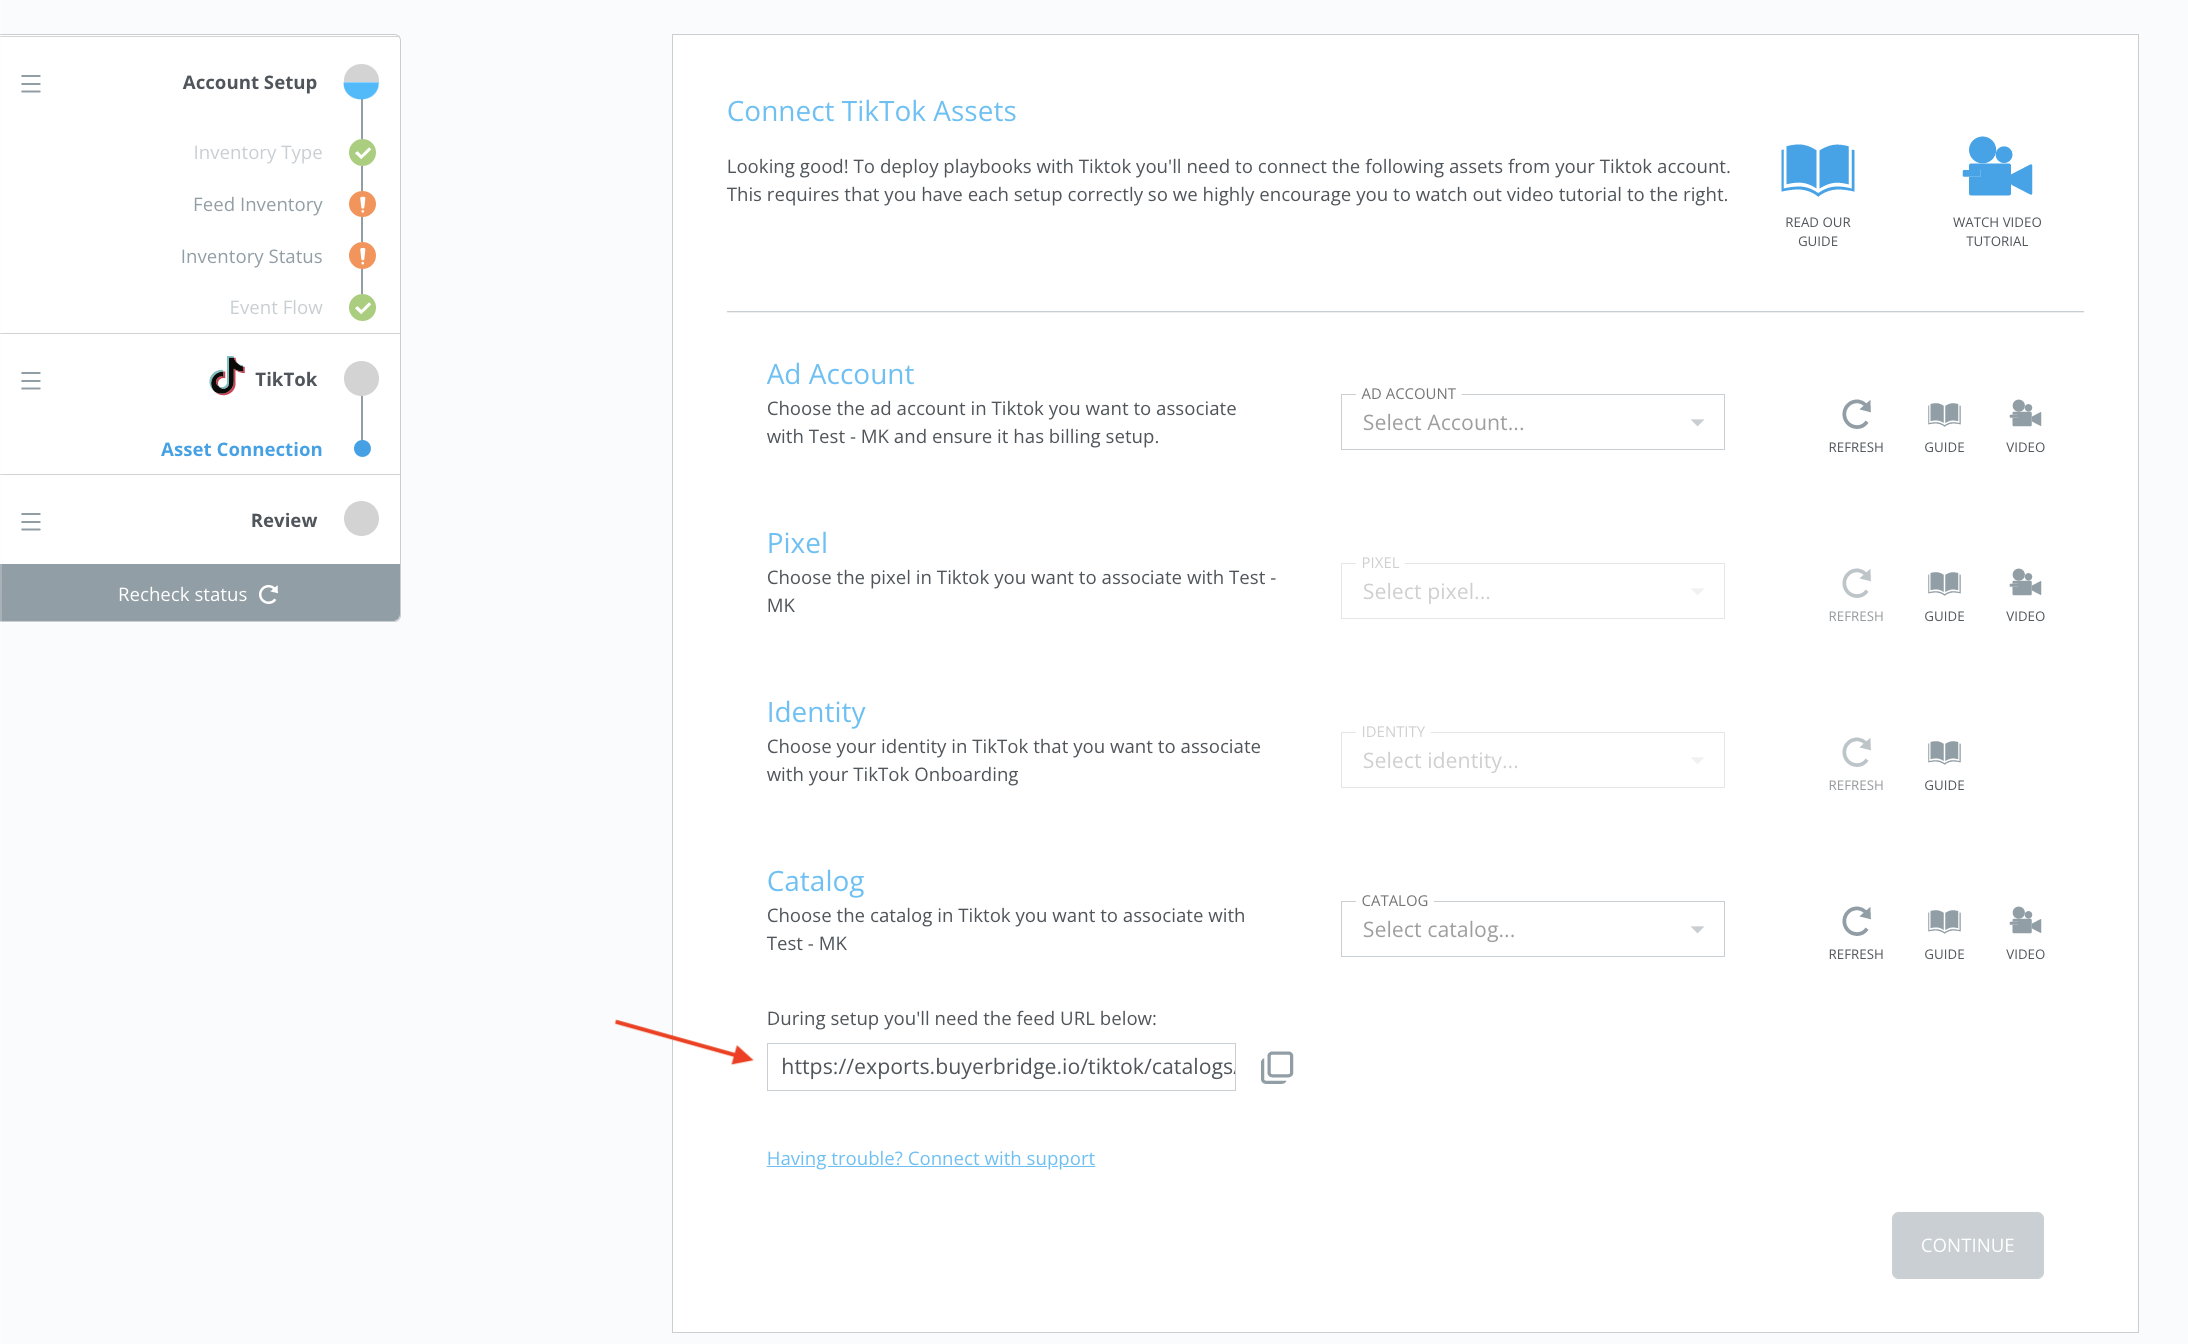
Once you see the "Connect TikTok Assets" Page, select the drop-down and choose the matching asset that you just created for each asset.
If you do not see your asset in the drop-down, hit the refresh icon on the right side to tell our platform to re-pull information from TikTok.
- After all of the assets have been connected, select Continue to reach the review process.
- If everything looks accurate, you will click Complete Onboarding
If you're onboarding a BRAND-NEW client to TikTok:
- Check out our "Getting Started with Omnichannel Onboarding" article for a step-by-step guide on how to get your new client set up and onboarded to TikTok.
As you navigate through the TikTok Ad Account creation process for you or your clients and still have questions you can reach out to your partner experience manager or contact BuyerBridge Support via email: support@buyerbridge.com.