If you’ve deployed a new Lead Generation Campaign, your organization should always double-check that everything is working correctly!
And you can do this by simply submitting a “test lead,” which is precisely what this article will walk you through - so follow along for a step-by-step guide.
Step 1: Assigning Permissions
- In the top header of the BuyerBridge platform, use the Account drop-down and select the Account you wish to send a test lead for.
Confirm that the BuyerBridge dash has been updated to display the dashboard associated with the client you wish to submit a test lead for.
- Next, click the Channel Settings icon located in the header of the platform.
- From the Channel Settings slide-out panel, select the Facebook tab.
- Under the Facebook Settings area within the panel, click Assign Permissions to gain access to the assets that are in that account.
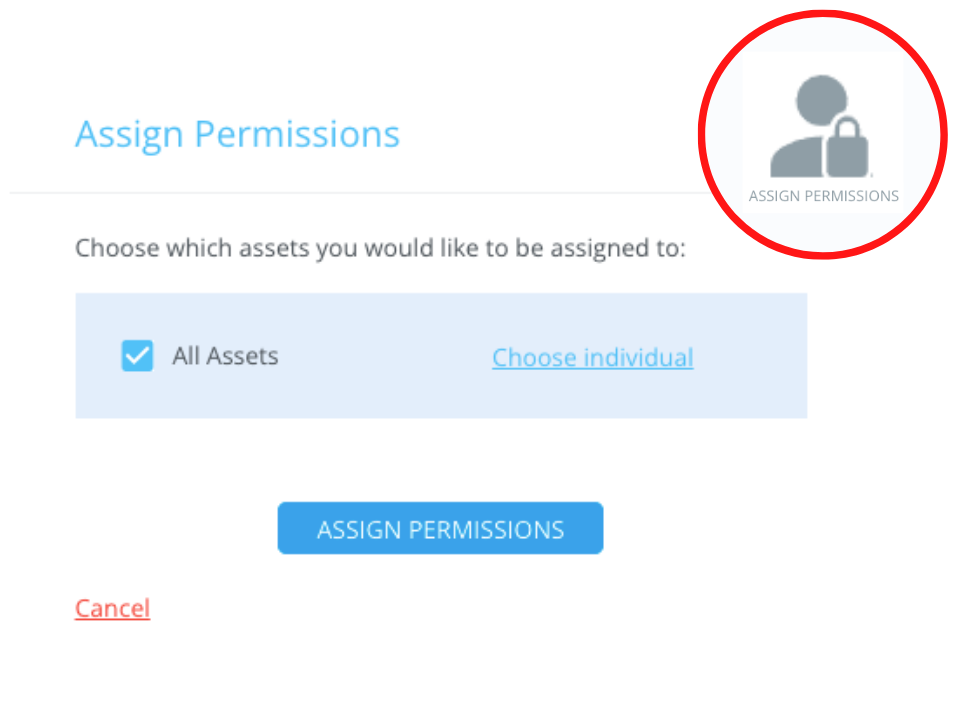
By default, "All Assets" will automatically be selected, which includes the following assets: Ad Account, Pixel, Catalogs, + Page.
BUT...you do have the option to choose individual assets!
- If you would like to be assigned to "All Assets:"
- Continue through the process and click the Assign Permissions button.
- If you would like to select "individual Assets:"
- Click “Choose individual” > select the specific Assets > click the Assign Permissions button.
Now that you have confirmed your Assigned Permissions, it's time to dive into the ad account - which we've made easily accessible from the Channel Settings panel...
Step 2: Preparing to Send The Test Lead
To access the client’s ad account and prep the test lead for submission:
- From the Channel Settings panel, under Ad Account, click on your client's hyperlinked Ad Account name.
This will redirect you to your client’s Business Manager account, at which point you will need to navigate to their Ads Manager.
- Once you’re in the client’s Ads Manager, select the Lead Generation campaign that's in "question" > toggle to the Ads tab.
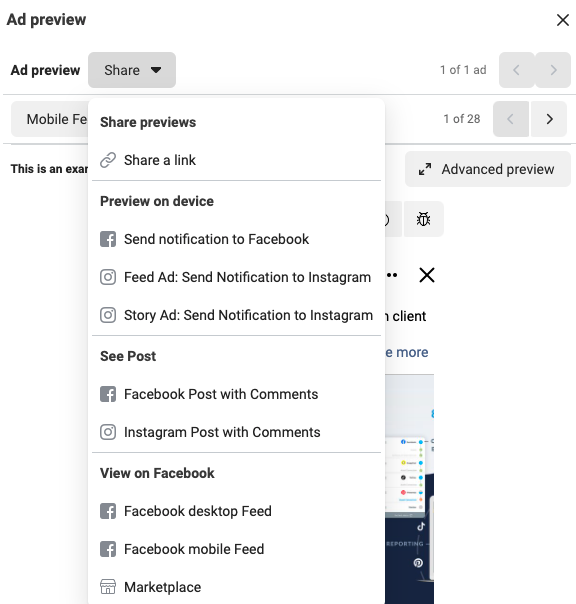
- Choose any Ad within the Lead Gen campaign that you want to send a test lead for > click the Preview button located above the ads.
This will trigger the Ad Preview pop-up to display.
- From the Ad Preview pop-up, click Share > Share a link.
- The “Share This Ad” window will display and provide you with a URL.
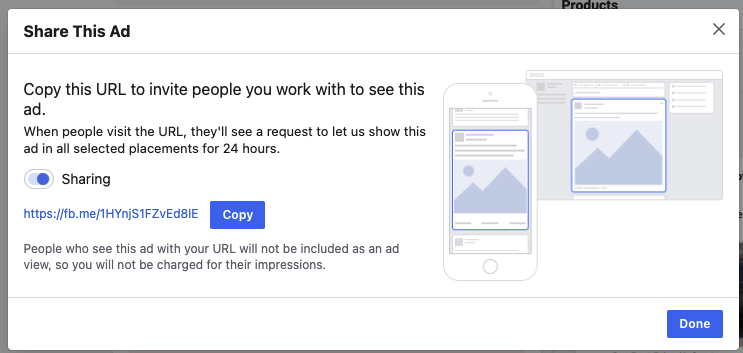
- Copy the URL > open a new window > paste the link into the address bar.
Note: Make sure that you’re signed into Facebook!
To the right of the Facebook Ad Experience Preview window, you'll see “[Your Client’s Name] wants to share an ad with you."
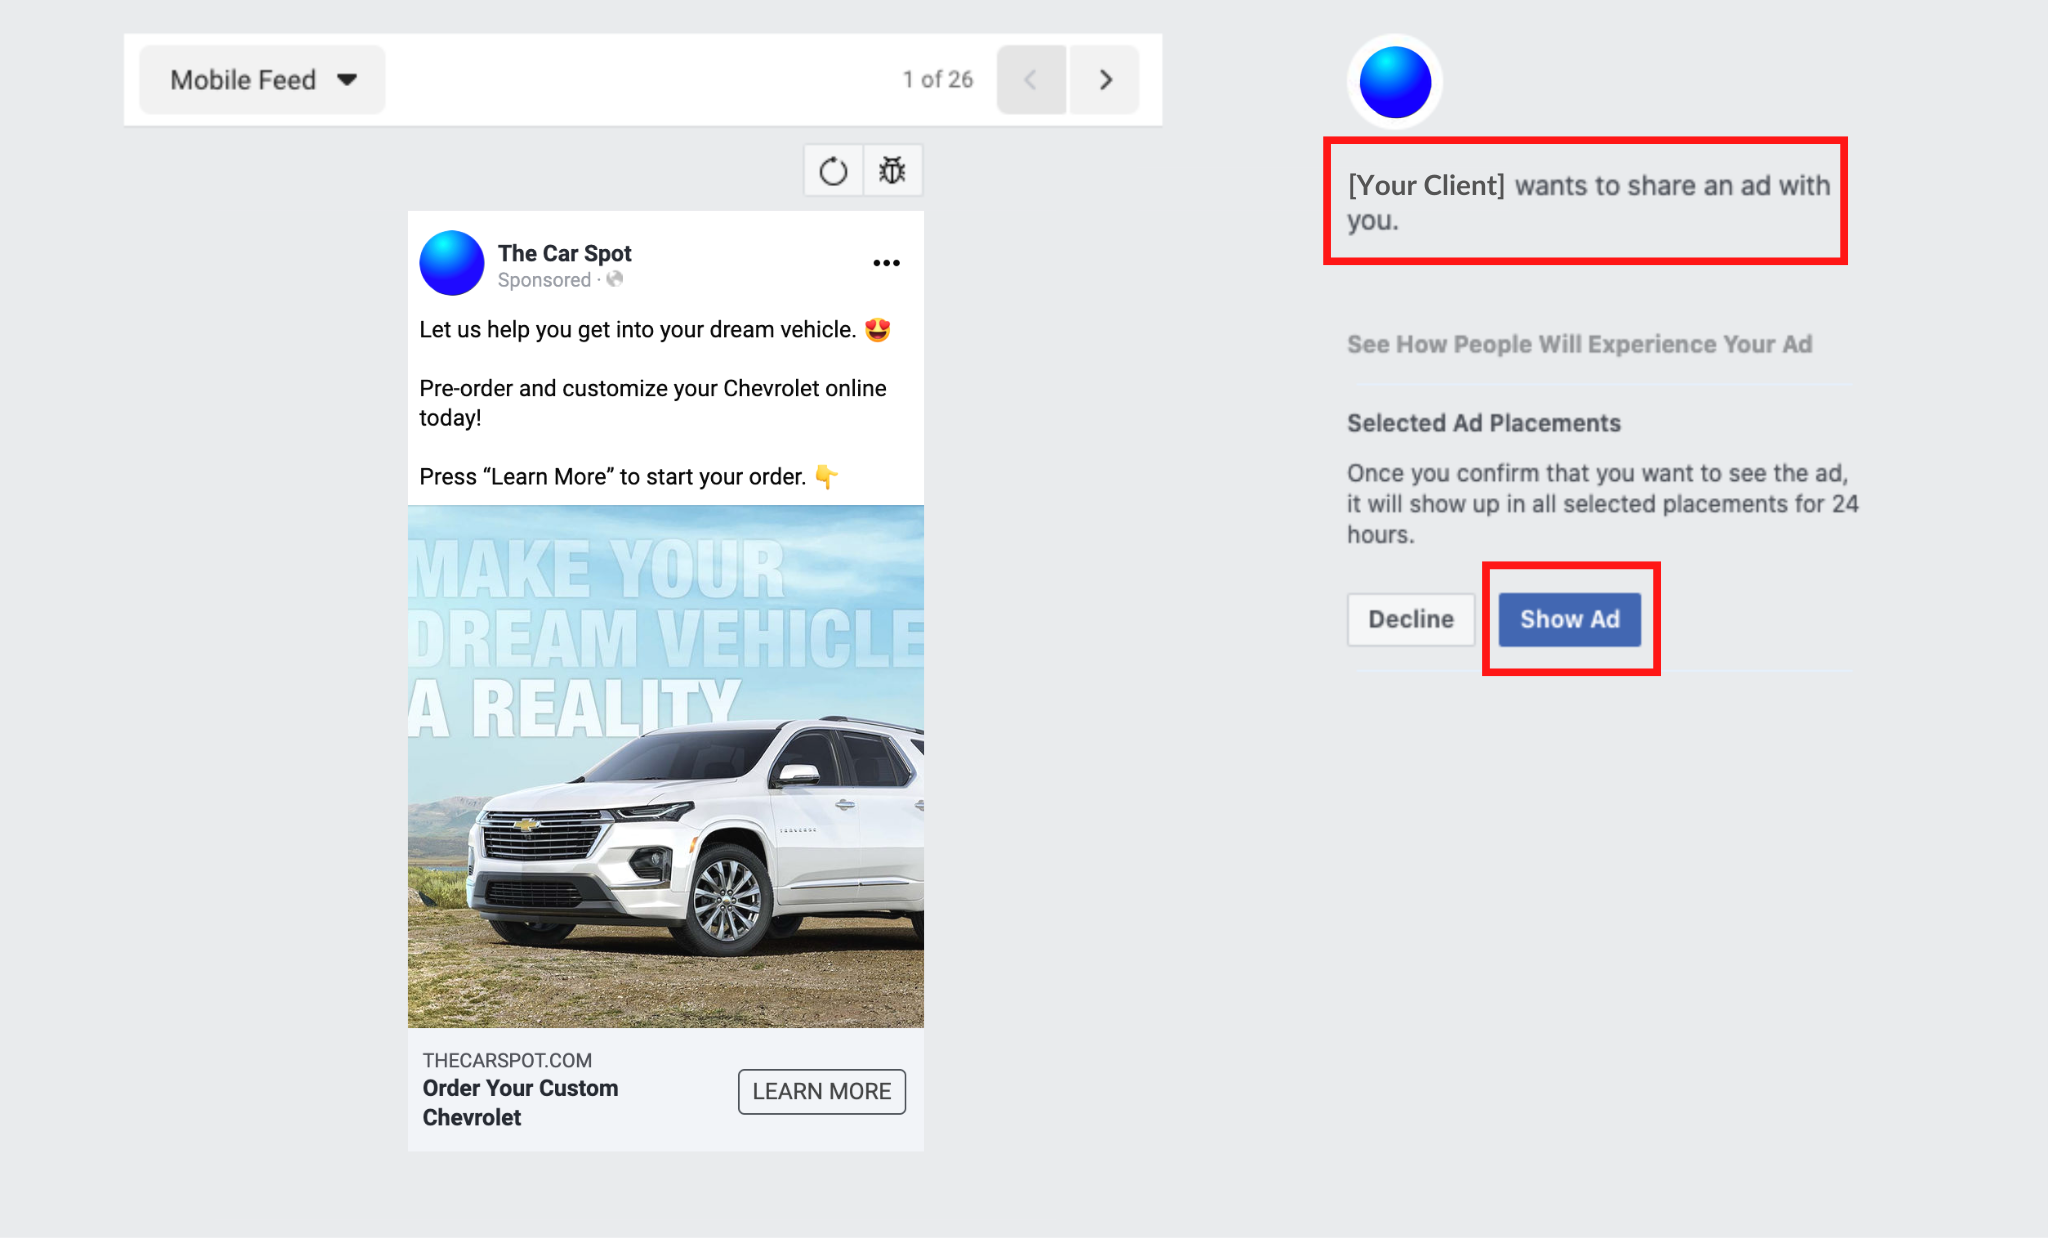
- Click the blue “Show Ad” button to trigger the preview.
Once on your Facebook page, scroll down your feed until you see the preview shown as if you were viewing the ad organically.
Step 3: Sending The Test Lead
Next, it’s time to submit the test lead.
- Click the Call To Action Button (CTA button), for example, "Sign-Up" > fill out the requested information > hit Next > Submit.
These steps will complete the Lead submission and from there you will need to return to the BuyerBridge Dashboard to complete the final step.

Lead Form Fields:
It should include the fields we map by default and which ones go in the Comments field of the Contact record in the CRM. Things like First Name is mapped to the First Name field in the CRM. Things like custom fields on the FB Form (What is your timeframe to buy?) would be mapped in the Other/Comment/What specified field in their CRM
Step 4: Confirming The Test Lead In The BuyerBridge Platform
So you've sent the test lead, and now you need to confirm that the lead was delivered! To confirm this:
- Open the BuyerBridge Dashboard > click Leads on the left-side > locate the lead you just submitted.
If you see the test lead that you just sent then CONGRATS - your client’s Lead campaign and integration are set up correctly and you are set to run the lead campaign.
If you do not see the test lead that you just sent, then this could mean that there might be an issue with the integration between your Business Manager and BuyerBridge…
To check your integration, review the steps here.
After reviewing the above article, once you have corrected the integration issue and are ready to import your missing leads, get details on how to do this here.
Step 4a: Confirming The Test Lead In The CRM
After confirming that the Test Lead made it to the BuyerBridge Platform, you might want to see that Test Lead made it to your CRM. To do this:
- Visit your CRM website > enter Username and Password > select the Leads section of your CRM > locate the lead you submitted.
If you have trouble locating the Test Lead in the CRM, some CRMs may require a call to have them confirm the delivery of the Test Lead.
If while sending a test lead you run into issues or have questions, please contact support either by clicking the Support icon on the top right of the BuyerBridge Dashboard or by emailing support@buyerbridge.com.