How To Create and Connect Assets for Facebook (Meta) Onboarding
A Comprehensive Guide to Connect Facebook Ads to Your Dashboard
BuyerBridge can create almost all of the Facebook assets we require via automation, which makes Onboarding your clients to Facebook inside of the BuyerBridge platform super easy.
But there are certain Facebook assets that we are unable to create via automation, and that are required - for example, your organization's Facebook Business Manager.
IMPORTANT: Before being able to onboard to the BuyerBridge platform, your organization must have a Facebook Business Manager account [Step 1: Create a Facebook (Meta) Business Manager]...regardless of if you are onboarding client’s to Facebook or not.
There are also specific tasks that we recommend be completed to be in line with Facebook best practices - like domain verification, two-factor authentication, pixel prioritization, and more.
We will be going over the following requirements:
- Step 1: Create a Facebook (Meta) Business Manager
- Step 2: Connect Facebook Assets Inside the BuyerBridge Platform
And recommended best practices for Facebook setup:
- Verify your Business Manager & Turn on Two-Factor Authentication
- Domain Verification
- Pixel Sharing & Pixel Event Prioritization
- Provide Admin Access to BuyerBridge Team Members
Let’s go over the requirements first, and then we will get into recommended best practices for Facebook setup.
Step 1: Create a Facebook (Meta) Business Manager
You will need to set up a Facebook Business Manager account for your organization if you do not already have one.
For the purpose of this step-by-step guide, we will be taking you through the process of Signing Up for a new Facebook Business Manager account...
- Go to business.facebook.com
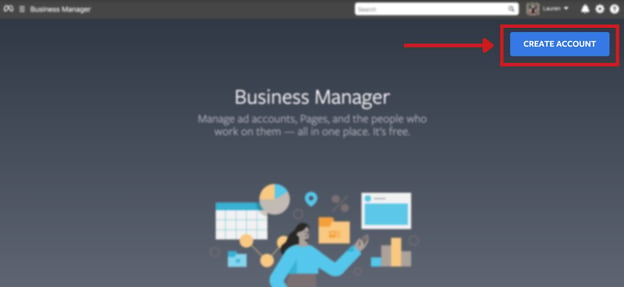
- Click “Create account” in the upper right corner of the “Meta Business Suite” screen
- Log in using your Facebook credentials
-
- If you do not have an existing Facebook account, you will select “Create new account” and follow the steps that Facebook provides.
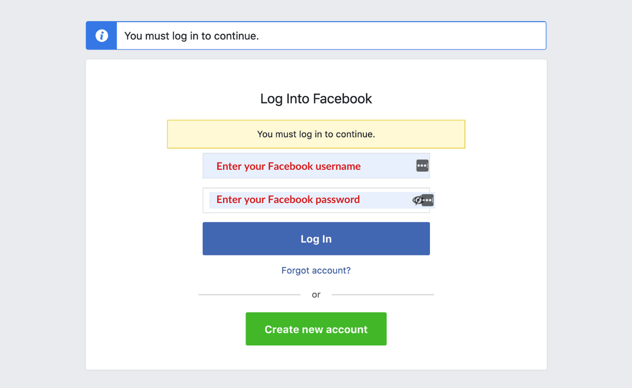
Is your two-factor authentication set up? If yes, you will need to verify that it is you by entering the 6-digit two-factor authentication code sent to your email OR click “Didn’t receive code?” > “Text me a login code.”
Once logged in, you’ll be redirected to “Meta Business Suite and Business Manager Overview.” (Double-check that your name and profile picture are displayed in the upper right!)
- From the “Meta Business Suite and Business Manager Overview” page, click “Create account”
- Enter your information in the “Create your Business Manager account” form displayed
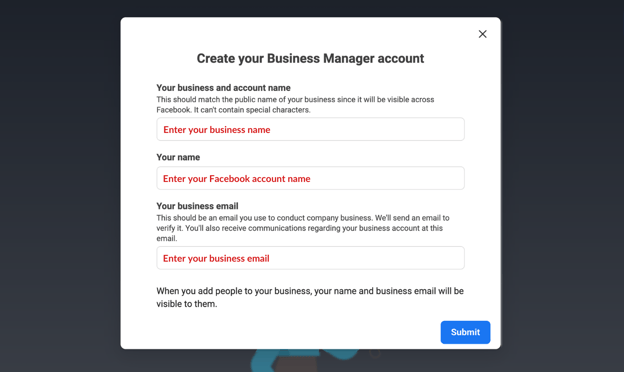
- “Add your business details” > Click Submit
- For “Business use,” make sure to select “Provide services to other businesses”
You will see the following message: “Your organization’s name* Agency was created.” (Example below)
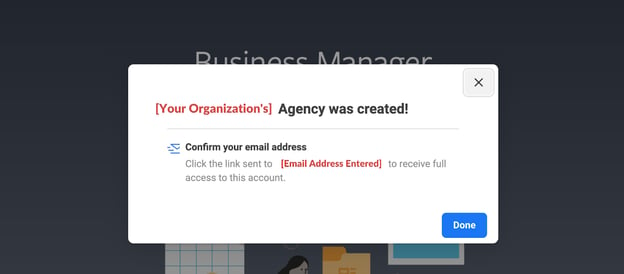
- Confirm your email address by clicking the link sent to your business email address entered > click Done
Add a Facebook Page to Your Organization’s Business Manager
In order for BuyerBridge to request access to any client’s Facebook Page (which is required for running ads or reporting on ad performance using BuyerBridge), your organization will need to have a Primary Page associated with your own Facebook Business Manager.
If your organization already has an existing Facebook Page, all you have to do is Add a Page to your Business Manager account:
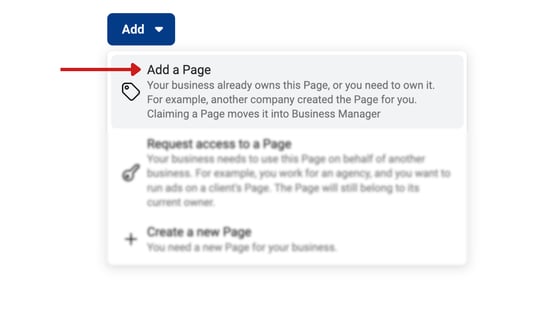
- Go to business.facebook.com and make sure that you’re working under the correct Business Manager for your organization
- Click the Business Settings gear icon
- Dropdown Accounts in the left-hand nav menu > Select Pages
- Click the blue “Add” button > Add a Page
- Enter your Facebook Page name or URL > Click Add a Page
If your organization does NOT have an existing Facebook Page, you will need to create a new Page:
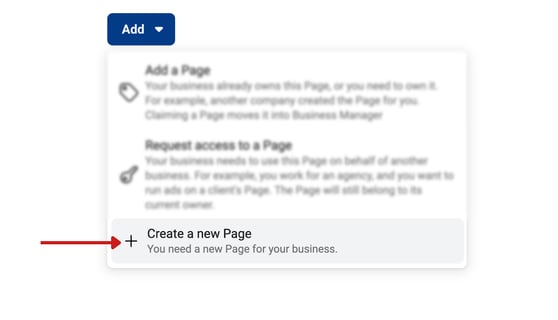
- Go to business.facebook.com and make sure that you’re working under the correct Business Manager for your organization
- Click the Business Settings gear icon
- Dropdown Accounts in the left-hand nav menu > Select Pages
- Click the blue “Add” button > Create a new Page
- When choosing a category for your Page, select Company, organization, or institution
- Enter your Page name > Choose a Category > Click Create Page
- Feel free to fully set up your Page with your business details, profile picture, etc!
Now that your organization’s Business Manager is created, and you have added your Primary Page, you can now move forward onboarding the BuyerBridge platform and/or onboarding your clients to Facebook inside of BuyerBridge.
Step 2: Connect Facebook Assets Inside of the BuyerBridge Platform
Following the creation of the above Facebook assets, it's time to go back inside of the BuyerBridge platform to onboard your client to Facebook!
In BuyerBridge, we require that you Authenticate the Connection User for any channel you’re onboarding a client to, but due to the way we currently have our platform set up, your Facebook connection user is authenticated during your organization's initial onboarding to our platform.
At any time, you can double-check that your Facebook Connection user is set up correctly or update your Facebook Connection user:
- Using the BuyerBridge navigation menu, under Organization > Select Settings
- Locate the Facebook "card" on the screen > Click Update Facebook Connection User
- From the "Change Facebook Connection User,” click Continue Changing Facebook Connection User > Authenticate With Facebook > Log in with your Facebook account
Get more details on how to authenticate the Facebook Connection user here.
If you're onboarding an EXISTING client to Facebook:
- Make sure that you have the correct client selected in the “Client” dropdown within the top navigation bar
- Click the Channel Settings icon located in the BuyerBridge header
- In the Channel Settings panel, toggle to Facebook > Click Setup
You will need to “Connect a Facebook Page” (your CLIENT’S Facebook Page!)
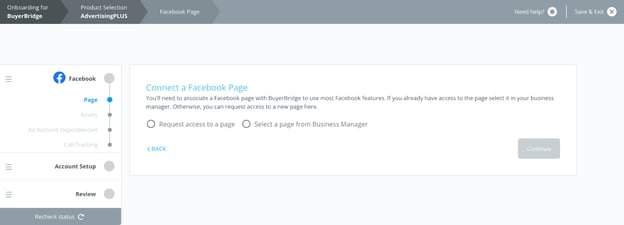
- If your Business Manager has access to your client’s Facebook Page:
- Click “Select a page from Business Manager” > Use the “Select a page” dropdown to Select the Page > Click Continue
- Click “Select a page from Business Manager” > Use the “Select a page” dropdown to Select the Page > Click Continue
- If your Business Manager does not have access to the Page:
- Select “Request access to a page” > Search for the Page or enter URL > Click Continue
- Select “Request access to a page” > Search for the Page or enter URL > Click Continue
BuyerBridge will send a request to the specified Page’s admins on your organization's behalf to have your organization added with Page admin permissions - until the request is approved, you will see “Facebook Page Access Pending,” but can continue the onboarding process.
Next, you will need to complete the “Connect Business Manager Assets” section of Onboarding, AKA connecting assets like Ad Account, Facebook Pixel, Offline Event Set, and Vehicle Catalog.
Heads up: Catalogs are only needed for Advertising and AdvertisingPLUS product packages, which are specific to clients within the automotive vertical. If you are on AdvertisingLITE, you can disregard the required connection of those assets.
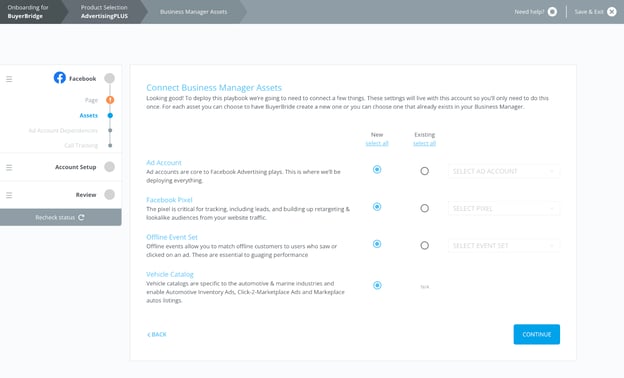
For each asset, you can choose to have BuyerBridge create a new one, or you can select one that already exists in your Business Manager.
- To have BuyerBridge create new Facebook assets for a client:
- Select the “New” option next to any asset you want BuyerBridge to create, and we will create them for you!
- To “Connect Business Manager Assets” that already exist:
- Locate the asset type > Select “Existing”
- Use the dropdown associated with the asset and select the matching asset
If you do not see your asset in the drop-down, hit the refresh icon on the right side to tell our platform to re-pull information from Facebook.
- After all of the assets have been connected, select Continue and finish the remaining Onboarding steps
At the end of onboarding, you will have the opportunity to review the Onboarding details and can Complete Onboarding if everything looks right!
If you're onboarding a BRAND-NEW client to Facebook:
- Check out our "Getting Started with Omnichannel Onboarding" article for a step-by-step guide on how to get your new client set up and onboarded to Facebook.
And now that you’ve completed all of the requirements, we can go over the recommended best practices…
Recommended Best Practices for Facebook Setup
Verify your Business Manager & Turn on Two-Factor Authentication
To avoid getting shut down or experiencing issues like your ads randomly being disapproved, we suggest that you verify your Business Manager and turn on Two-Factor Authentication for your organization’s Business Manager Admins.
Use our step-by-step guide to easily verify your Business Manager, turn on Two-factor Authentication, and avoid future problems: How To Verify your Business Manager and Turn on Two-Factor Authentication
Domain Verification
Domain verification is something that EVERYONE should do on any platform they’re advertising.
Domain verification is a critical step to ensure that your organization or clients' Facebook advertising efforts are not disrupted or suspended due to asset ownership or privacy concerns.
Once your client’s domain is verified, you'll gain the ability to configure conversion events and access advanced features for advertising and campaign performance tracking.
For details on domain verification, READ: How to Help Clients Verify Their Website Domain in Facebook Business Manager
Pixel Sharing & Pixel Event Prioritization
Following domain verification, it is your organization’s responsibility to share the Pixel with your client’s Business Manager.
And once you have shared the Pixel with your client's Business Manager, they will be able to prioritize the Pixel Events (aka configure their own Website Events), which you will want to encourage them to do if you’re using BuyerBridge to run or track ads.
Here’s documentation to help guide you through the process: Sharing Your Agency's Pixel & Prioritizing Pixel Events [Post Domain Verification Steps]
Provide Admin Access to BuyerBridge Team Members
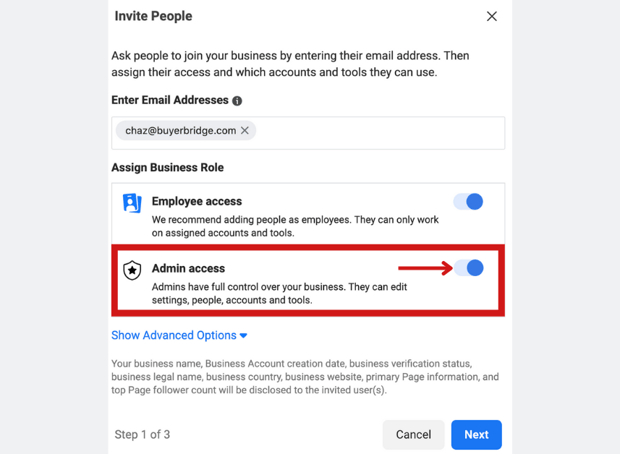
We encourage all of our partners to provide admin access to Chaz Stewart (chaz@buyerbridge.com) and your Partner Experience Manager within your agency’s Business Manager.
This is only to benefit you and will allow us the ability to easily provide support for any of your accounts down the line.
To provide the BuyerBridge team with admin access:
- Go to business.facebook.com
- Click the Business Settings gear icon
- Under Users > People > Click Add
- Enter the email address and toggle “Admin Access” ON under Assign Business Roles > Click Next and complete the remaining steps
As you navigate through the Facebook assets creation & connection process for you or your clients, if you still have questions you can reach out to your partner experience manager or contact BuyerBridge Support via email: support@buyerbridge.com.